Installing business process extensions (for local development)
| 🌐 This document is available in both English and Ukrainian. Use the language toggle in the top right corner to switch between versions. |
To simplify business process modeling, a set of standard integration connectors—Element Templates—has been developed.
| If you’re using the functionality of the Admin Portal for registry development, you do not need to install standard extensions, external applications, or plugins. The portal comes with everything required out of the box. The instructions below are intended only for local development. |
1. Prerequisites
1.1. Installing Camunda Modeler
-
Download the Camunda Modeler archive from the following link: camunda-modeler/4.8.0.
We recommend using version
4.8.0for the most stable experience. -
Select the Open Source Modeler product and download the version compatible with your operating system (e.g.,
Windows 64bit). -
Once the archive is downloaded, extract it to a folder on your local machine.
The extracted folder might be named something like:
camunda-modeler-4.8.1-win-x64
1.2. Installing BPMN Linter plugin
Install the BPMN Linter plugin to enhance Camunda Modeler’s capabilities and validate your BPMN diagrams.
-
Visit the official repository:
camunda-modeler-linter-plugin. -
Click to download the plugin archive.
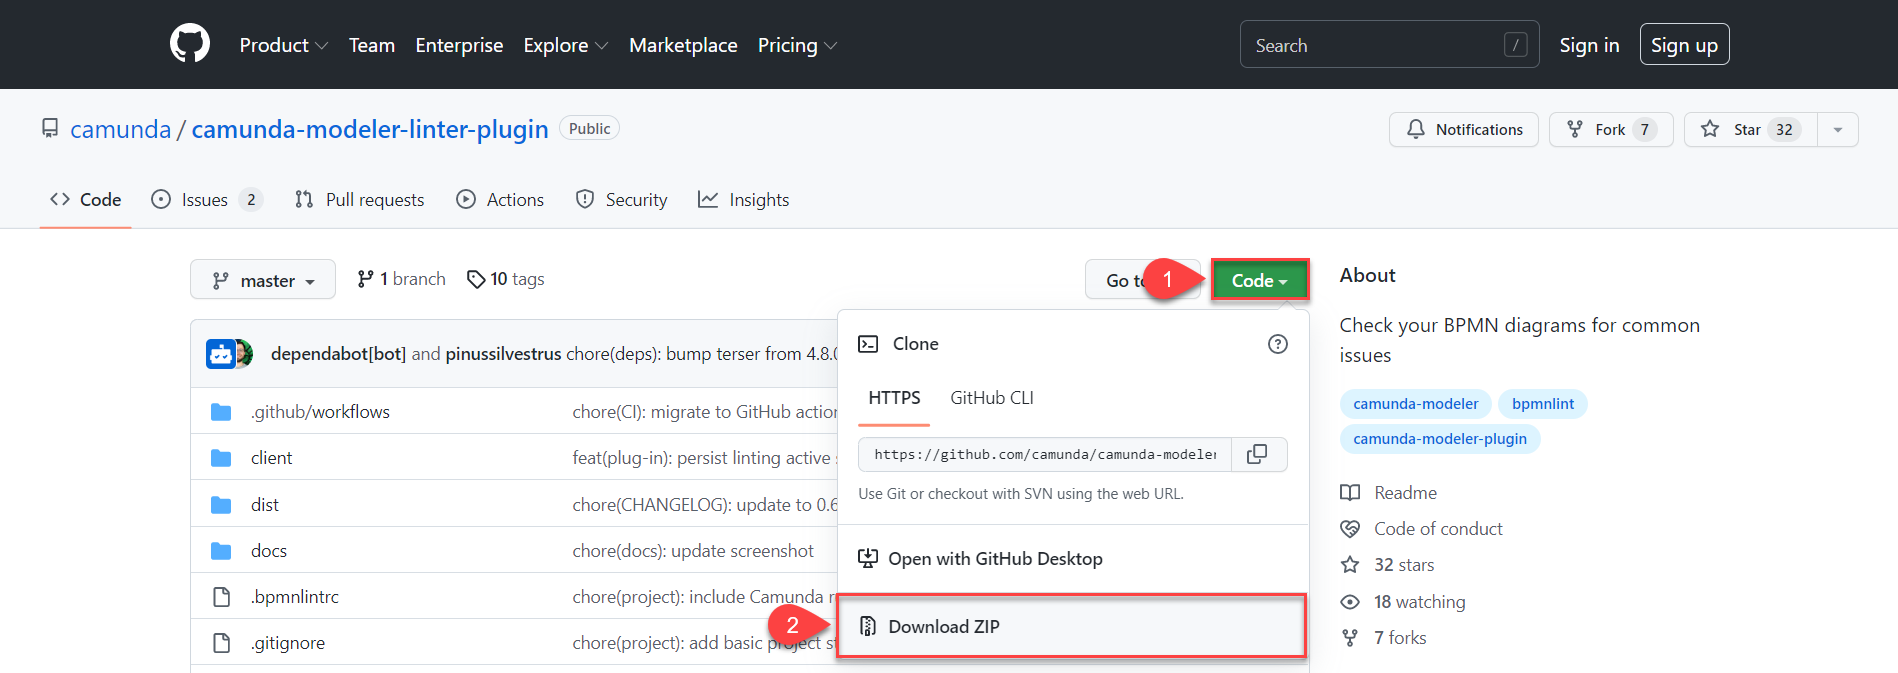
-
After downloading, extract the contents into the following directory inside your Camunda installation:
camunda-modeler-4.8.1-win-x64\resources\plugins -
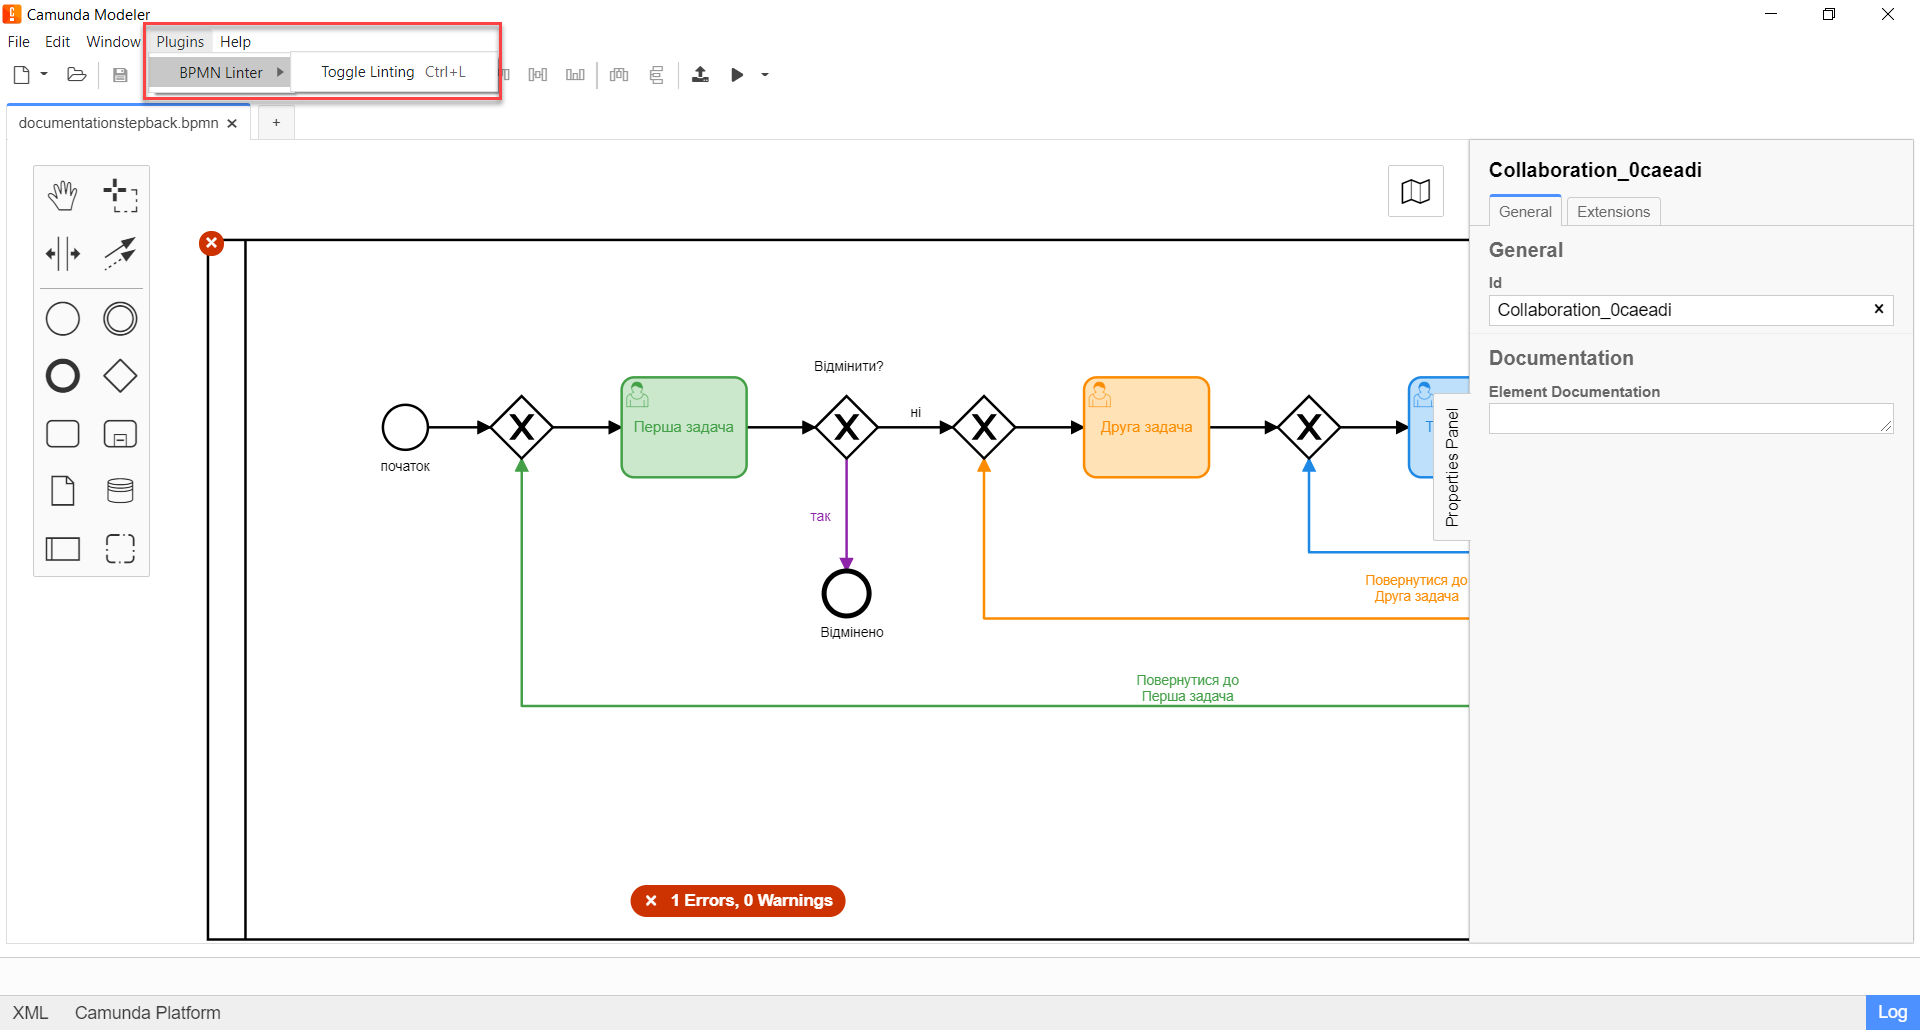
Restart the Camunda Modeler application.
-
Enable the plugin: Go to .
-
Alternatively, use the keyboard shortcut Ctrl+L.
-
Use Ctrl+L again to toggle the plugin on or off.
-
2. Installing Element Templates directory
2.1. Installing Element Templates on Windows
Follow these steps to install the Element Templates directory.
-
Clone the repository containing the element templates from GitHub:
edp-ddm-registry-configuration. Use the following command for HTTPS cloning:git clone https://github.com/epam/edp-ddm-registry-configuration.git -
Open the cloned repository on your local machine and locate the
/element-templatesfolder. -
Copy the entire folder with JSON files and paste it into the project directory used for modeling. For example, for Camunda Modeler, the path might look like this:
./camunda-modeler-4.8.1-win-x64/resources/element-templates
-
camunda-modeler-4.8.1-win-x64— your local application directory. -
resources— contains extensions (element-templates) and plugins (plugins). -
element-templates— contains JSON files with standard business process extensions.
-
-
The resulting
resourcesdirectory structure should look like: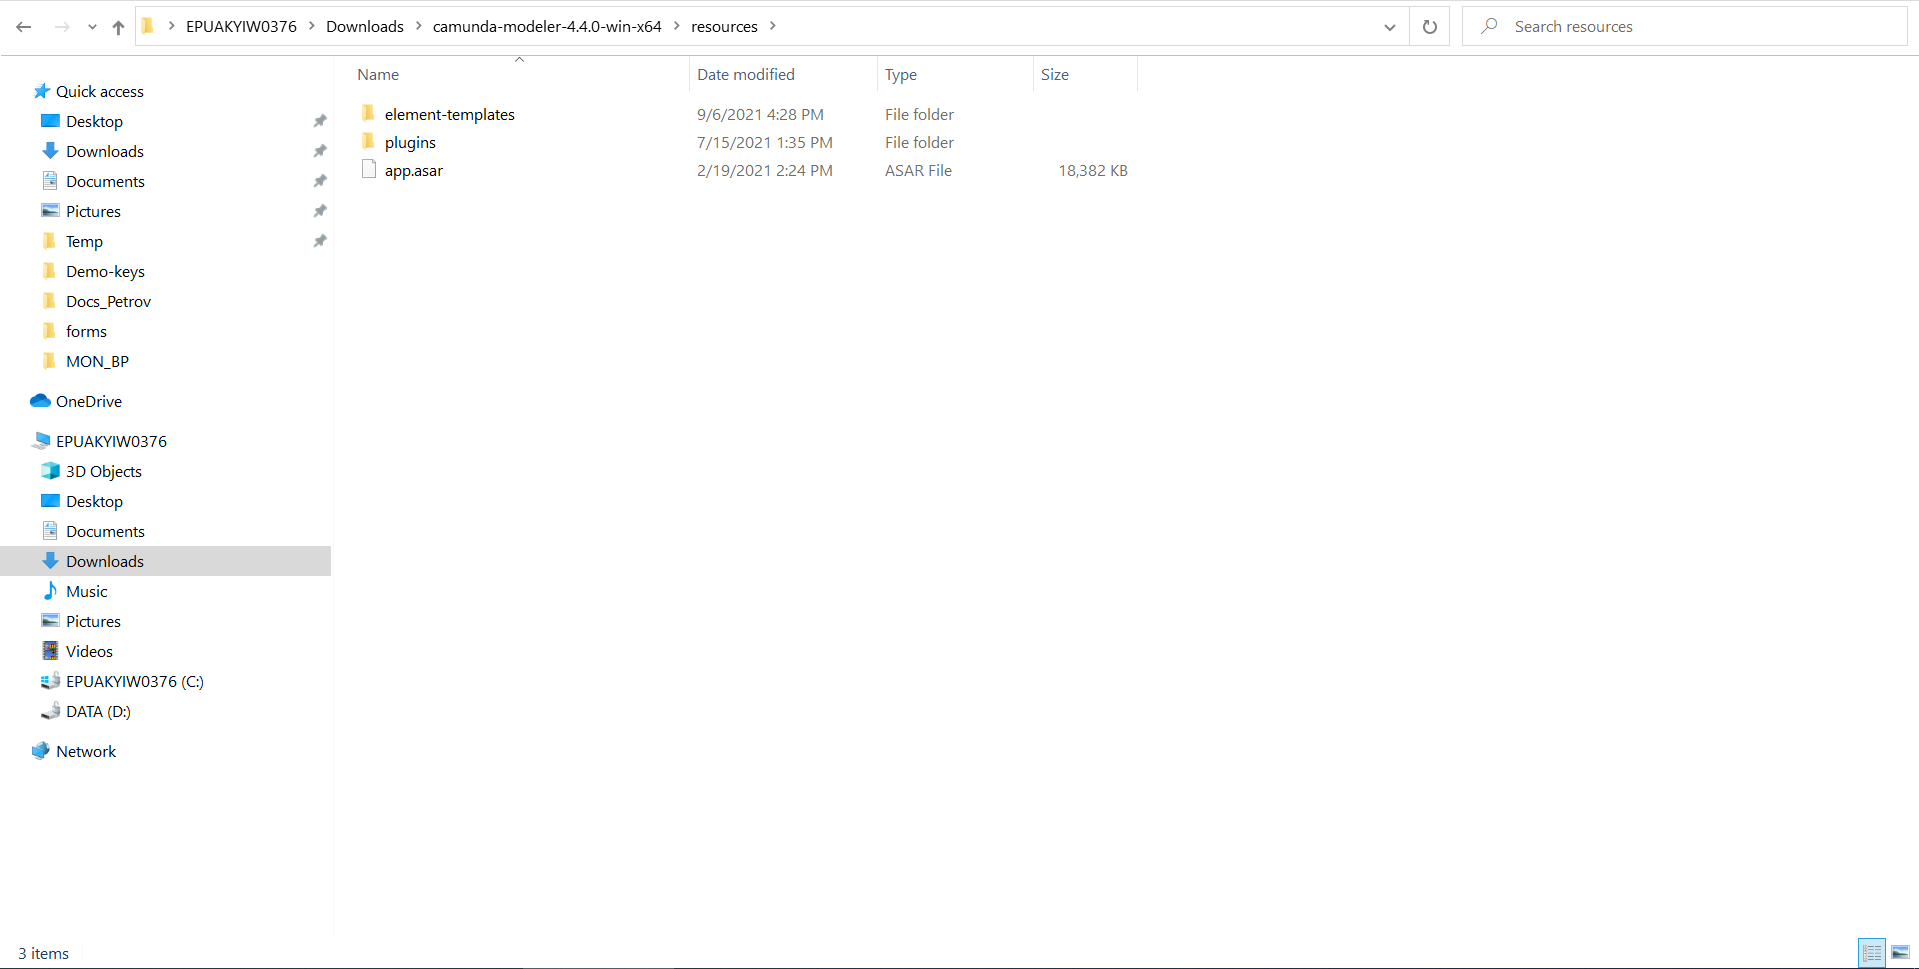
-
The resulting
element-templatesdirectory structure should look like: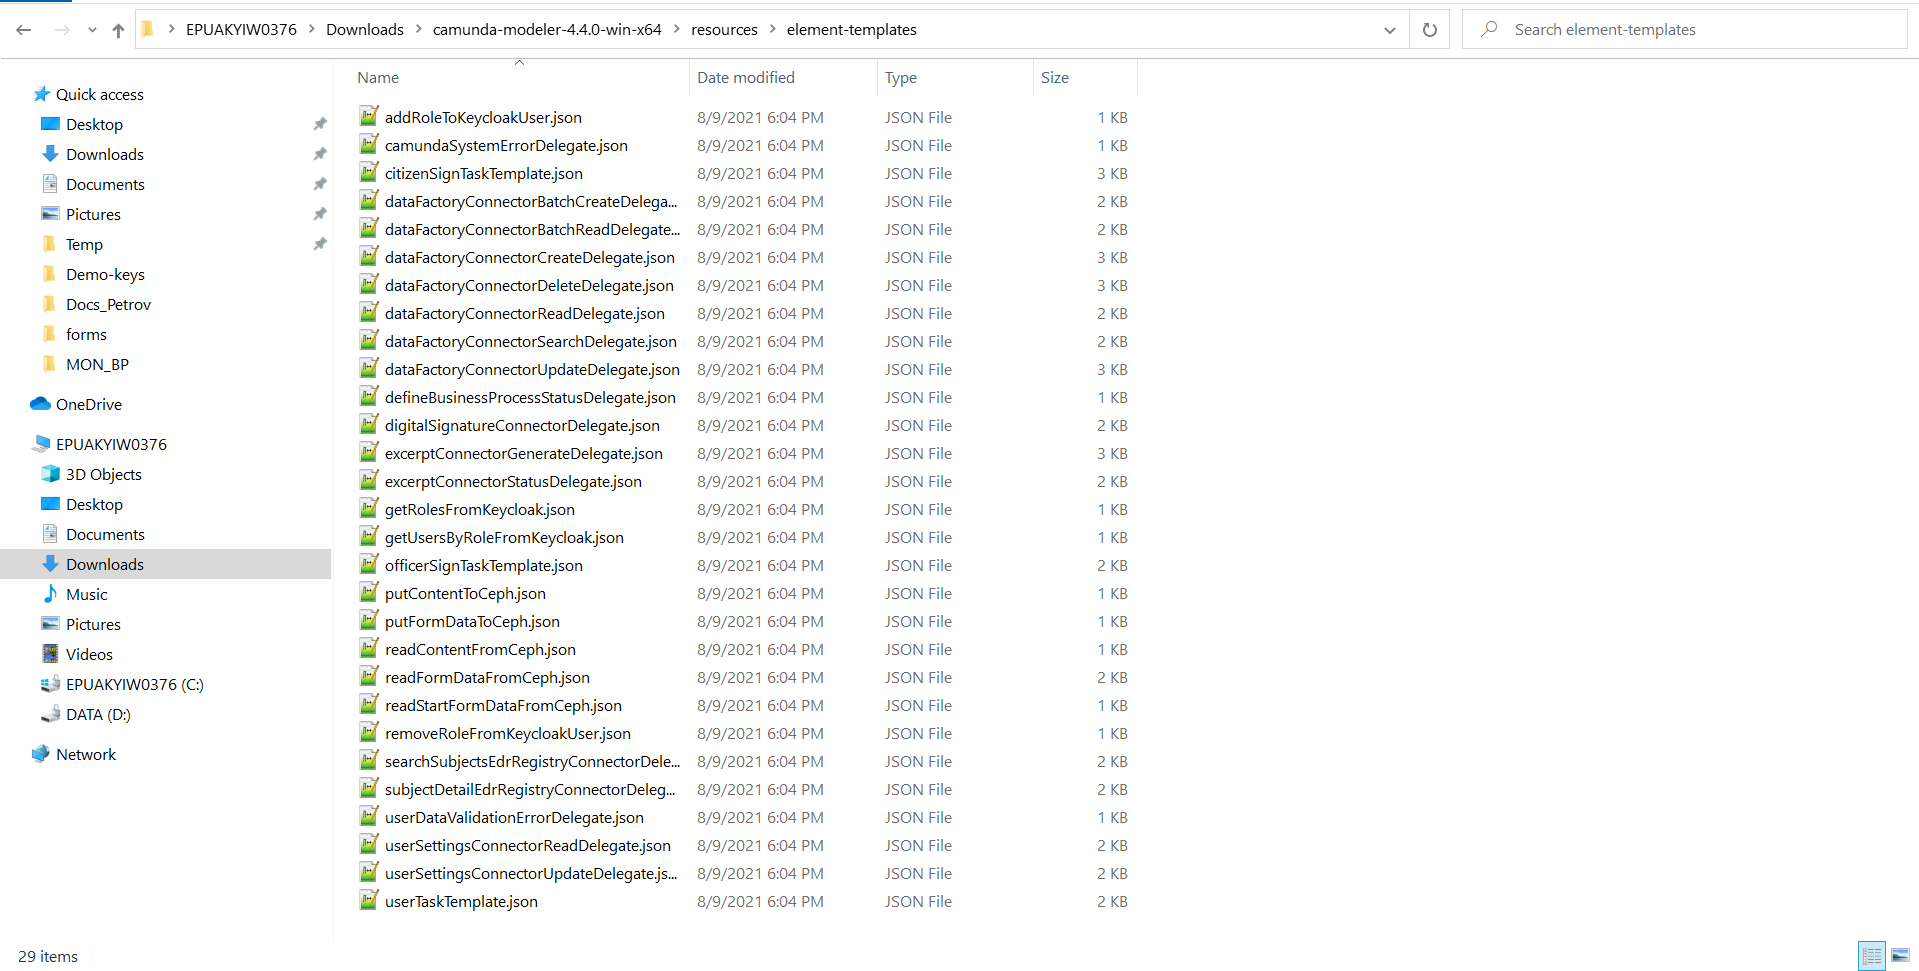
-
The resulting
pluginsdirectory structure should look like: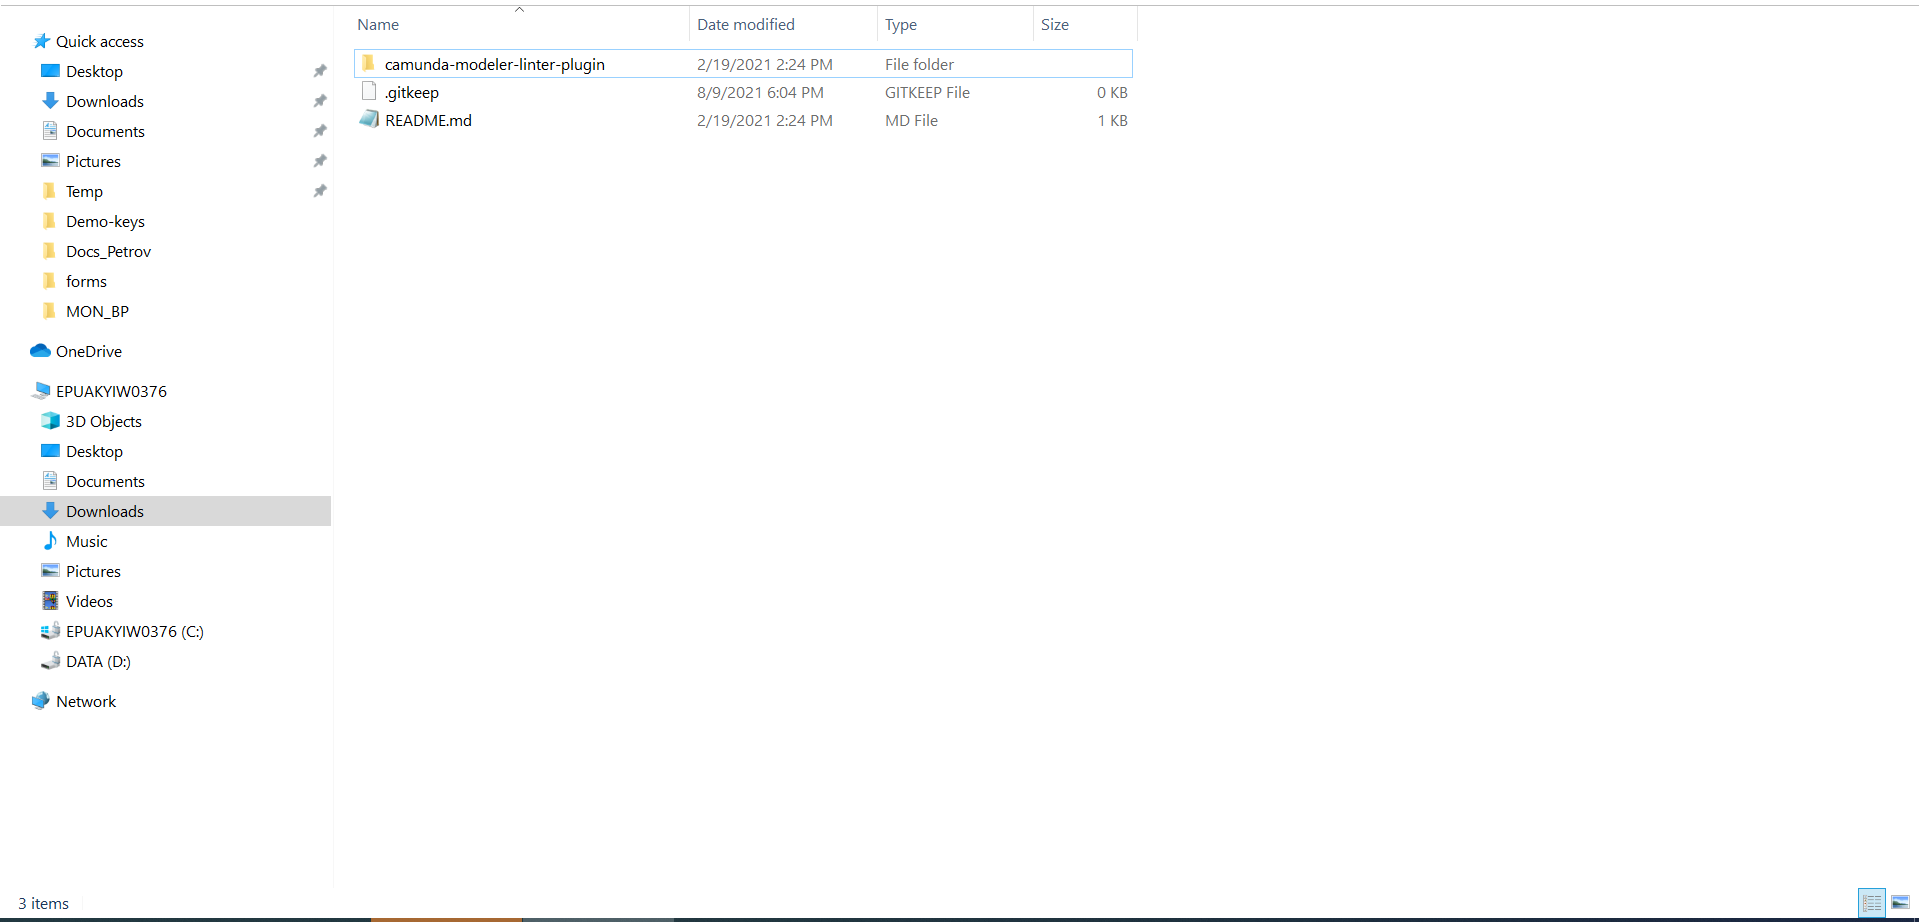
-
Restart Camunda Modeler and verify that the templates are available during business process modeling:
-
Create a task – select Create Task.
-
Click the wrench icon – choose Change Type.
-
Set the task type – Service Task, User Task, or Call Activity.
-
Click the Open Catalog button.
The Element Templates catalog will open, allowing you to apply extensions during modeling.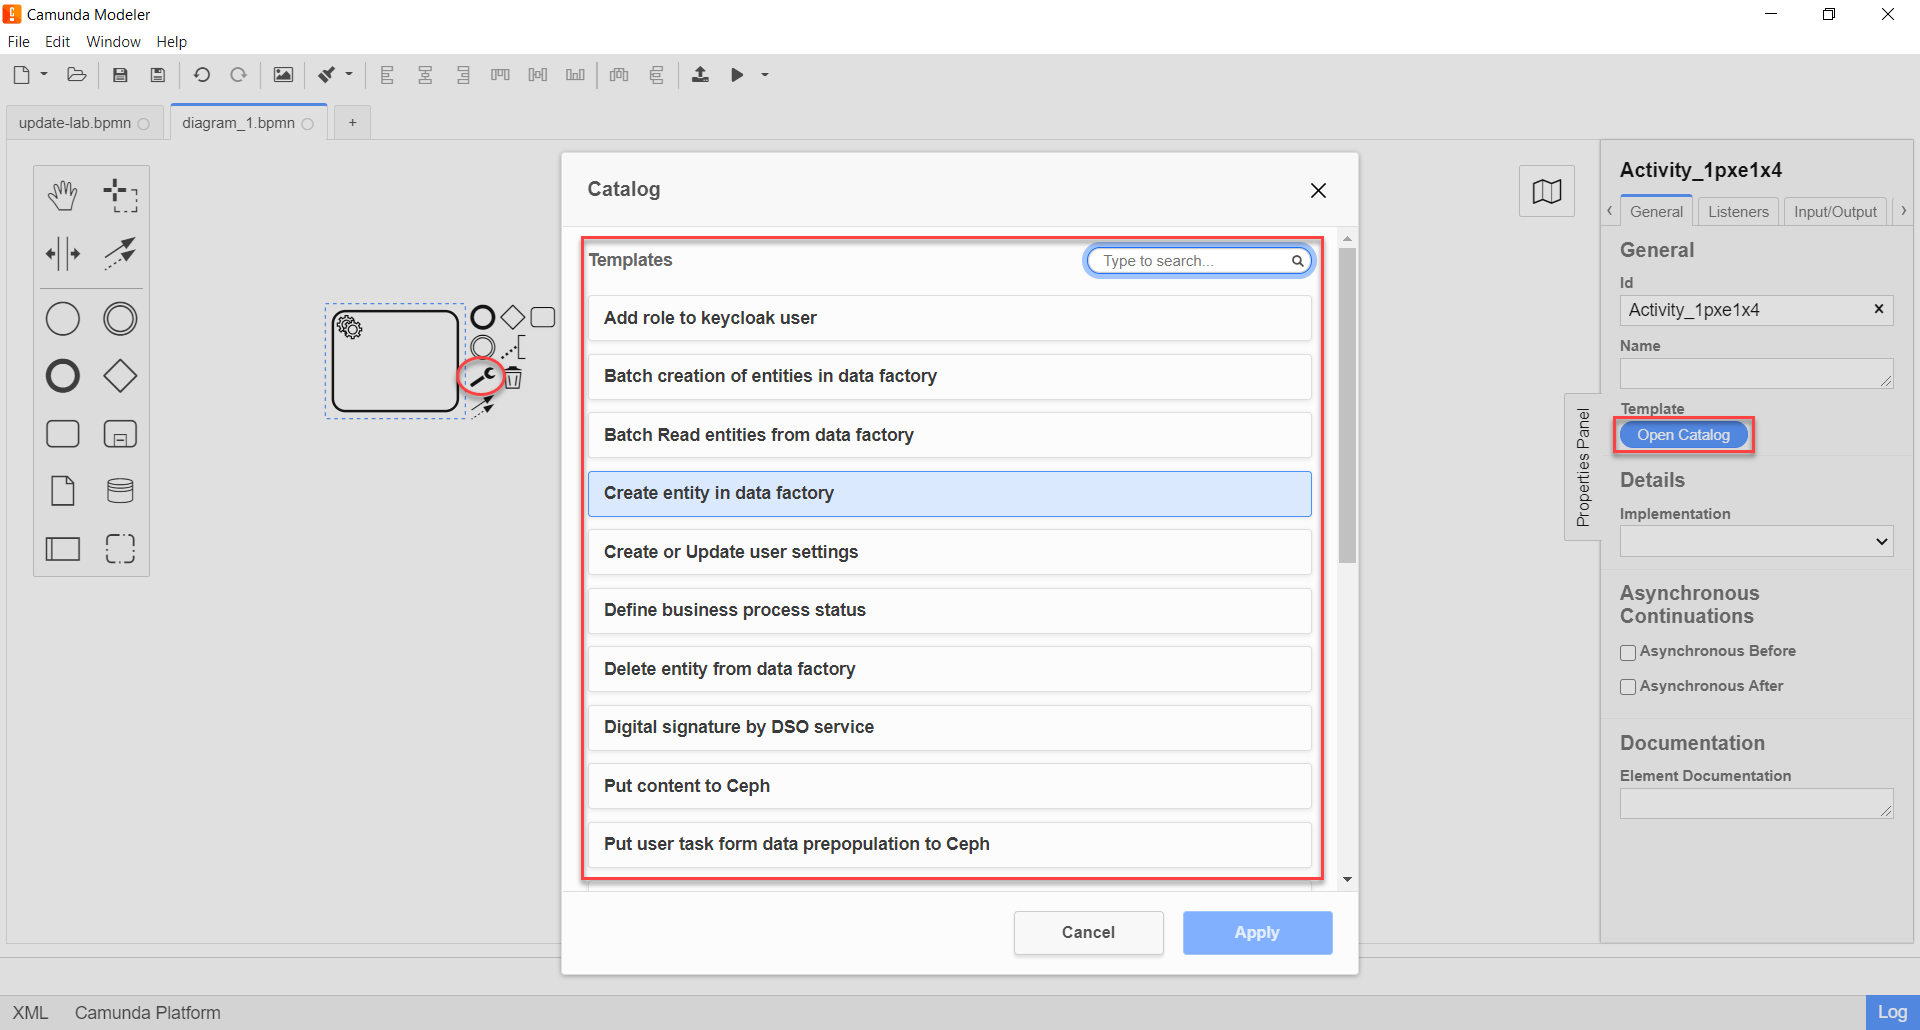
-
2.2. Installing Element Templates on macOS
Follow these steps to install the Element Templates catalog on macOS.
-
Download the extension catalog for business processes as described in Installing Element Templates on Windows.
-
Open the Terminal.
-
Navigate to the Camunda Modeler’s resources directory:
cd ~/Library/Application\ Support/camunda-modeler/resources -
If it doesn’t exist, create a new directory for
element-templates:mkdir element-templates -
Copy all JSON files from the
business-process-modeler-extensionsdirectory to the new directory:cp business-process-modeler-extensions/*.json ~/Library/Application\ Support/camunda-modeler/resources/element-templates -
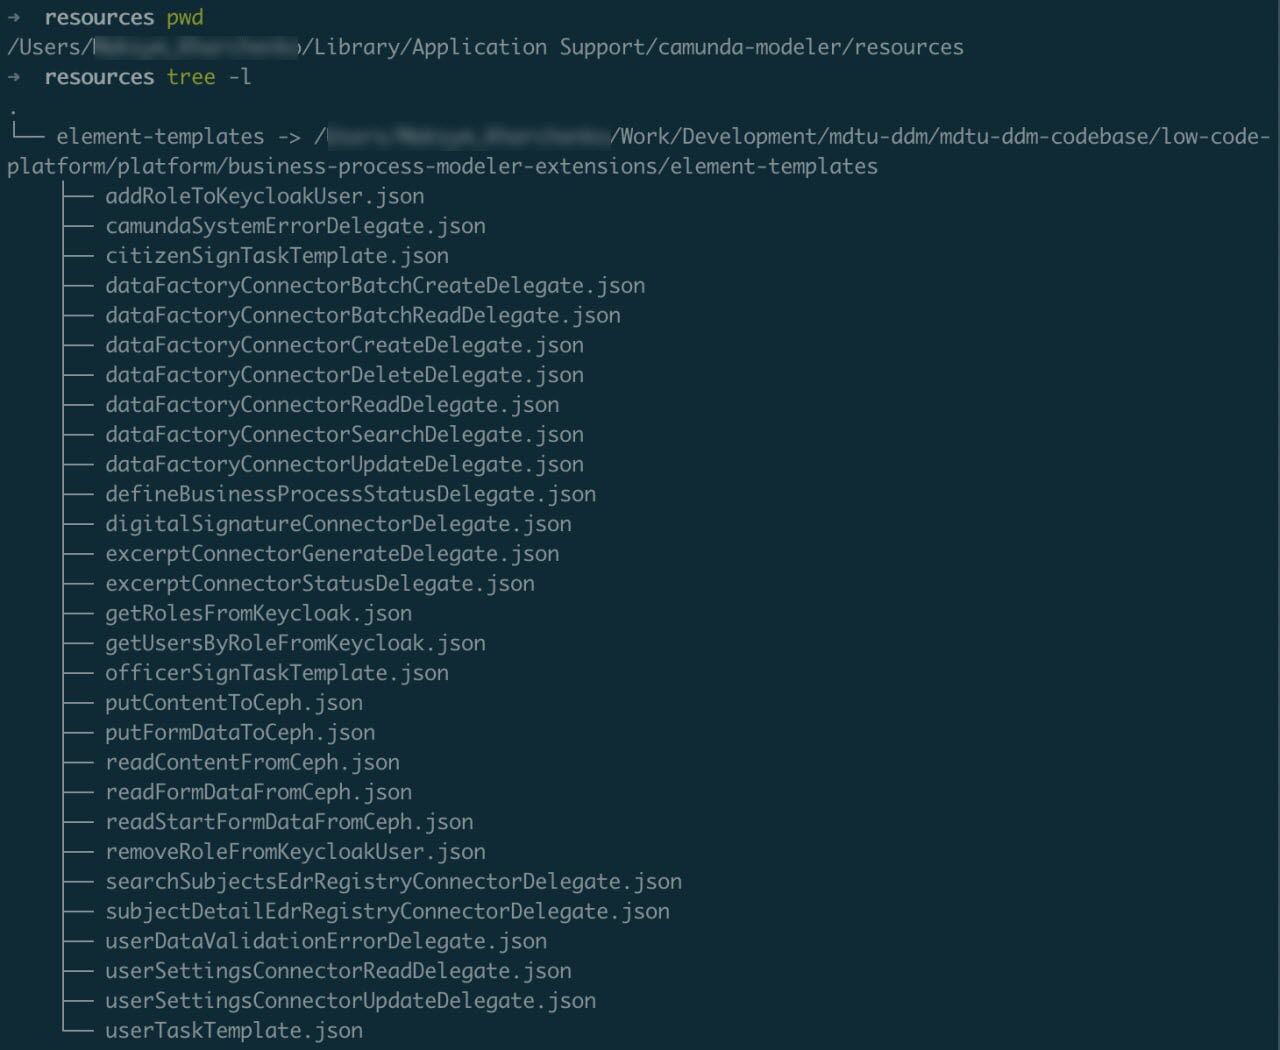
The resulting directory structure should look like:
~/Library/Application\ Support/camunda-modeler/resources/element-templates/
-
Restart Camunda Modeler and check that the templates are available during business process modeling:
-
Create a task – select Create Task.
-
Click the wrench icon – choose Change Type.
-
Set the task type – Service Task, User Task, or Call Activity.
-
Click the Open Catalog button.
The Element Templates catalog will open, allowing you to apply extensions during modeling.
-