Uploading data from a CSV file as an array into a database
The possibility of loading data as an array to a database allows you to create business processes that the registry users can use for adding a data array as a single file, for example, filling the registry directories or loading additional data.
In order to model a business process with the possibility of importing data from a CSV file as an array into a database, perform the following actions.
|
Use out-of-the-box BPMN diagram of the test business process and the Download diploma data (csv file) and Sign diploma data (csv file) forms to see more context for further use. |
1. Business process modeling
Model the business process according to the instructions in the link.
Otherwise, use the delegate download instructions available at the link. |
|
Using the |
-
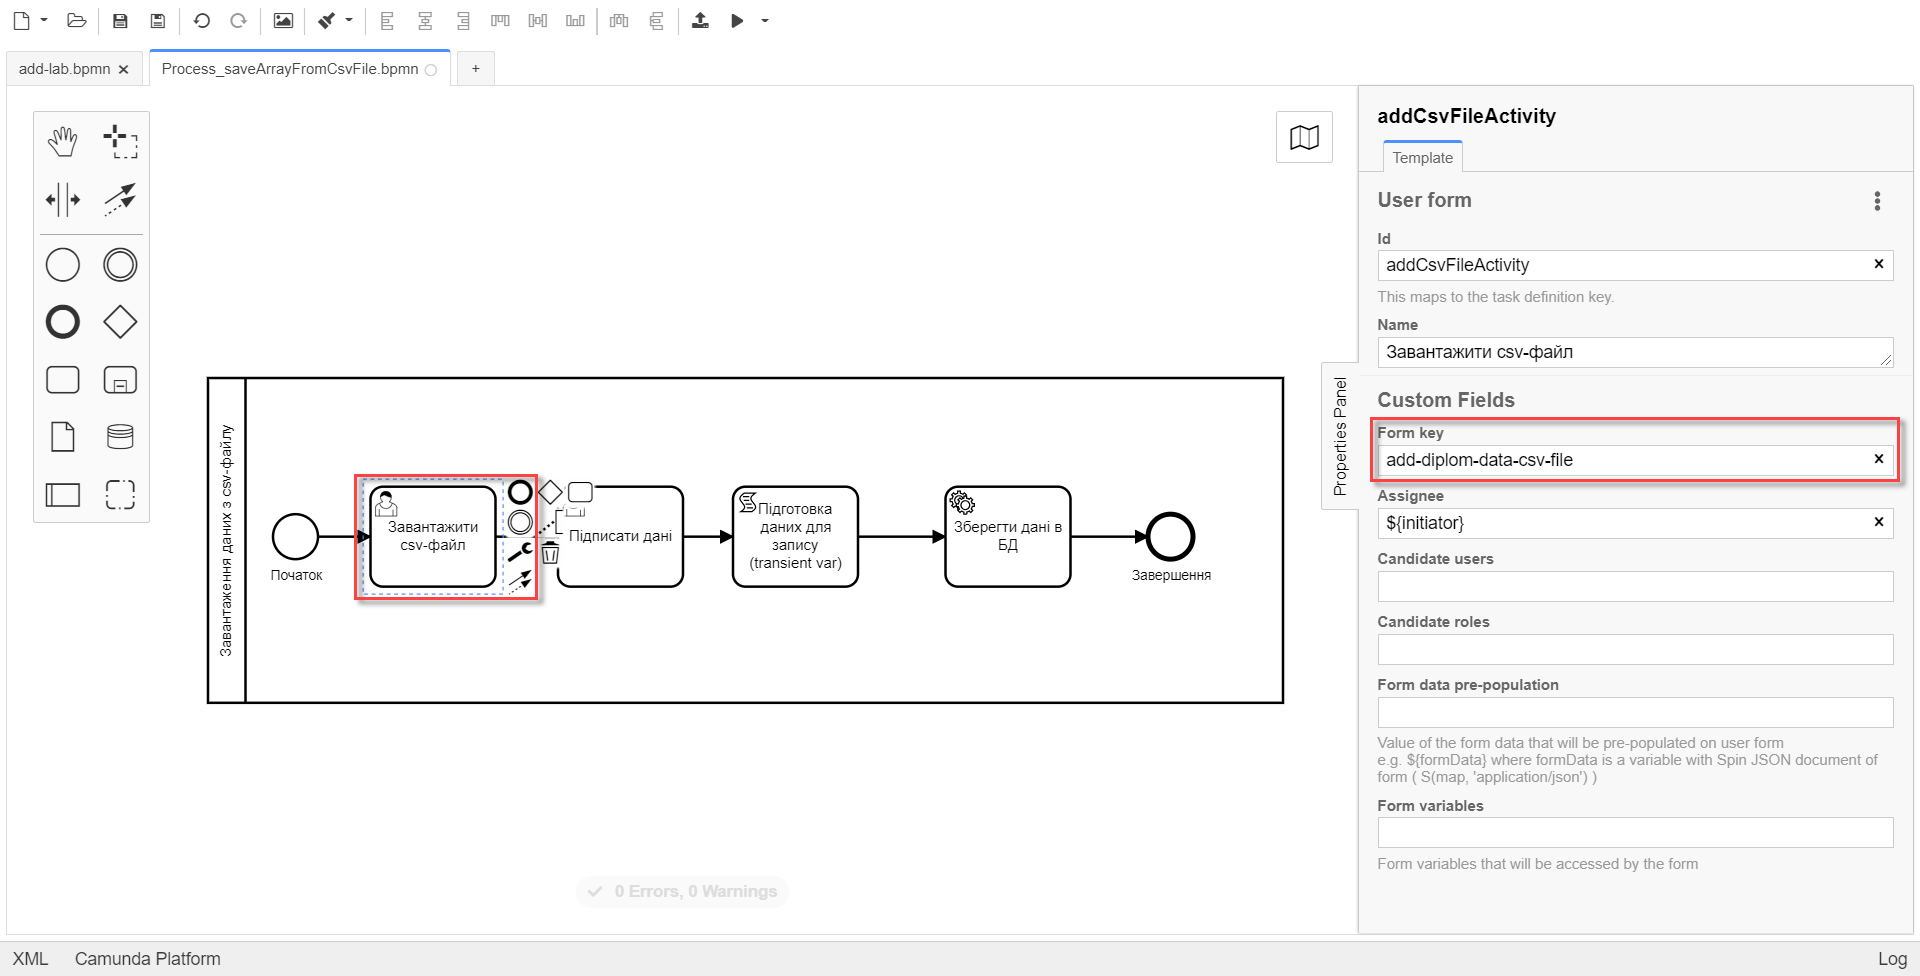
Create the user task using a form that contains the corresponding file component for loading.
-
Enter the task name in the
Namefield. -
In the
Form keyfield, enter the service name of the form. -
In the
Assigneefield, enter${initiator}— the user who initiated the execution of this business process.
-
-
Create the user task using the form for data signing.
-
Enter the task name in the
Namefield. -
In the
Form keyfield, enter the service name of the form for data signing. -
In the
Assigneefield, enter${initiator}— the user who initiated the execution of this business process. -
in the
Form data pre-populationfield, enter the${submission('addCsvFileActivity').formData}variable.

-
-
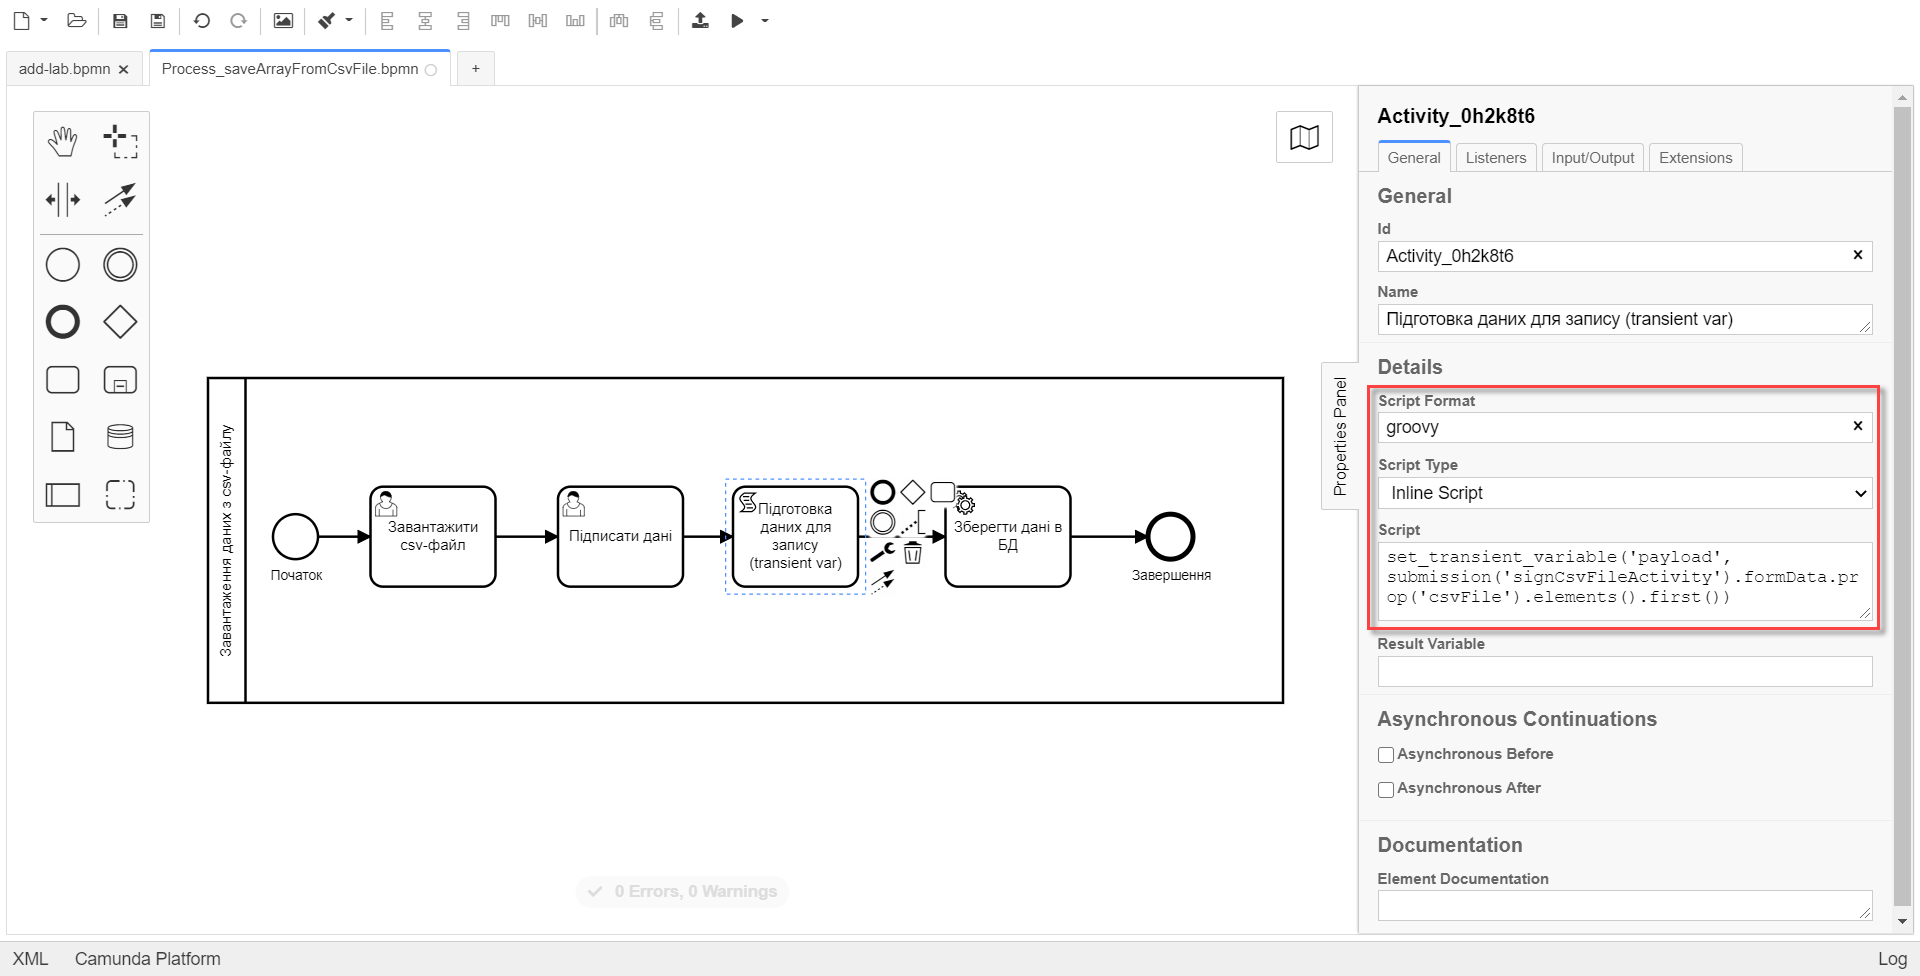
Create the script task to prepare the data for writing.
-
Enter the task name in the
Namefield. -
In the
Script Formatfield, selectgroovy. -
In the
Script Typefield, selectInlineScript. -
In the
Scriptfield, enter the script itself, for example, in our case:set_transient_variable('payload', submission('signCsvFileActivity').formData.prop('csvFile').elements().first())
-
-
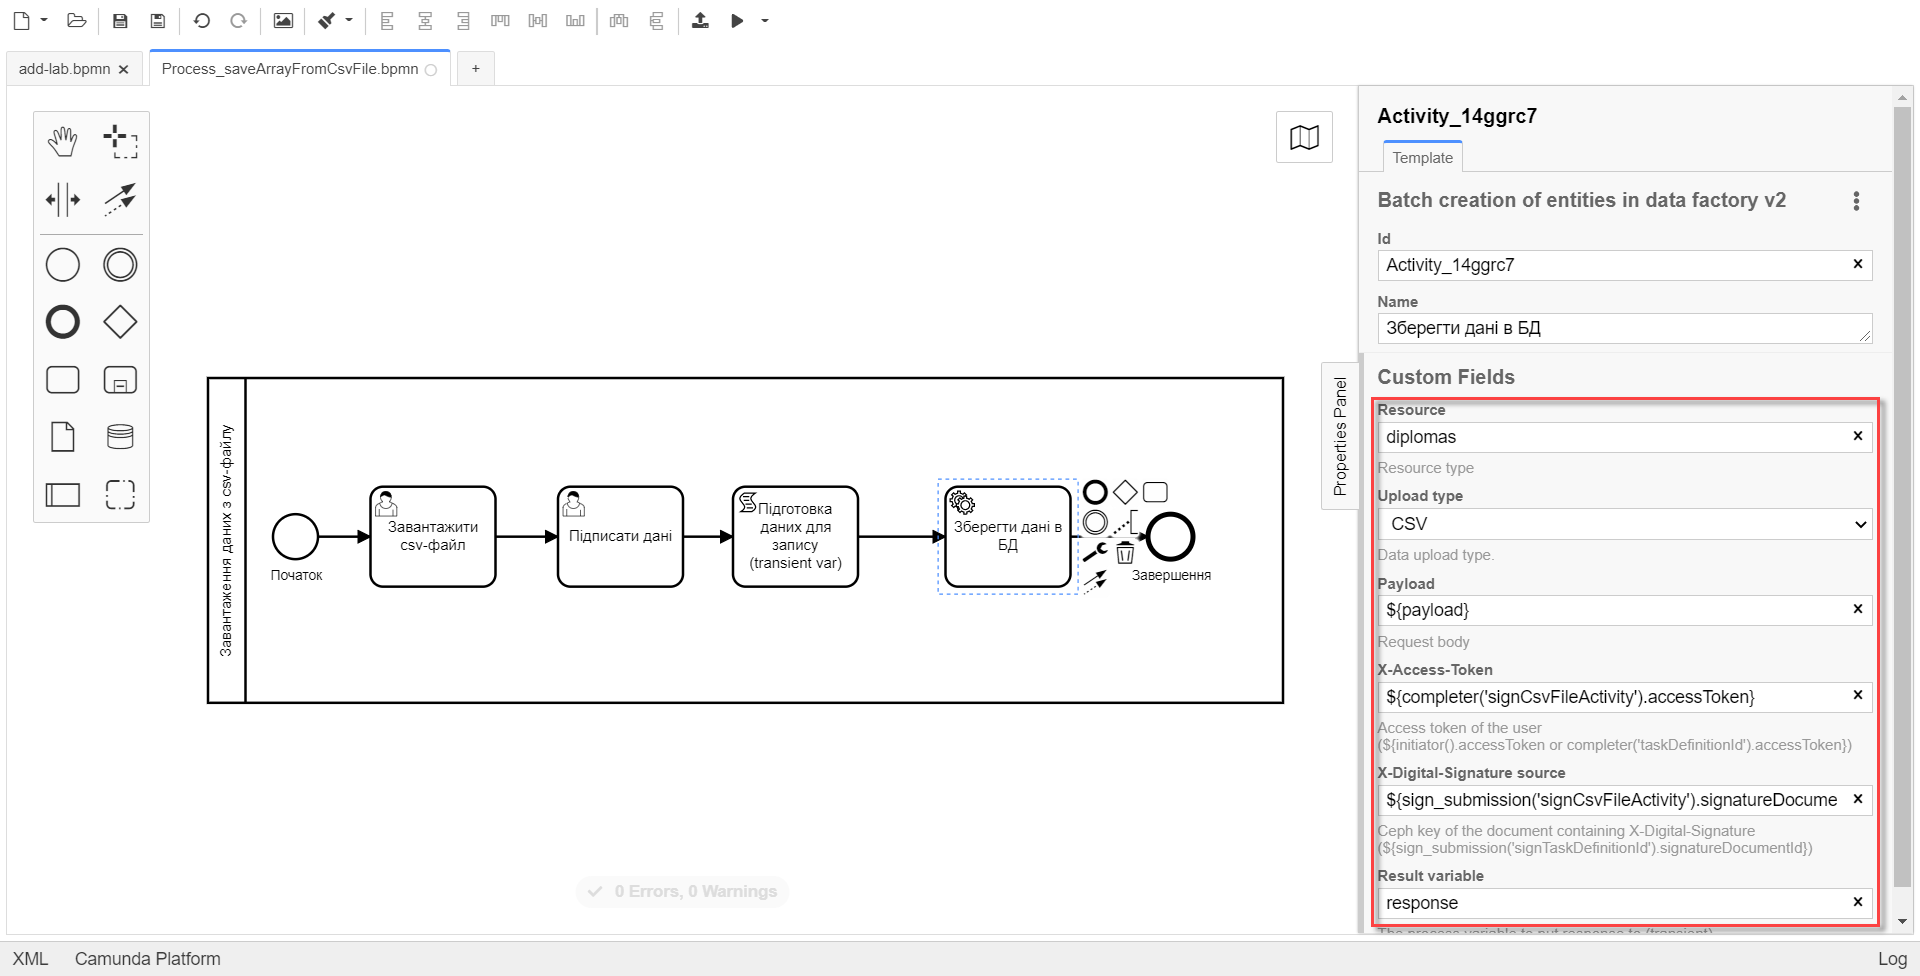
Create the service task for data saving.
-
Click
Open Catalogand selectBatch creation of entities in data factory v2delegate, then clickApply.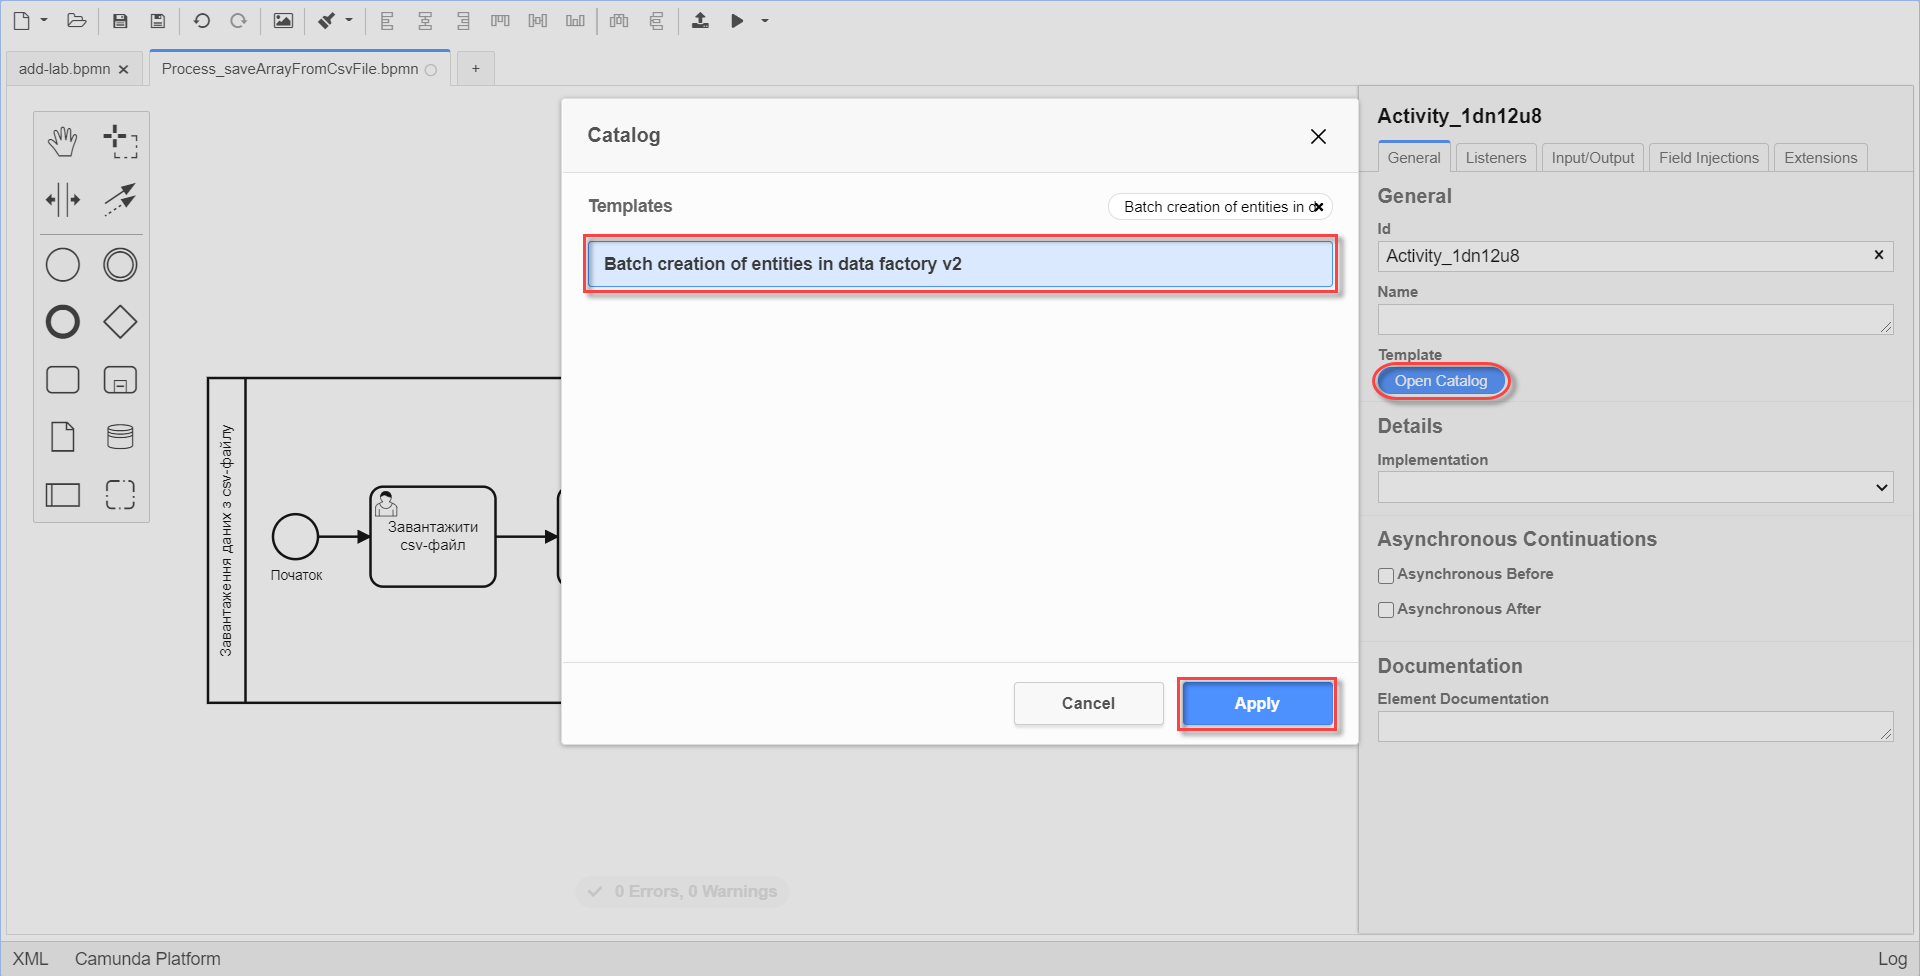
-
Enter the task name in the
Namefield. -
In the
Resourcefield, enter the resource — the name of the endpoint for the table, where the data will be stored. -
In the
Upload typefield, selectCSV. -
In the
Payloadfield, enter data you want to create —${payload}. -
in the
X-Access-Tokenfield, enter the user’s system access token under which the operation is performed, for example:${completer('signCsvFileActivity').accessToken}. -
In the
X-Digital-Signature sourcefield, enter the source of the digital signature, for example:${sign_submission('signCsvFileActivity').signatureDocumentId}. -
In the
Result variablefield, enter any name for the output parameter (by default,response).
-
2. Form modeling
Model the forms according to the instructions in the link.
2.1. Data upload form
-
Enter
Form’s business nameandForm’s service name.
-
Go to the
Buildertab. Select theUpdatedsection. Select theContentcomponent and drag it to the modeling panel.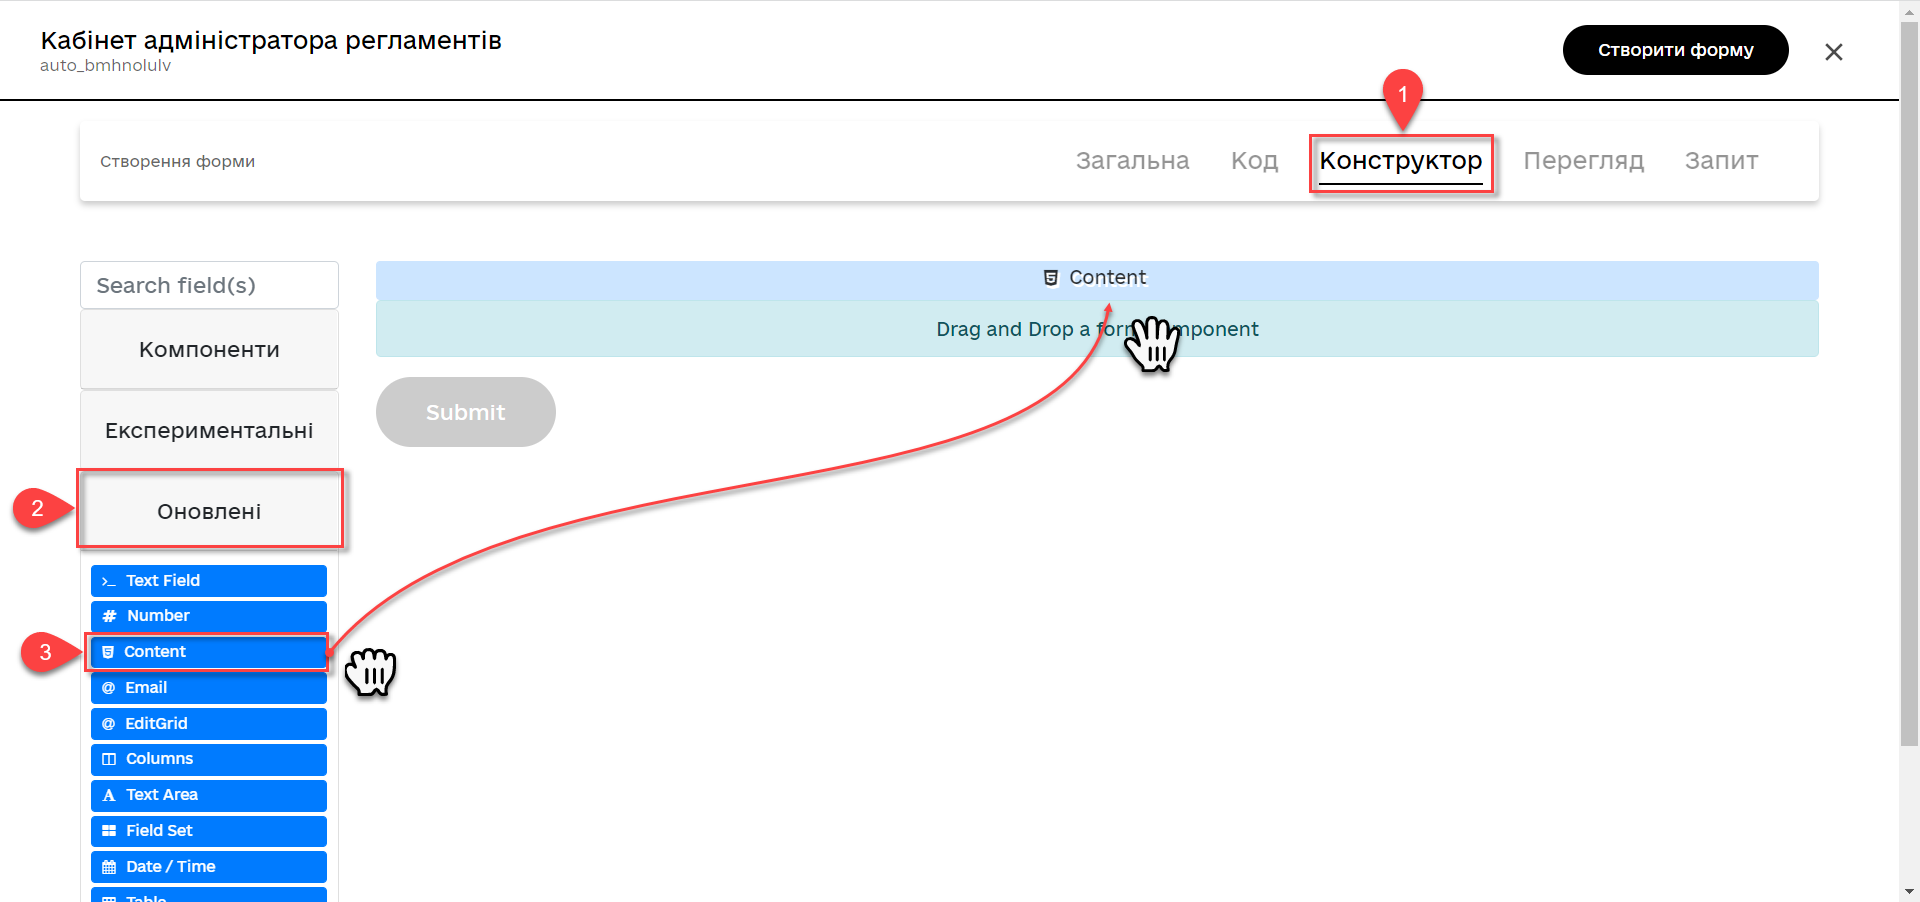
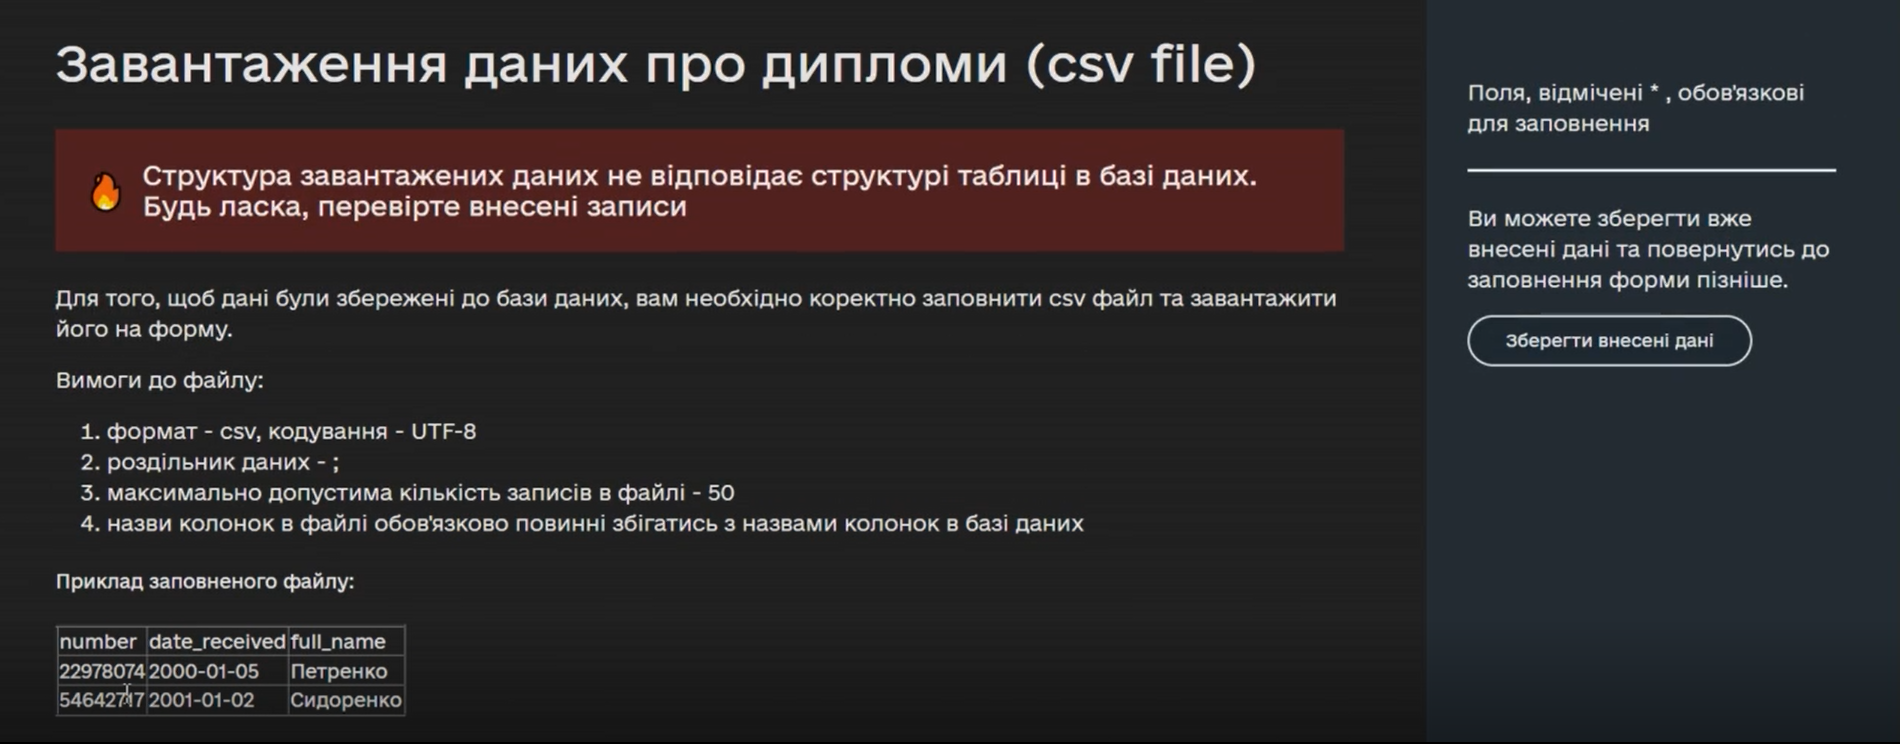
In the form for file uploading, we recommend to model a prompt for filling out the file (for example, using the Content component) where it is necessary to describe the requirements for the uploaded file.
-
Add a description of the requirements to the file and click
Save.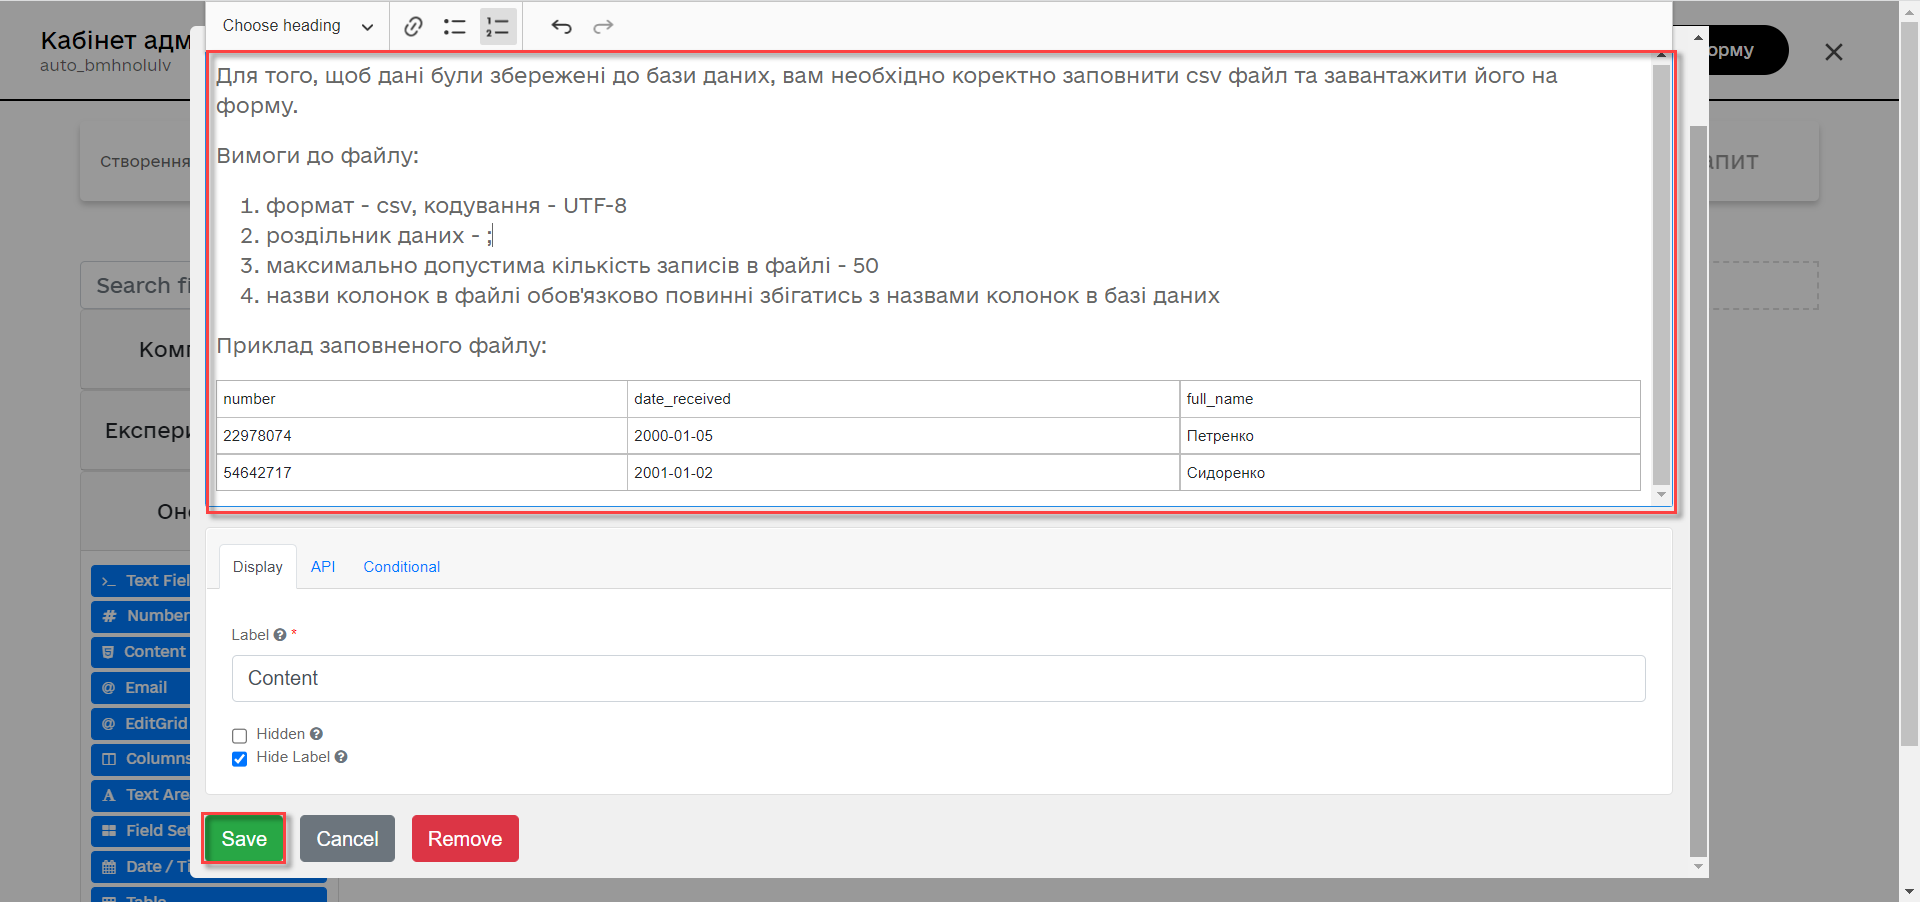
The following restrictions for the file are currently in place:
-
It is possible to download only one file at a time.
-
The file format is CSV only.
-
Encoding is UTF-8.
-
The maximum number of entries is 50.
-
The maximum file size is 100 MB. This is the limit for data processing for saving or editing (general input limit).
Requirements for the data in the file:
-
Data separator in the file is
";"(semicolon). -
The format of the fields in the file must comply with that of the fields in the database.
-
If data is uploaded to the directory, then each record must contain a unique key in the corresponding format.
-
-
In the
Updatedsection, select theFilecomponent and drag it to the modeling panel.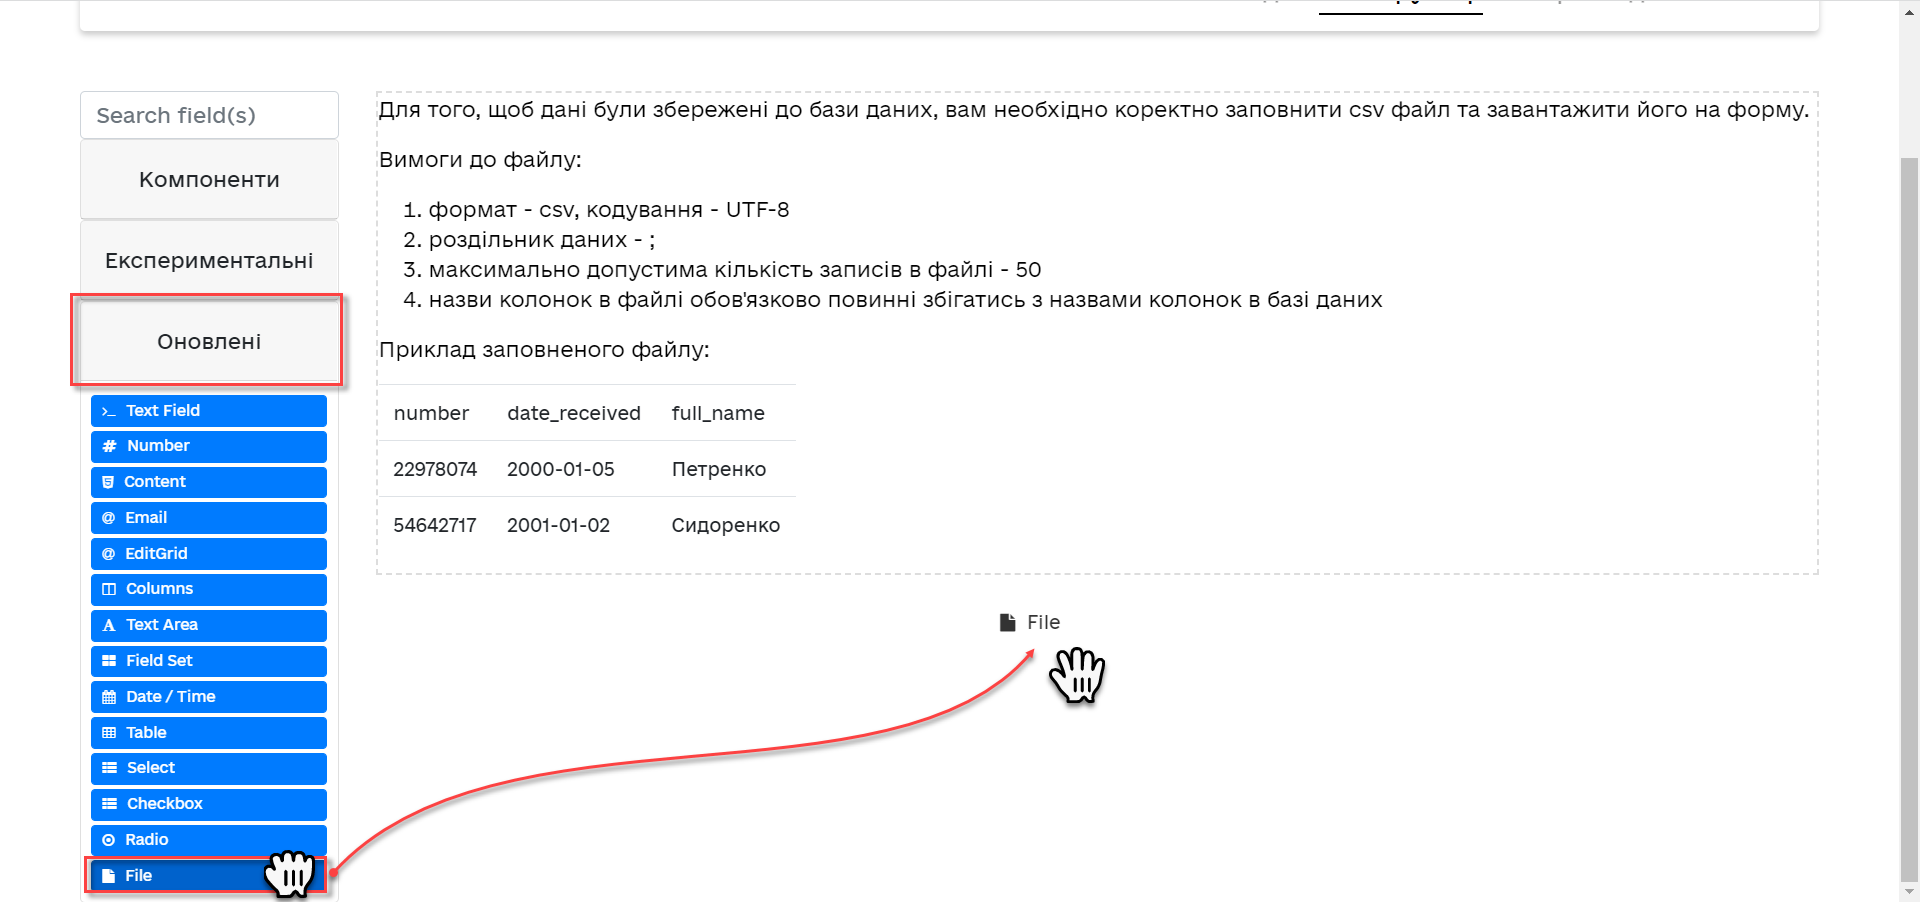
-
Enter the name of the component in the
Labelfield.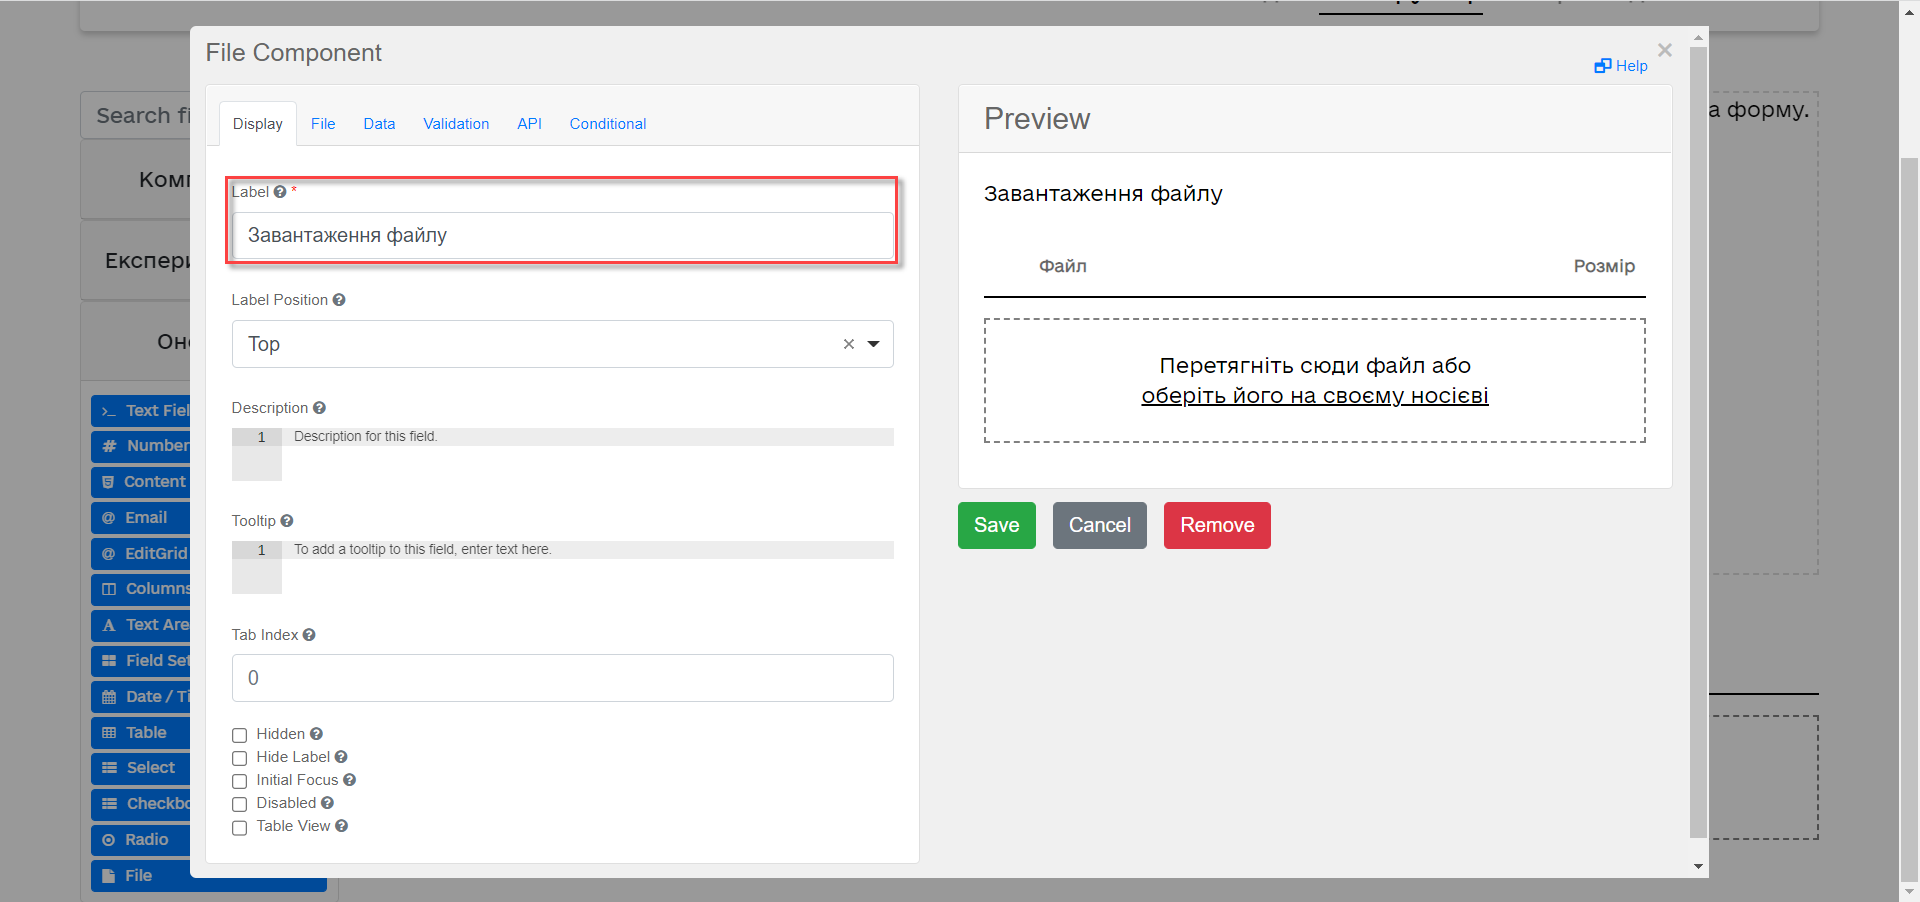
-
Go to the
Filetab. In theFile Patternfield, enter the*.csvvalue. Below in the form, set the minimum and maximum permissible file size in the corresponding fields:File Minimum SizeandFile Maximum Size(maximum 1 MB).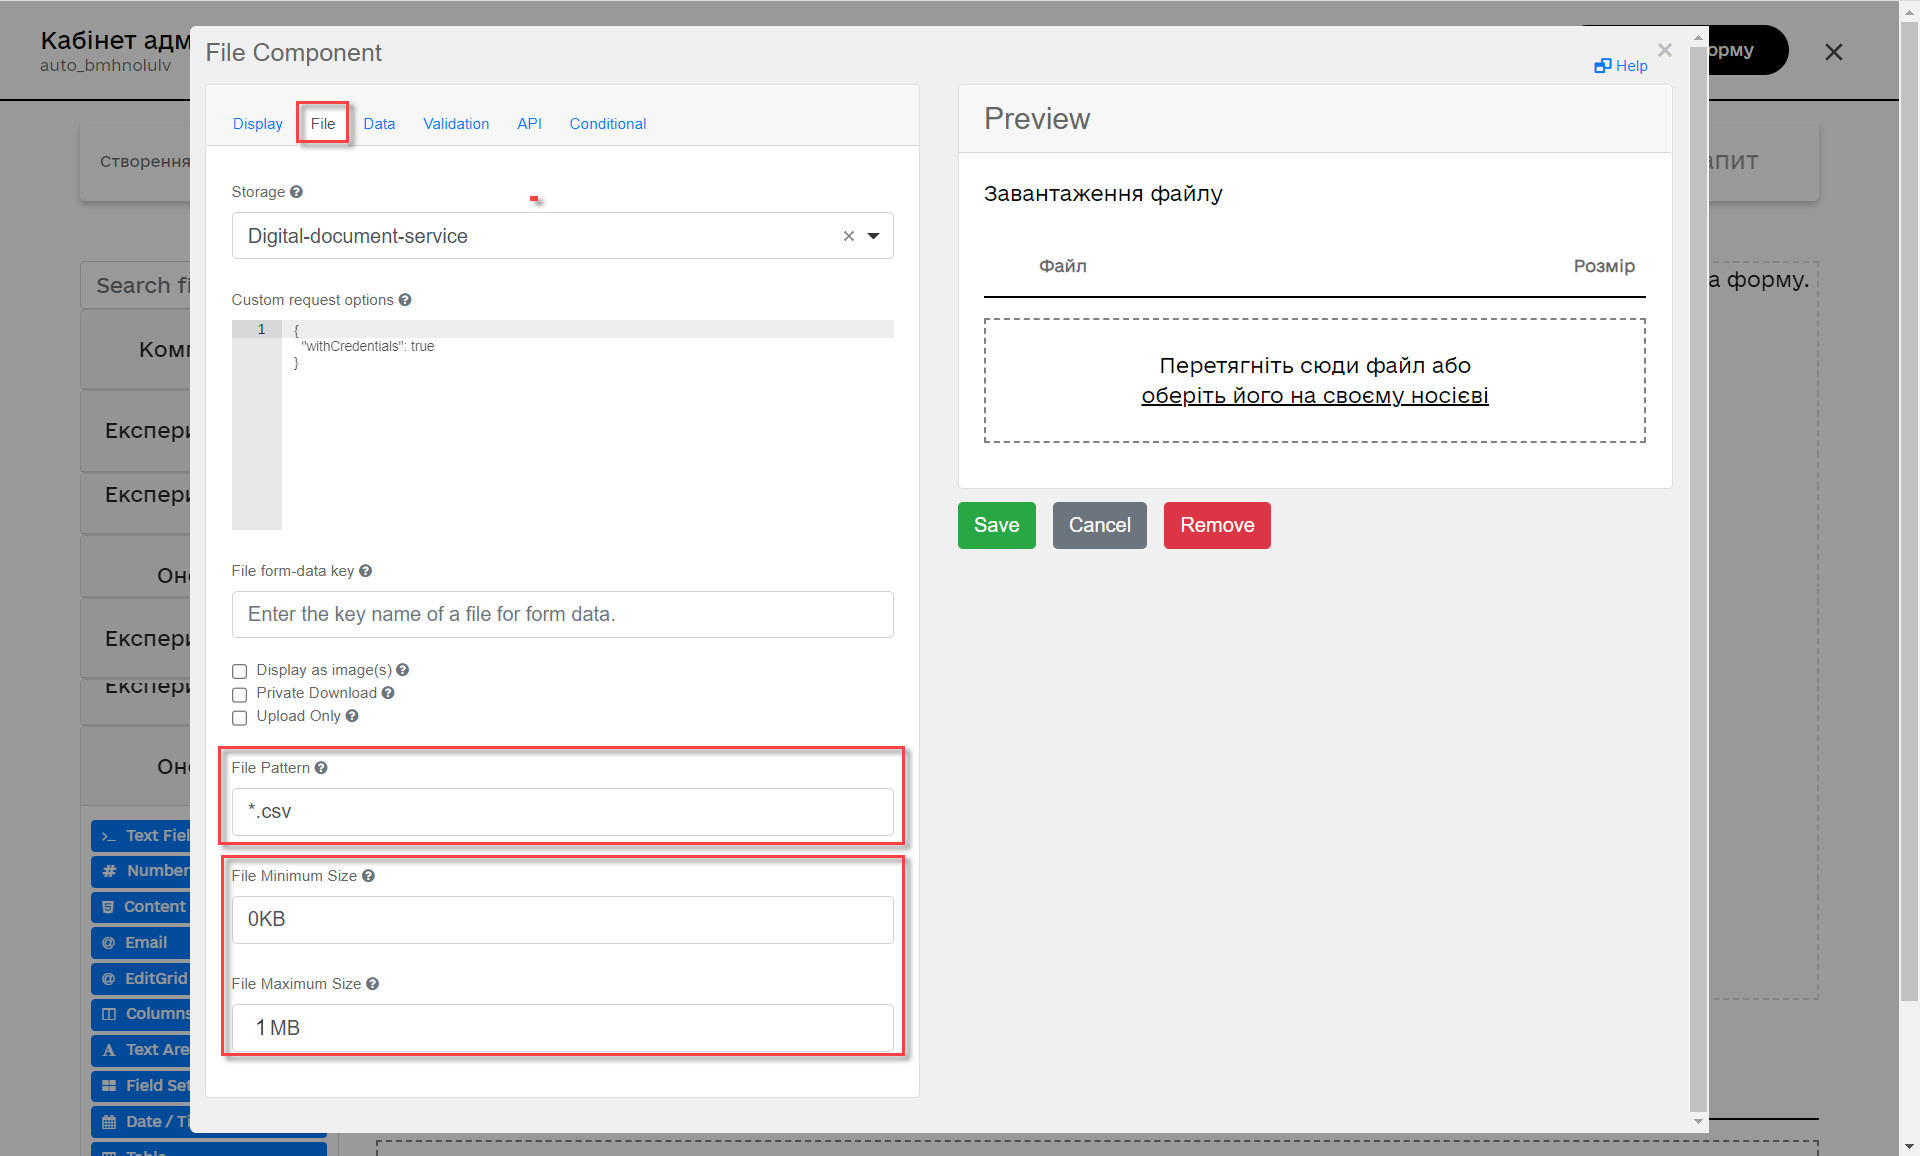
-
Go to the Validation tab. Select the
Requiredcheckbox and enter the name of the table to which data in theResource for validationfield will be written.
-
Go to the
APItab. In theProperty Namefield, entercsvFile. ClickSaveto save the changes.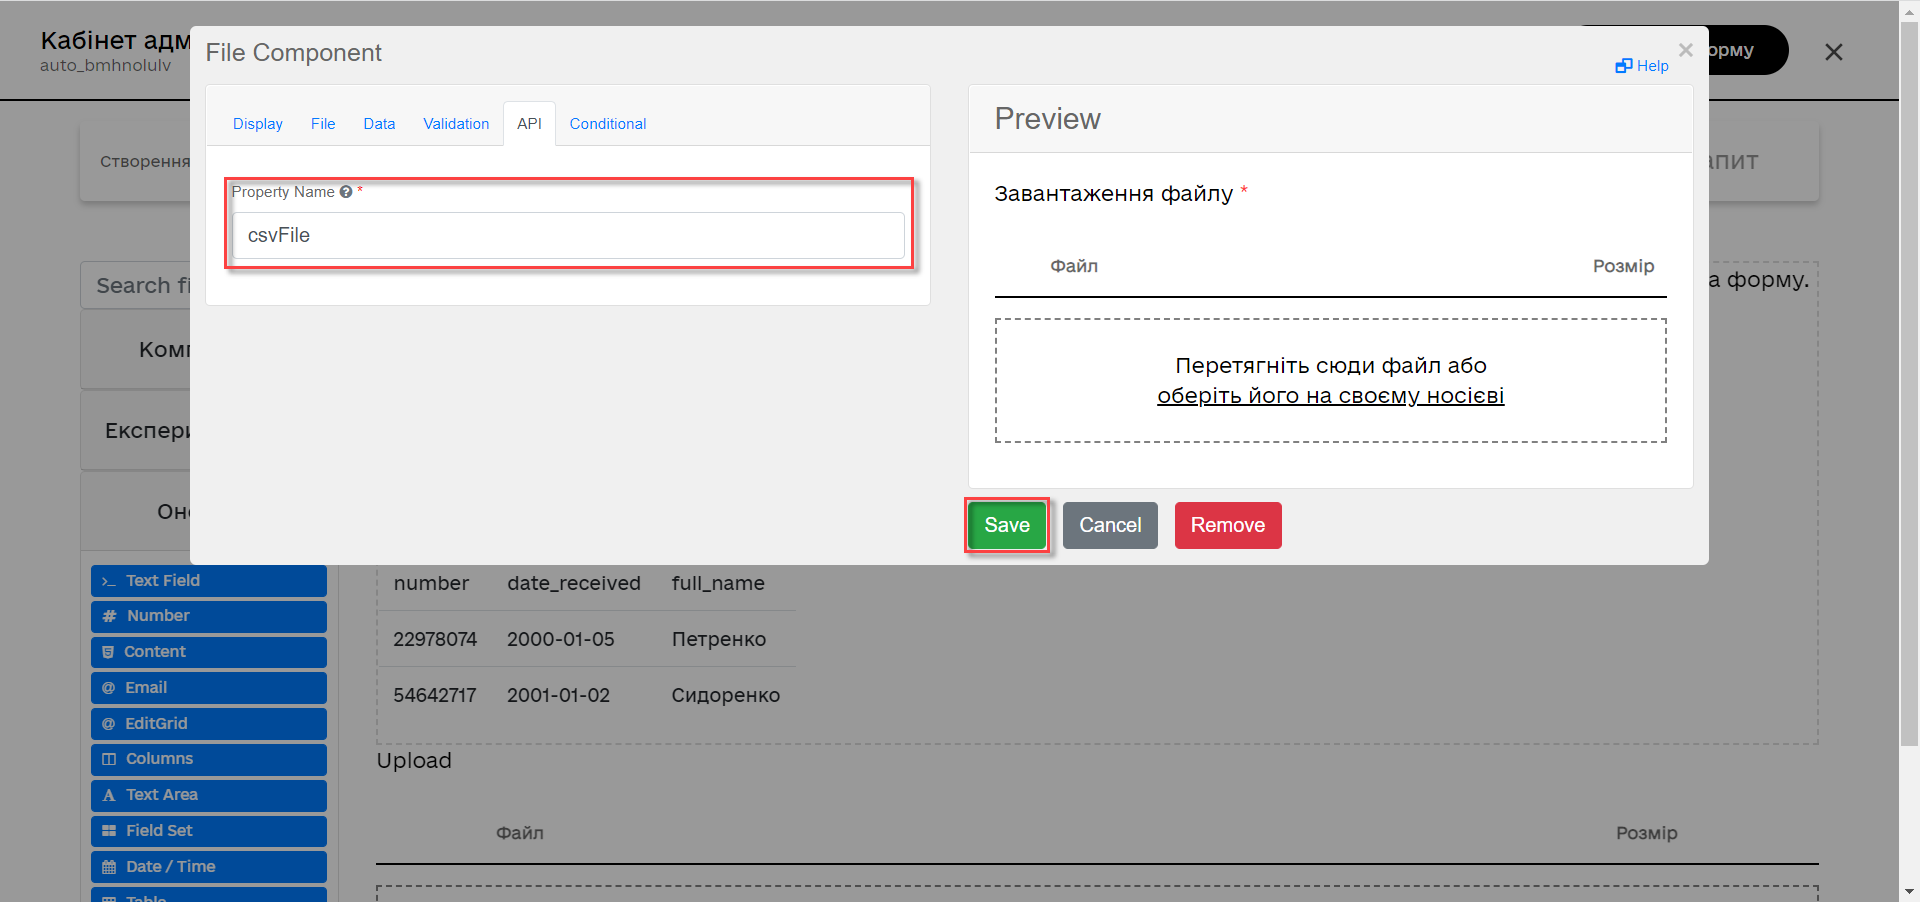
-
Add and configure the
Buttoncomponent.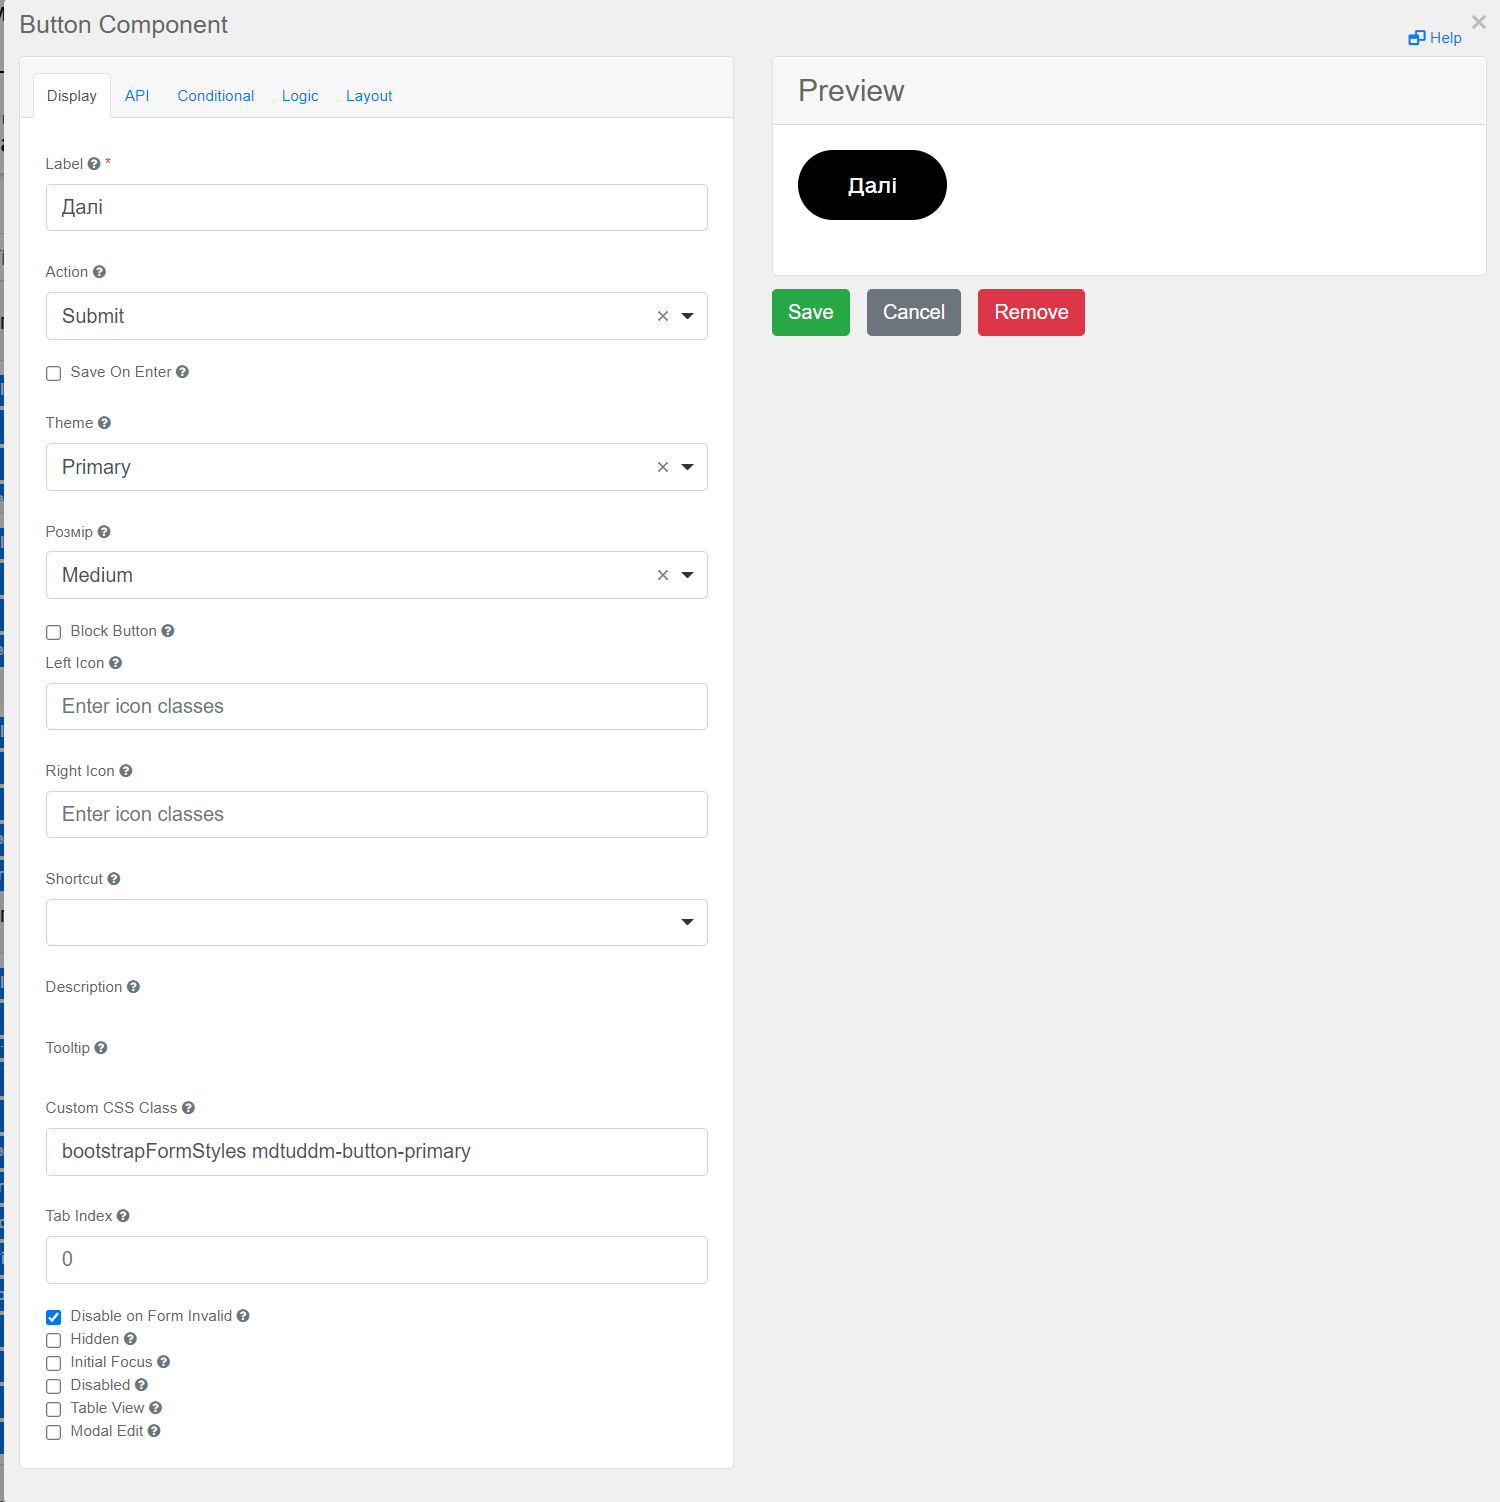
-
In the top right-hand side of the page, click
Create form.
2.2. Form for data signing
-
Enter
Form’s business nameandForm’s service name.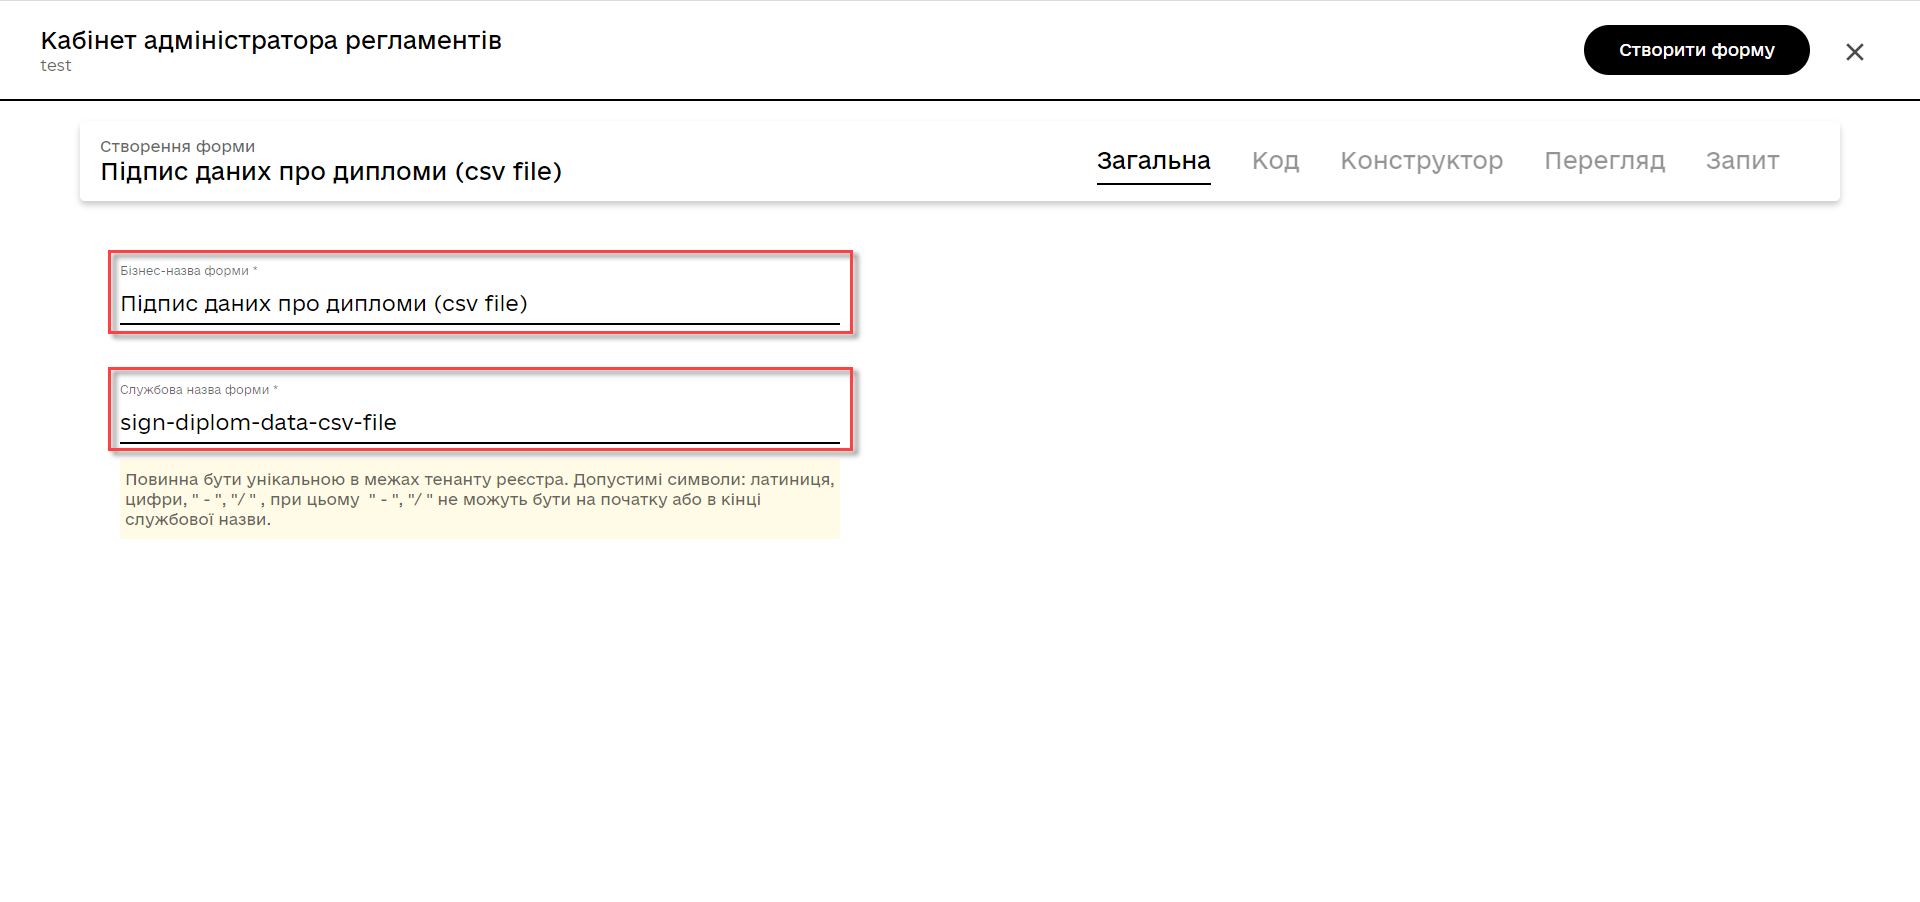
-
Go to the
Buildertab. Select theUpdatedsection. Select theFilecomponent and drag it to the modeling panel.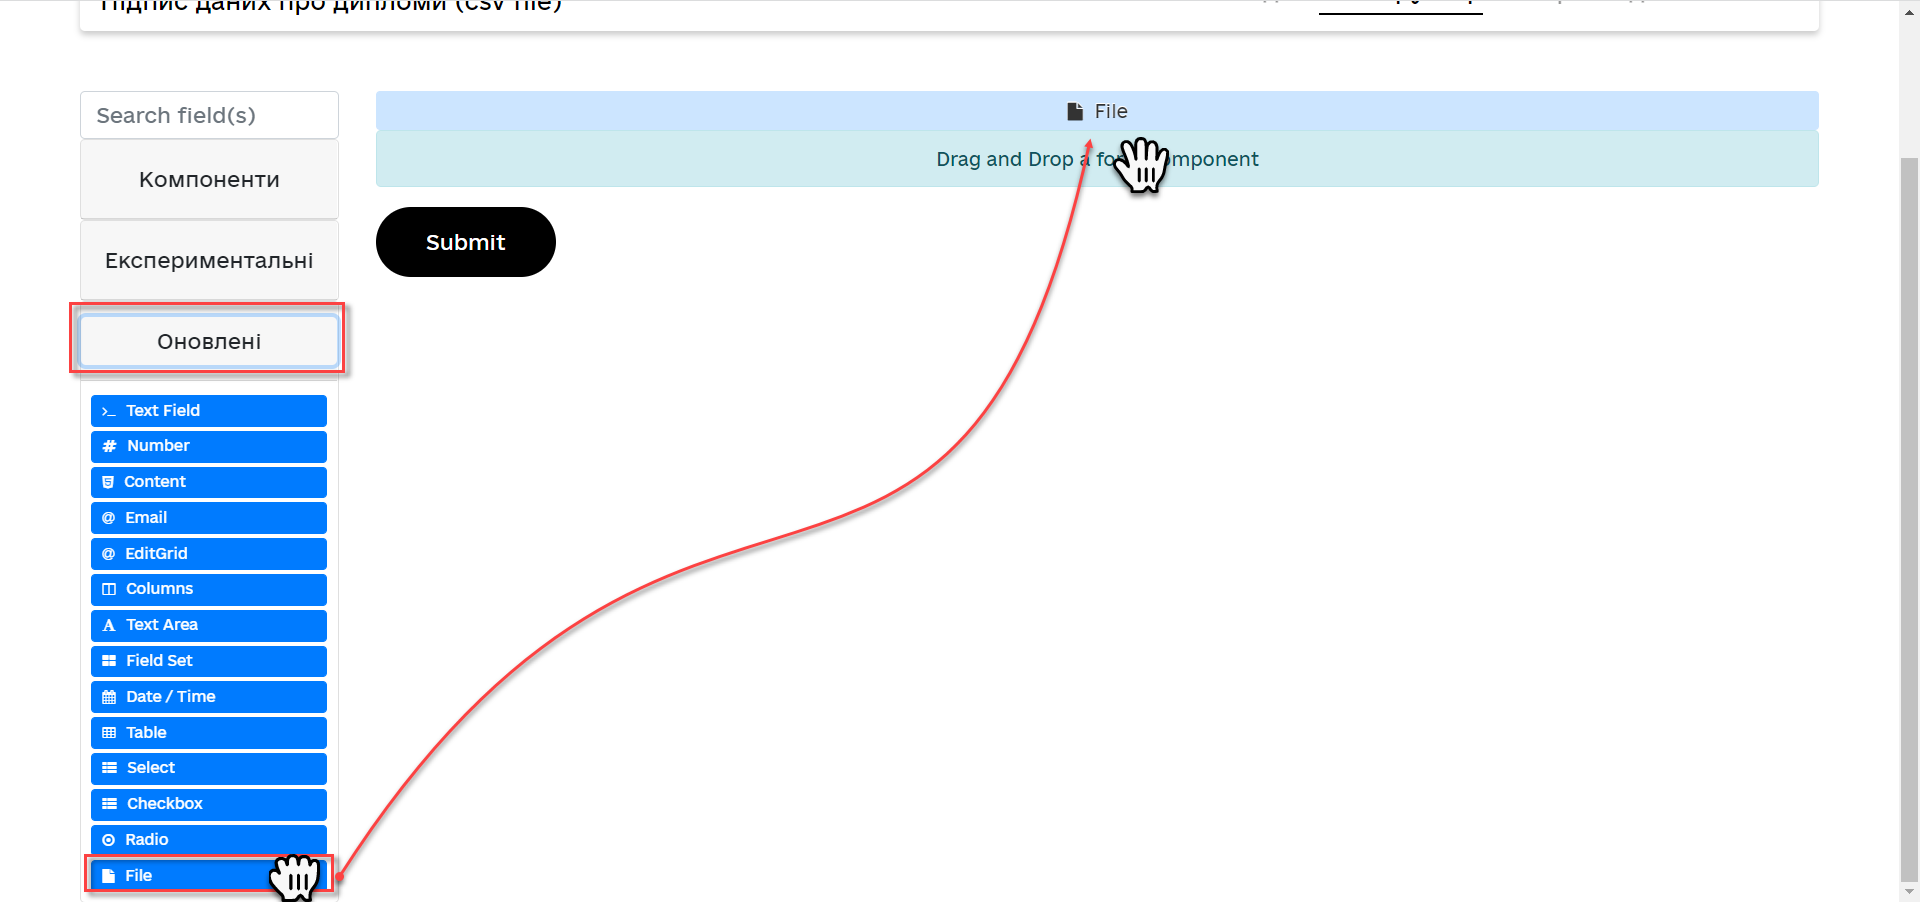
-
Configure the component in the same way as in the previous section, except that the form must be view-only. To do this, in the
Displaytab, select theDisabledcheckbox and change the name of the component.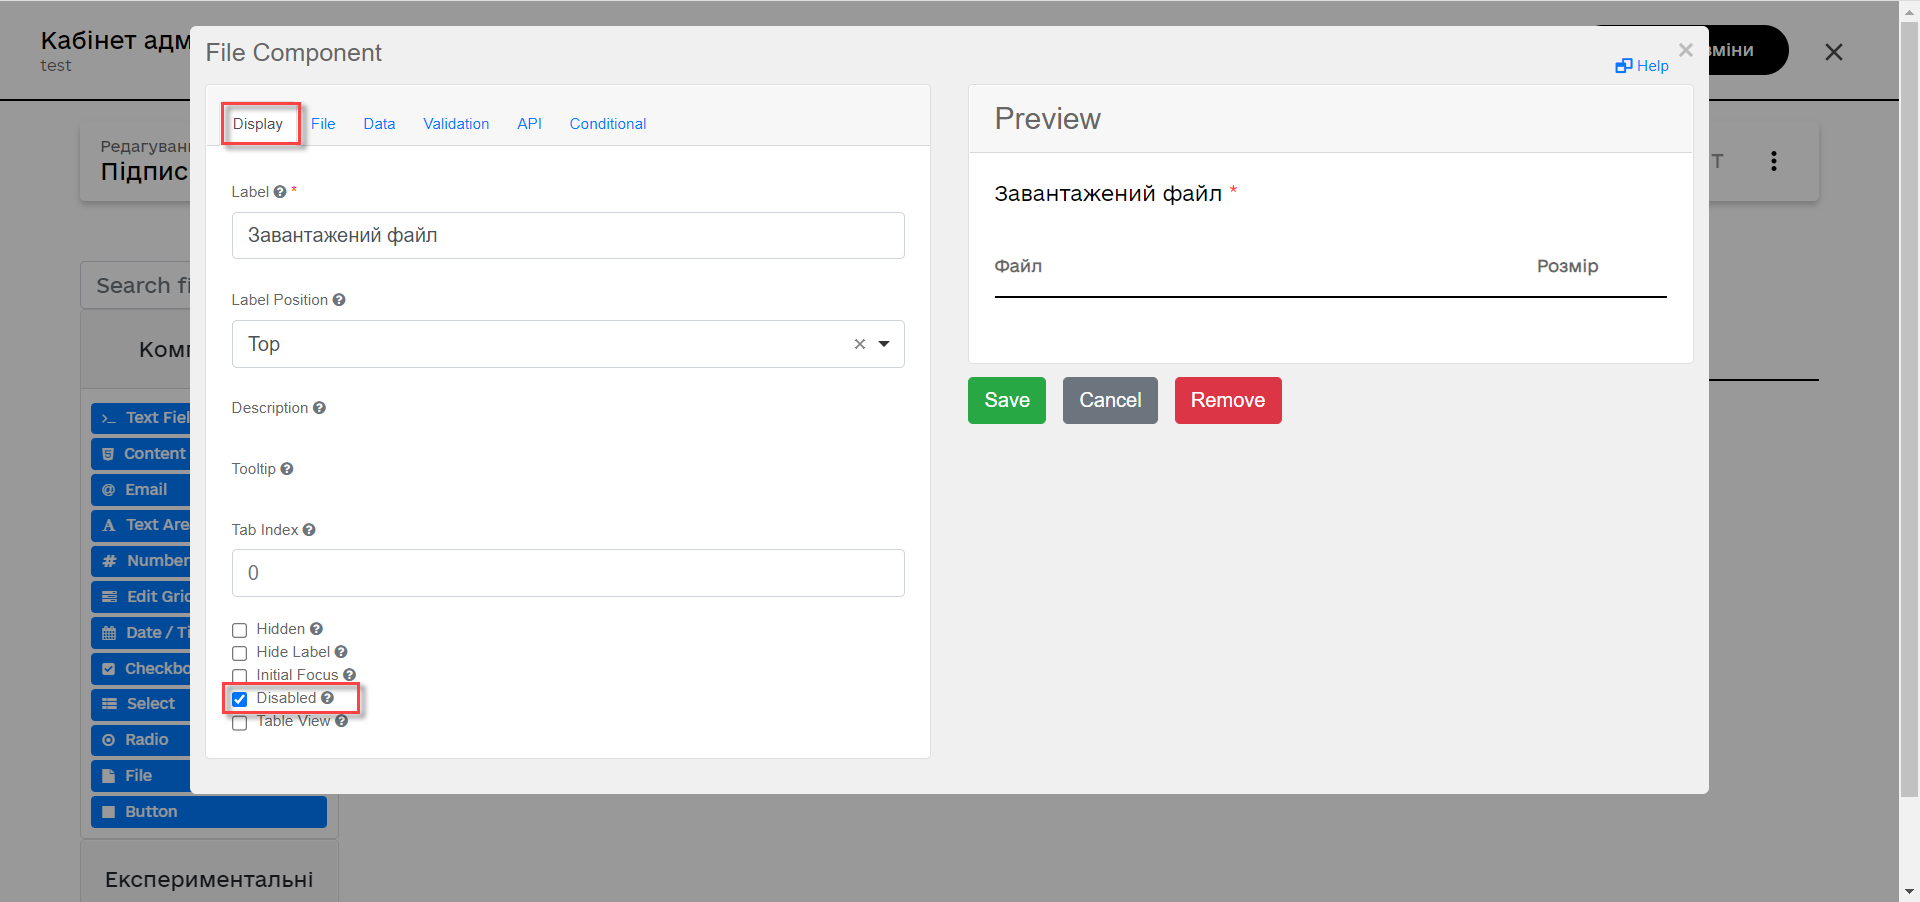
-
Add and configure the
Buttoncomponent.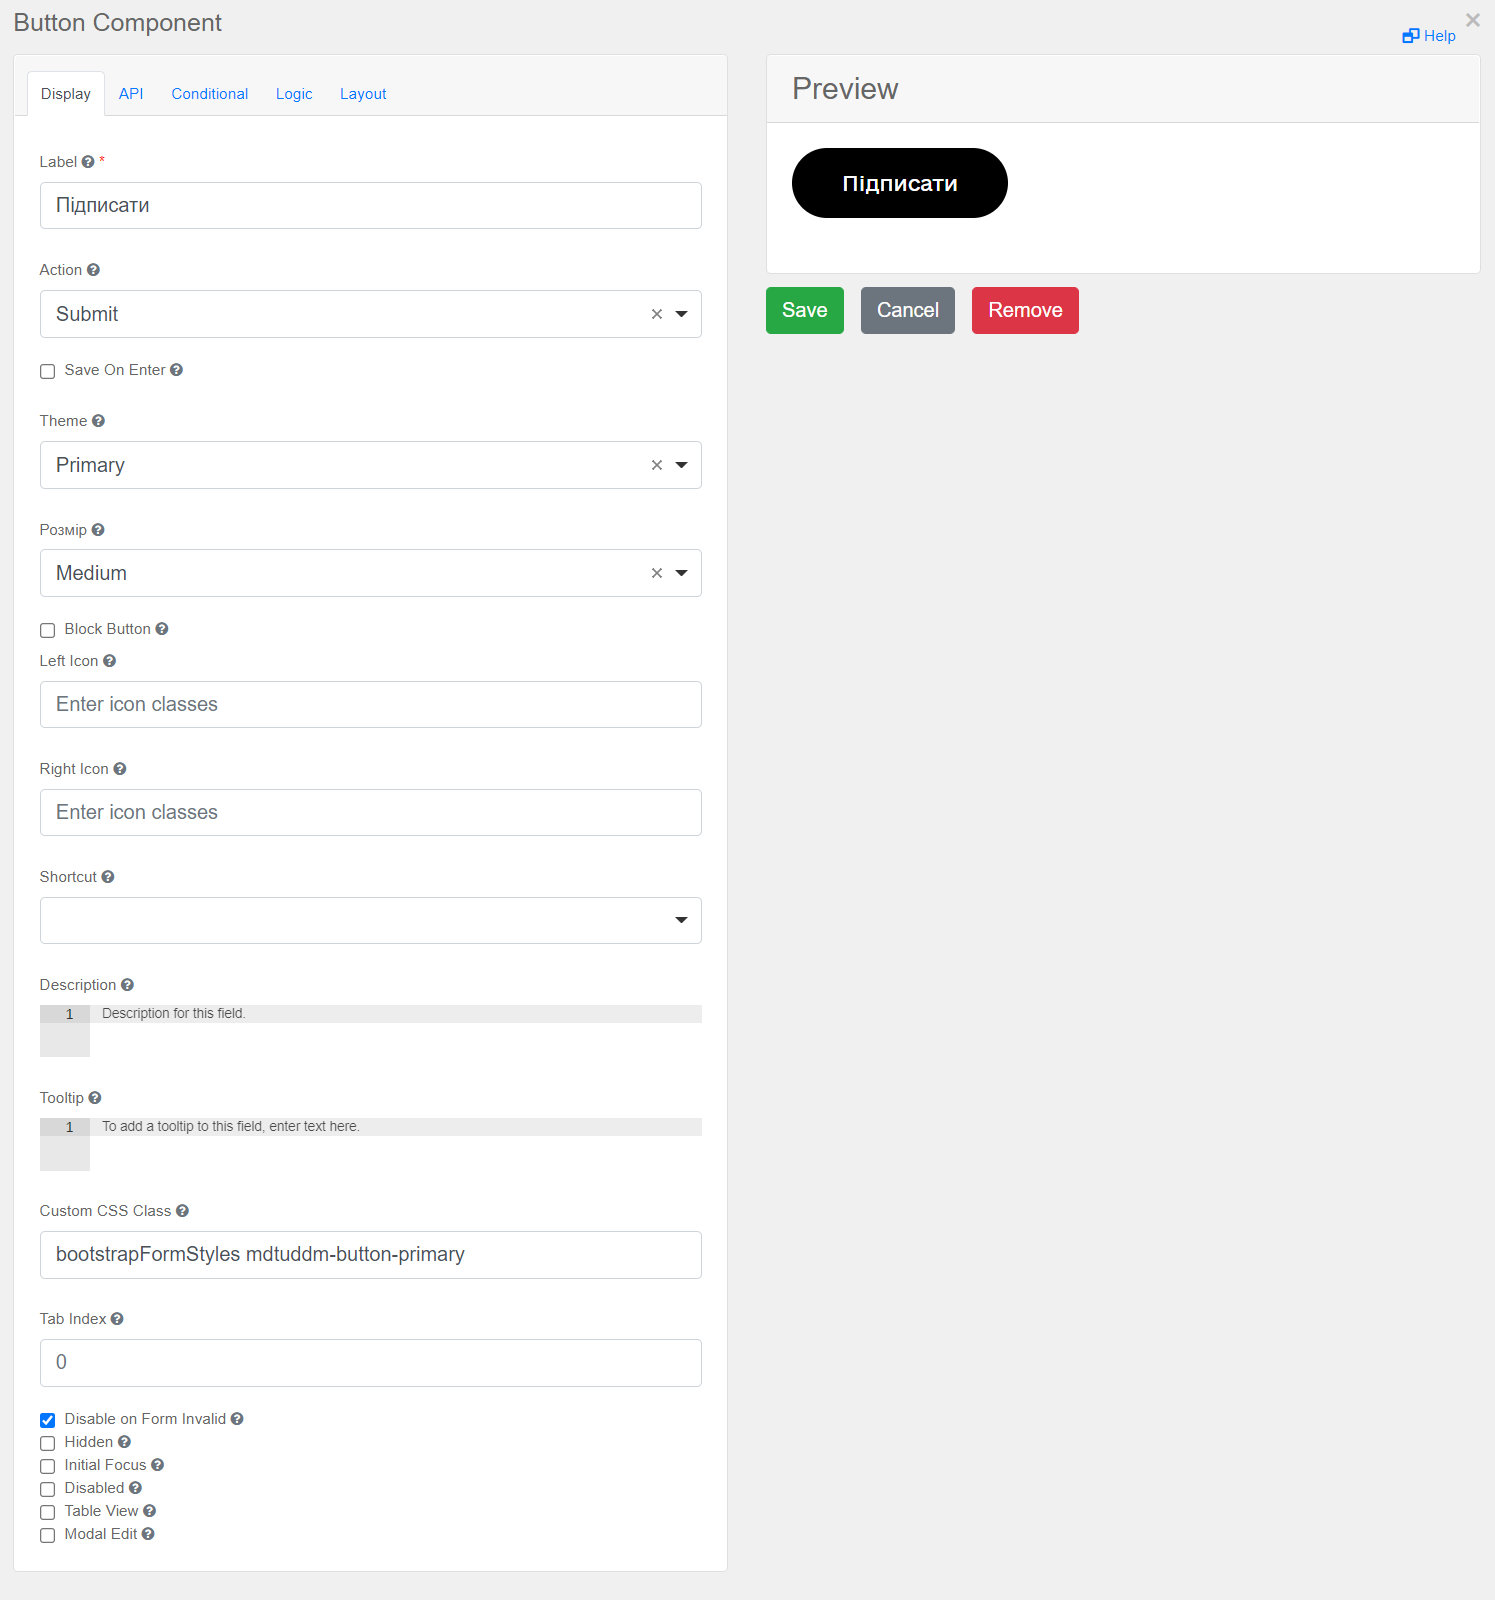
-
In the top right-hand side of the page, click
Create form.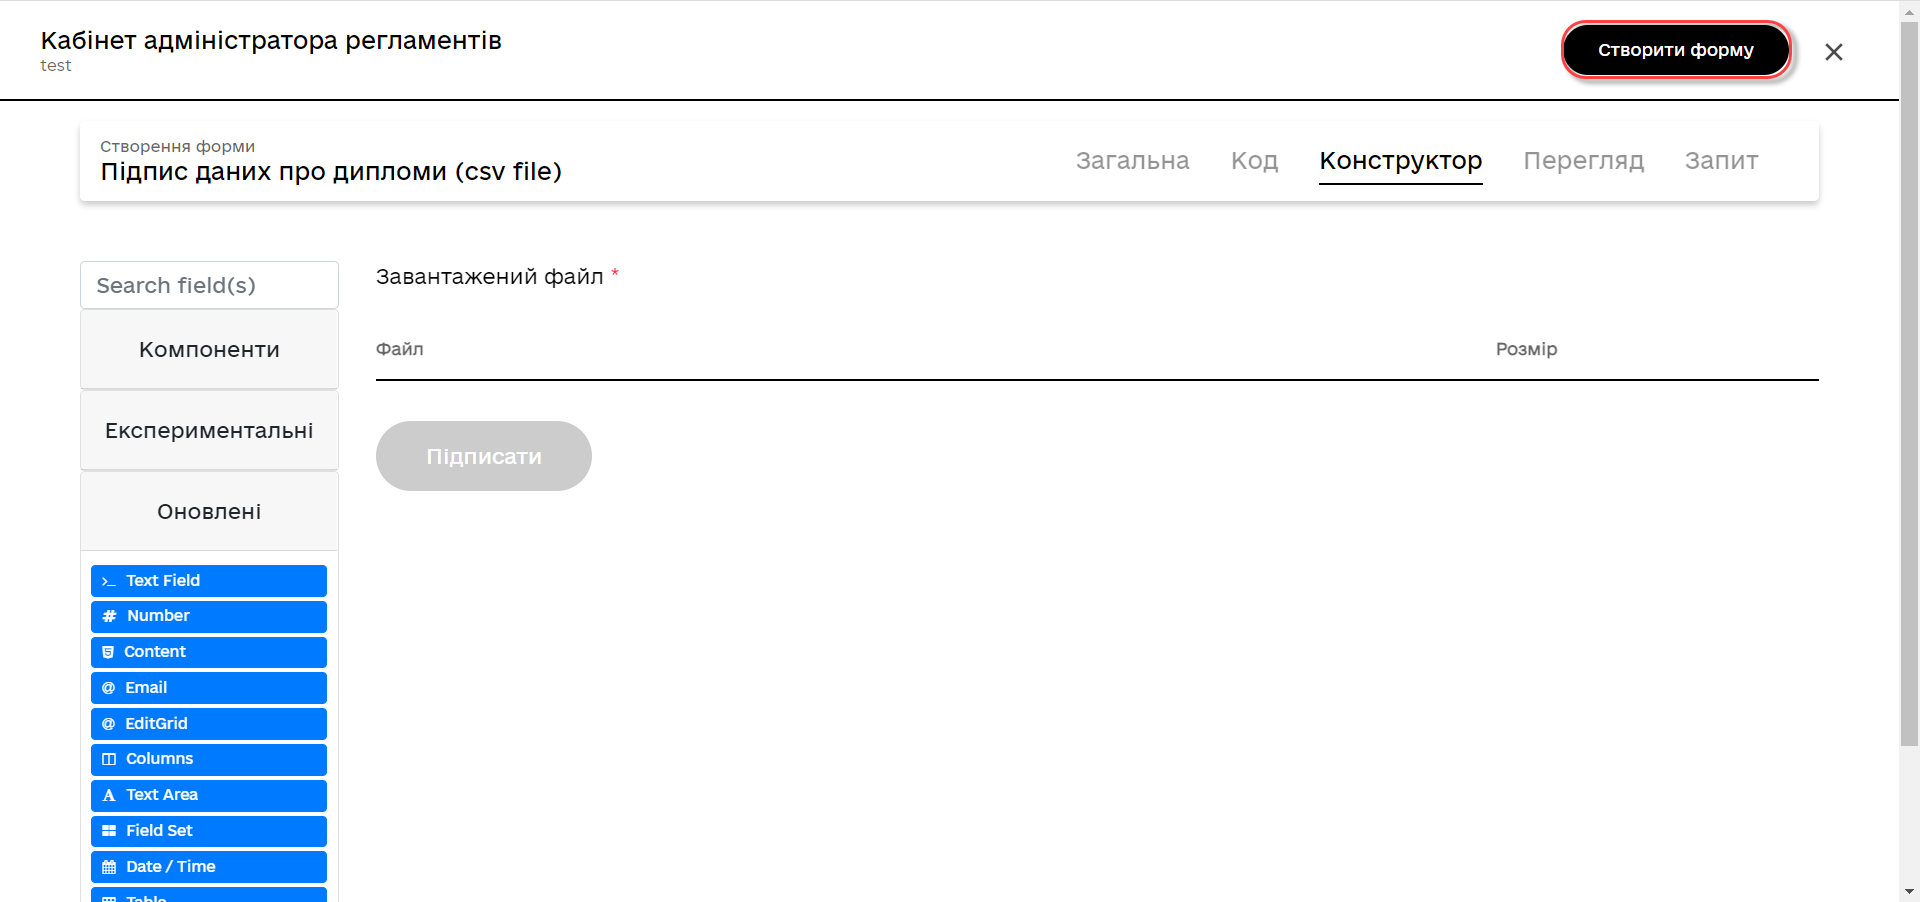
Apply the changes to the modeled forms. To do that, go to the Version view section and click the Apply changes to master version button.

3. Example of a business process in the Officer Portal
-
Go to the corresponding service modeled in the Officer portal in the
Available servicesmenu.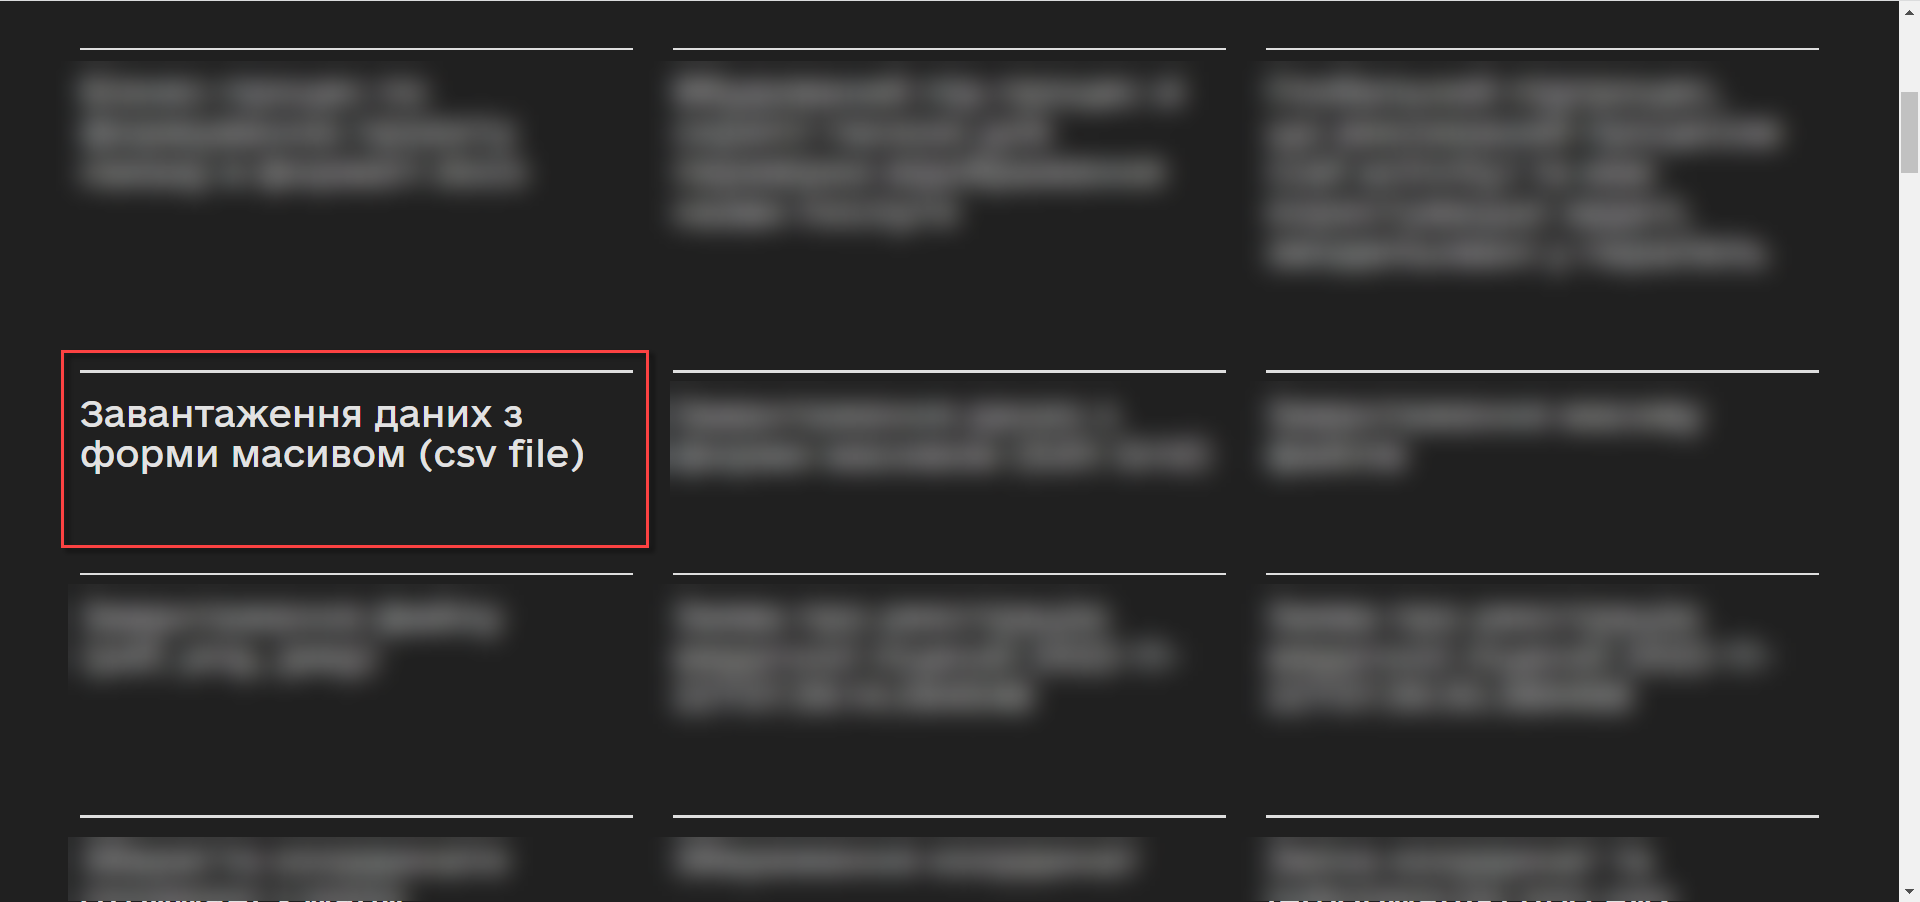
-
Add a file that meets the requirements and click
Next.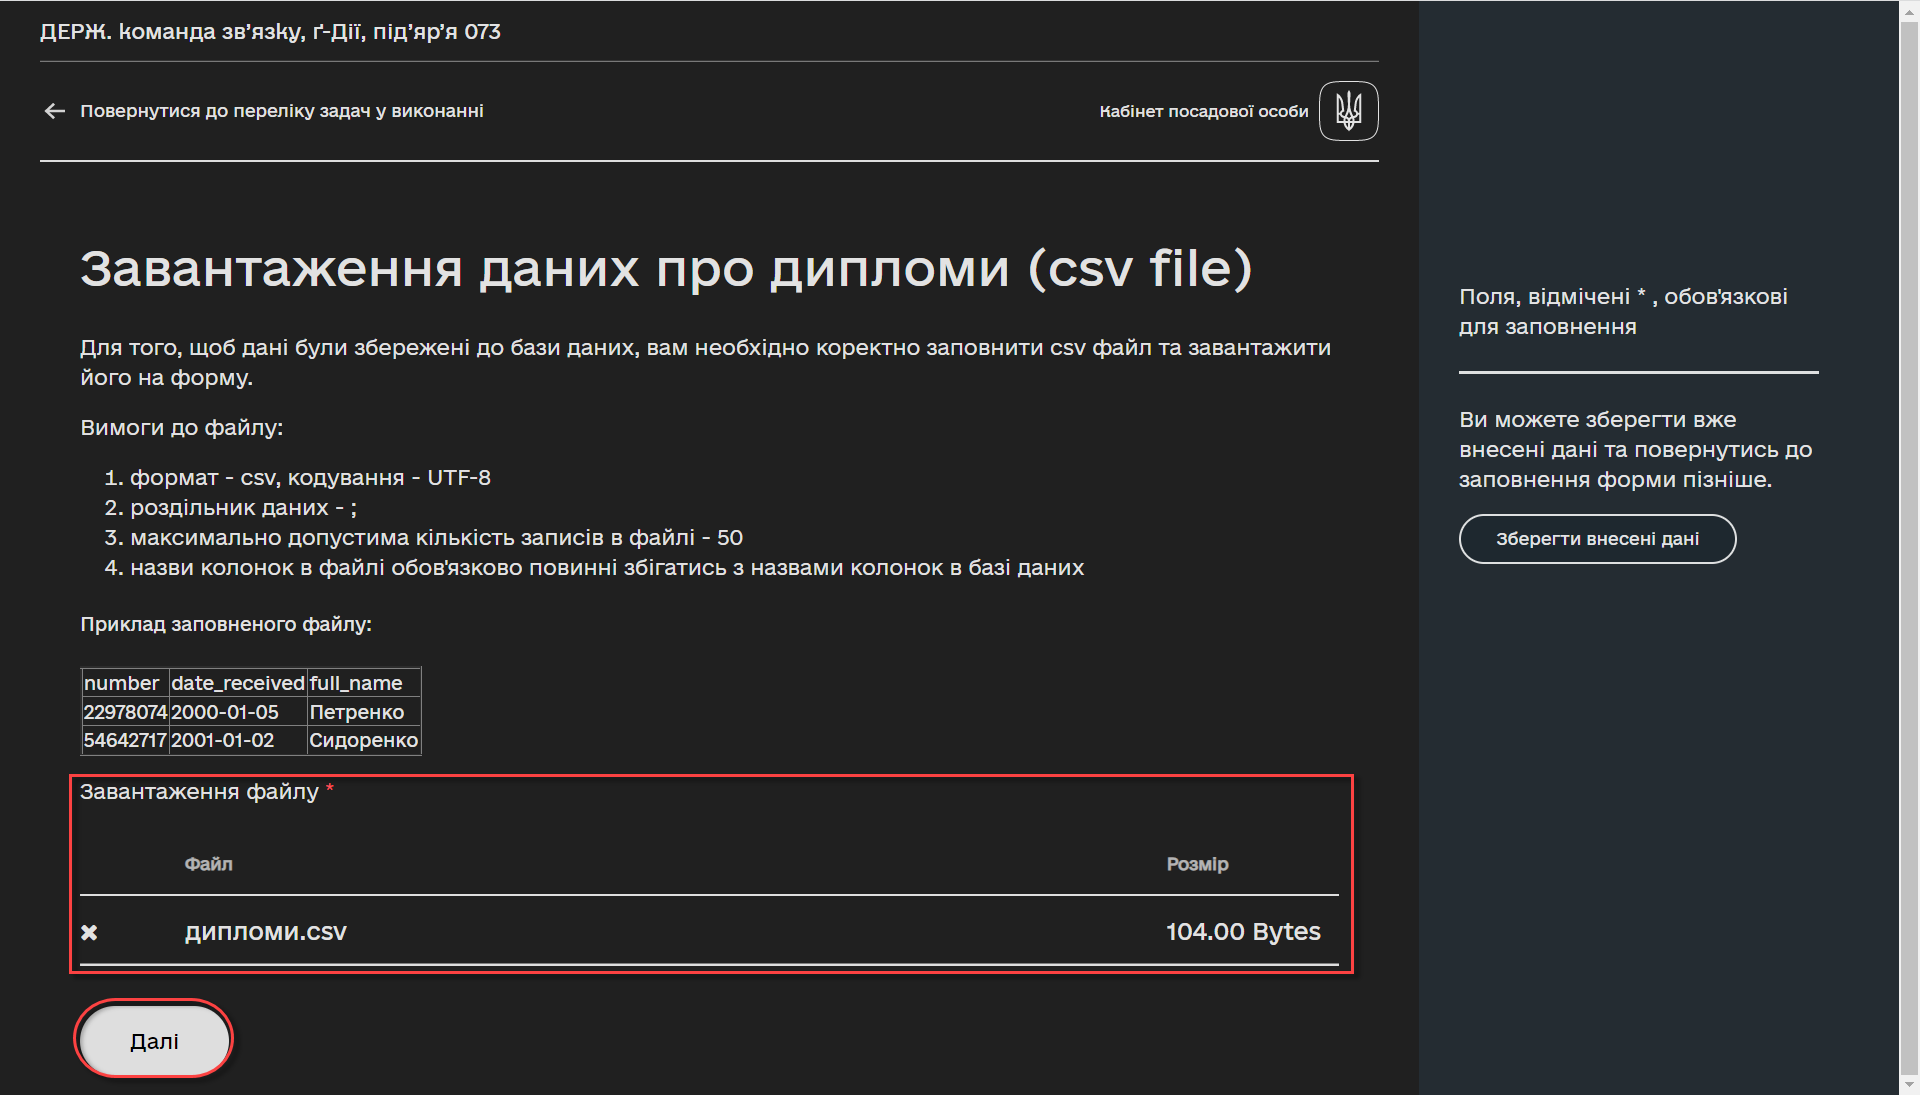
During upload, the pre-validation of the data in the CSV file is triggered immediately on the form.
In the event of an error, the system warns the user about format inconsistency even before switching to the UI form for signing the QES data.
- There are currently 3 types of CSV file validations when uploading data to the database:
-
-
Validation of the format (extension) and encoding.
-
Format is
CSV; encoding isUTF-8.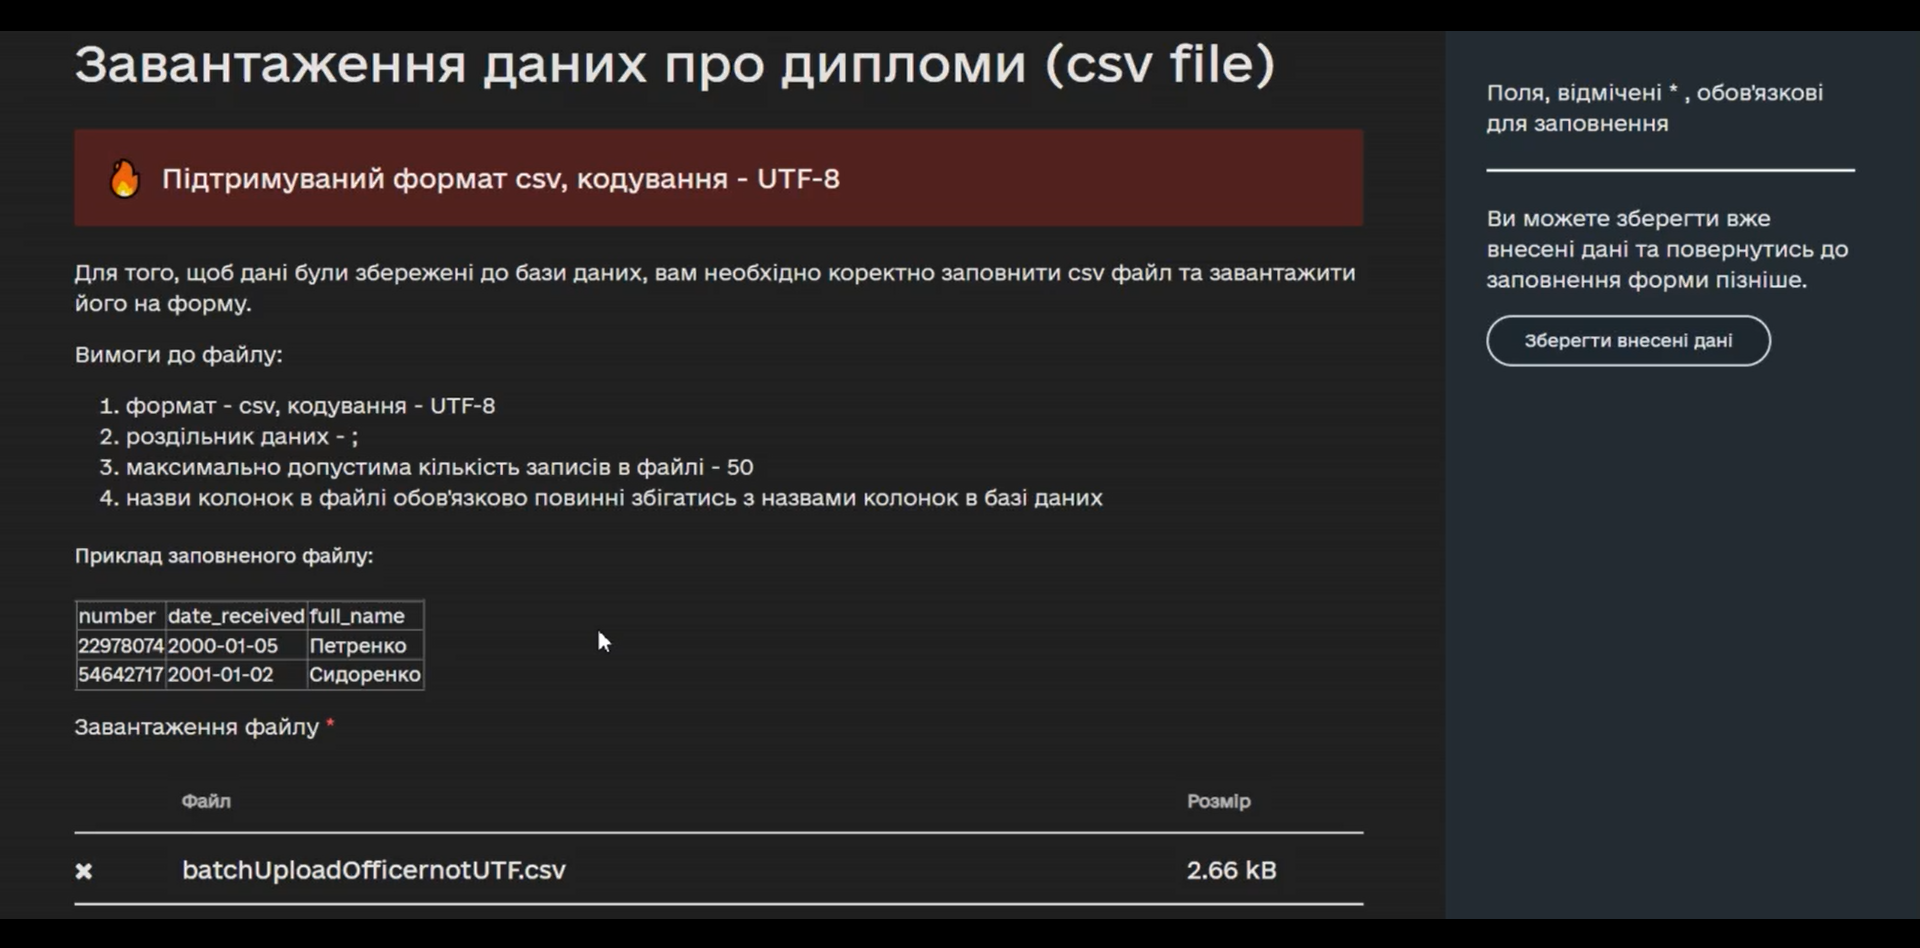
-
-
Validation of the number of entries in a file.
-
The maximum number of entries in a file is 50.

-
-
Validation of the uploaded data structure.
-
The separator is a semicolon (
;). -
The column names in the file must match the column names in the database.
-
The value format of the fields must match the format of the database.
-
-
-
At the data signing phase, the pre-uploaded file is view-only. At the bottom of the page, fill in the key parameters and click
Read.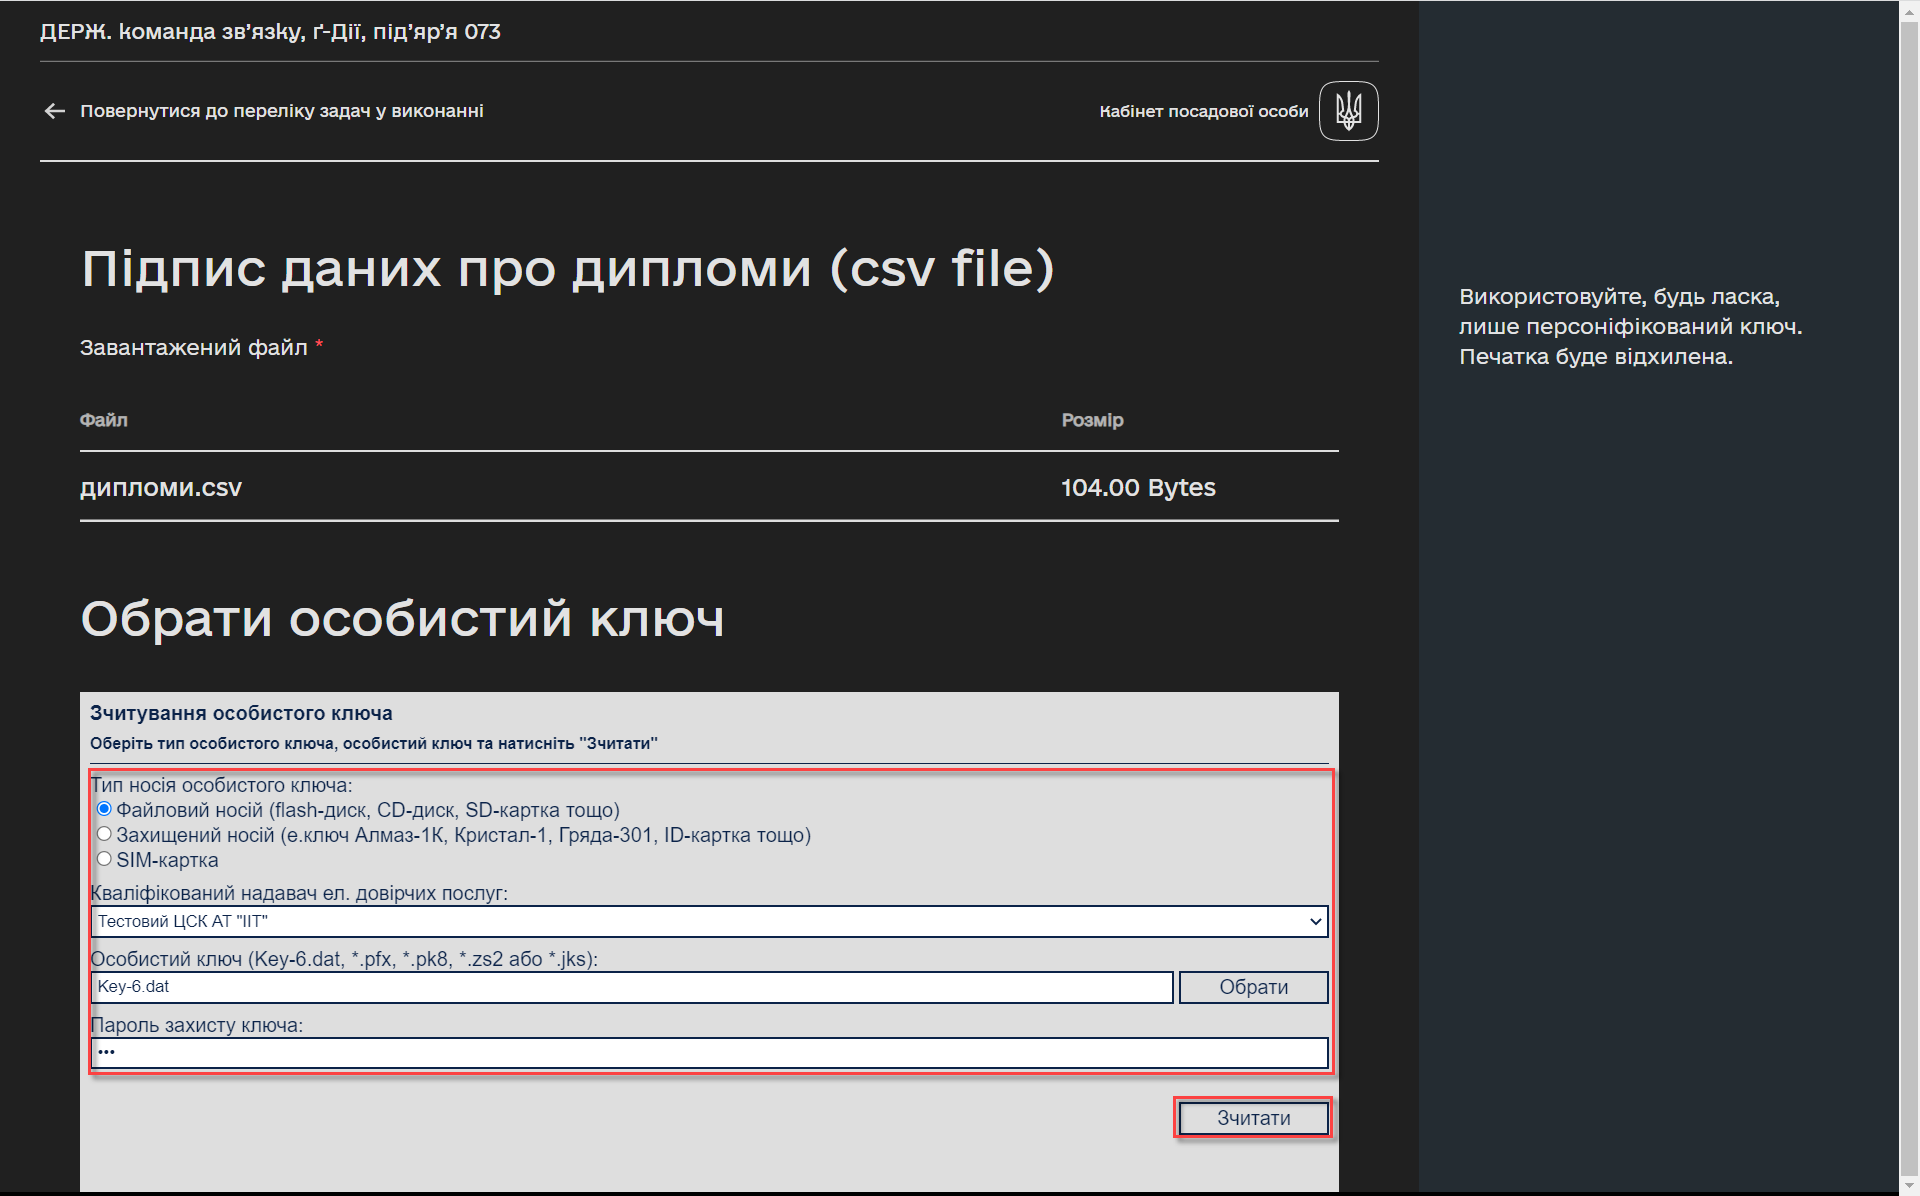
-
To apply the digital signature, click
Sign.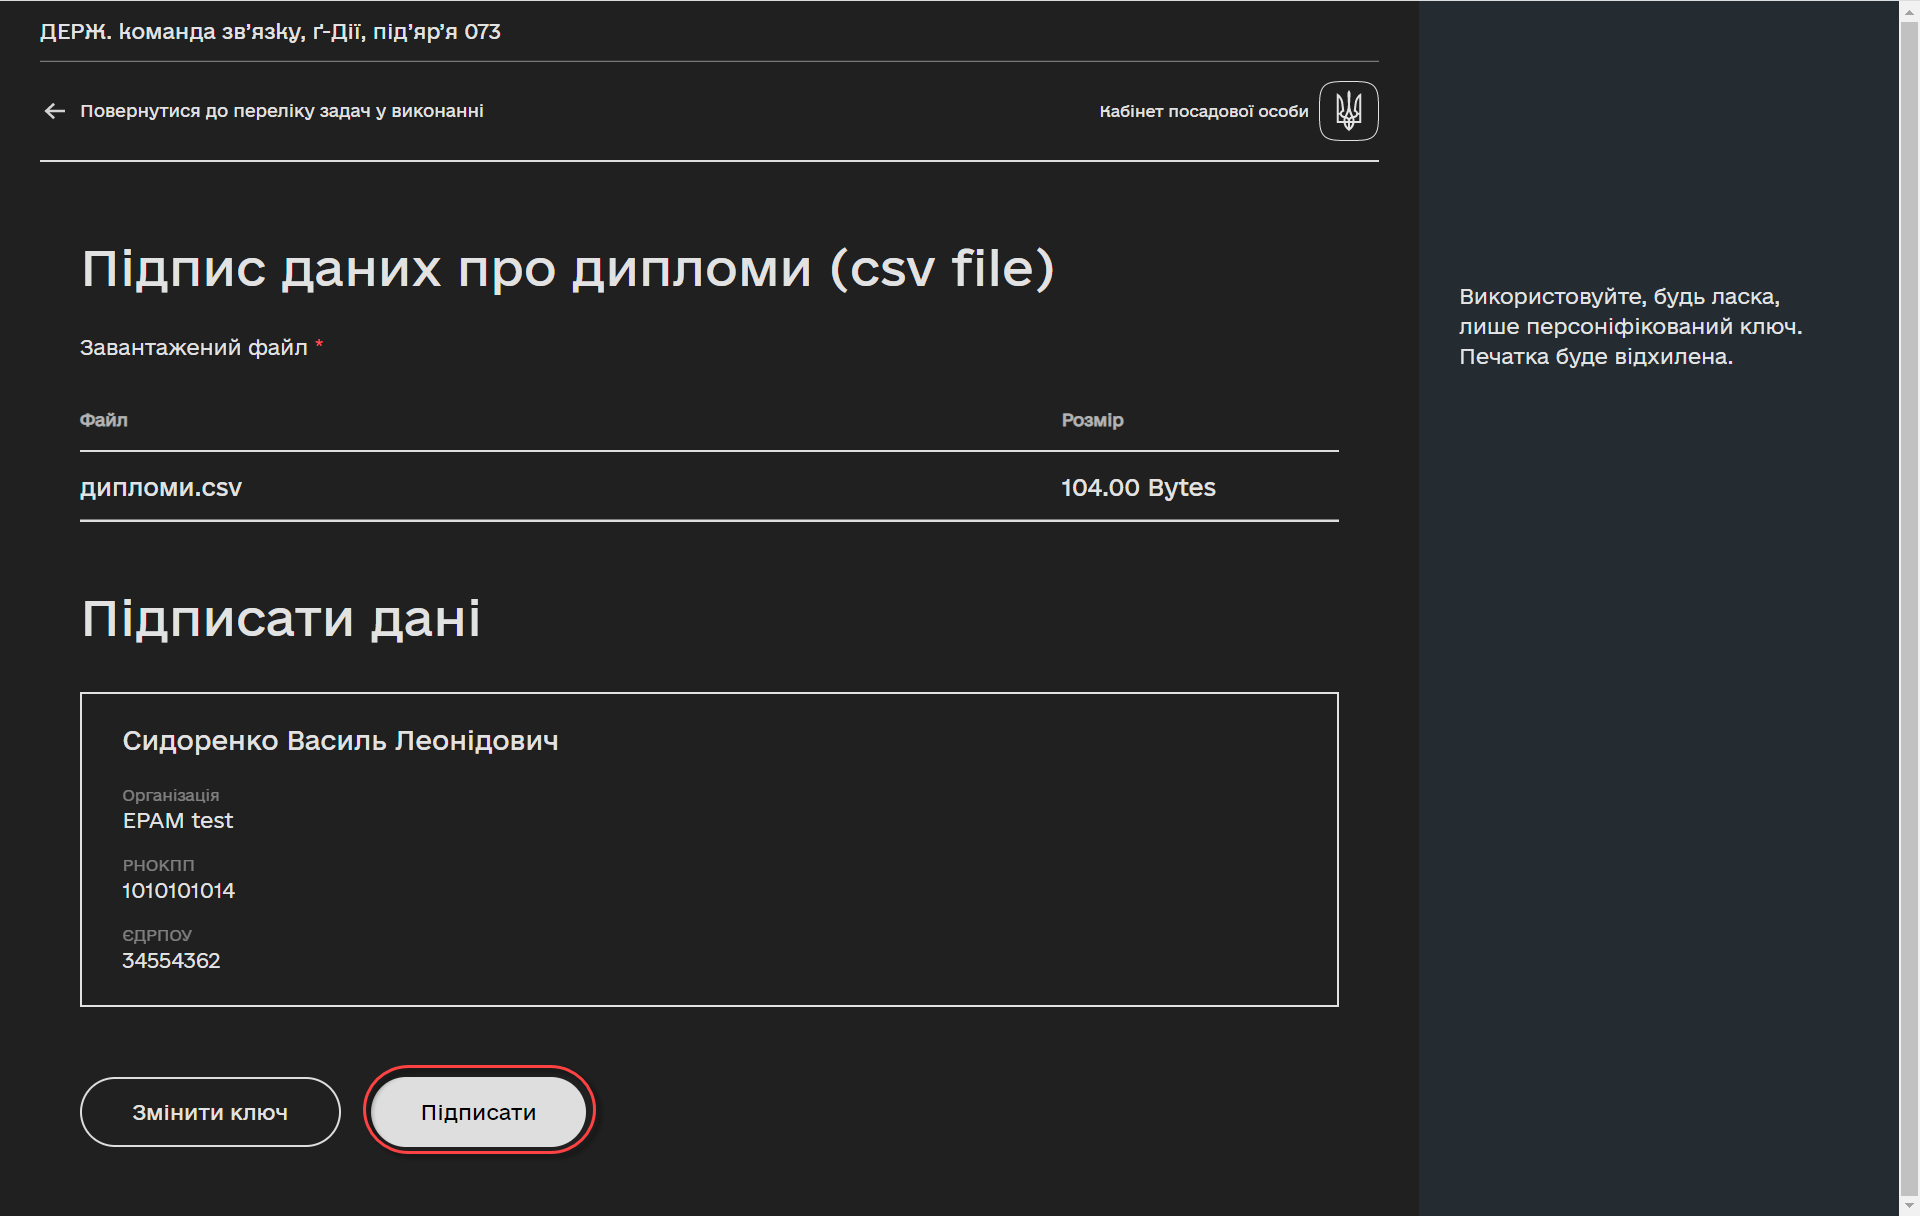
-
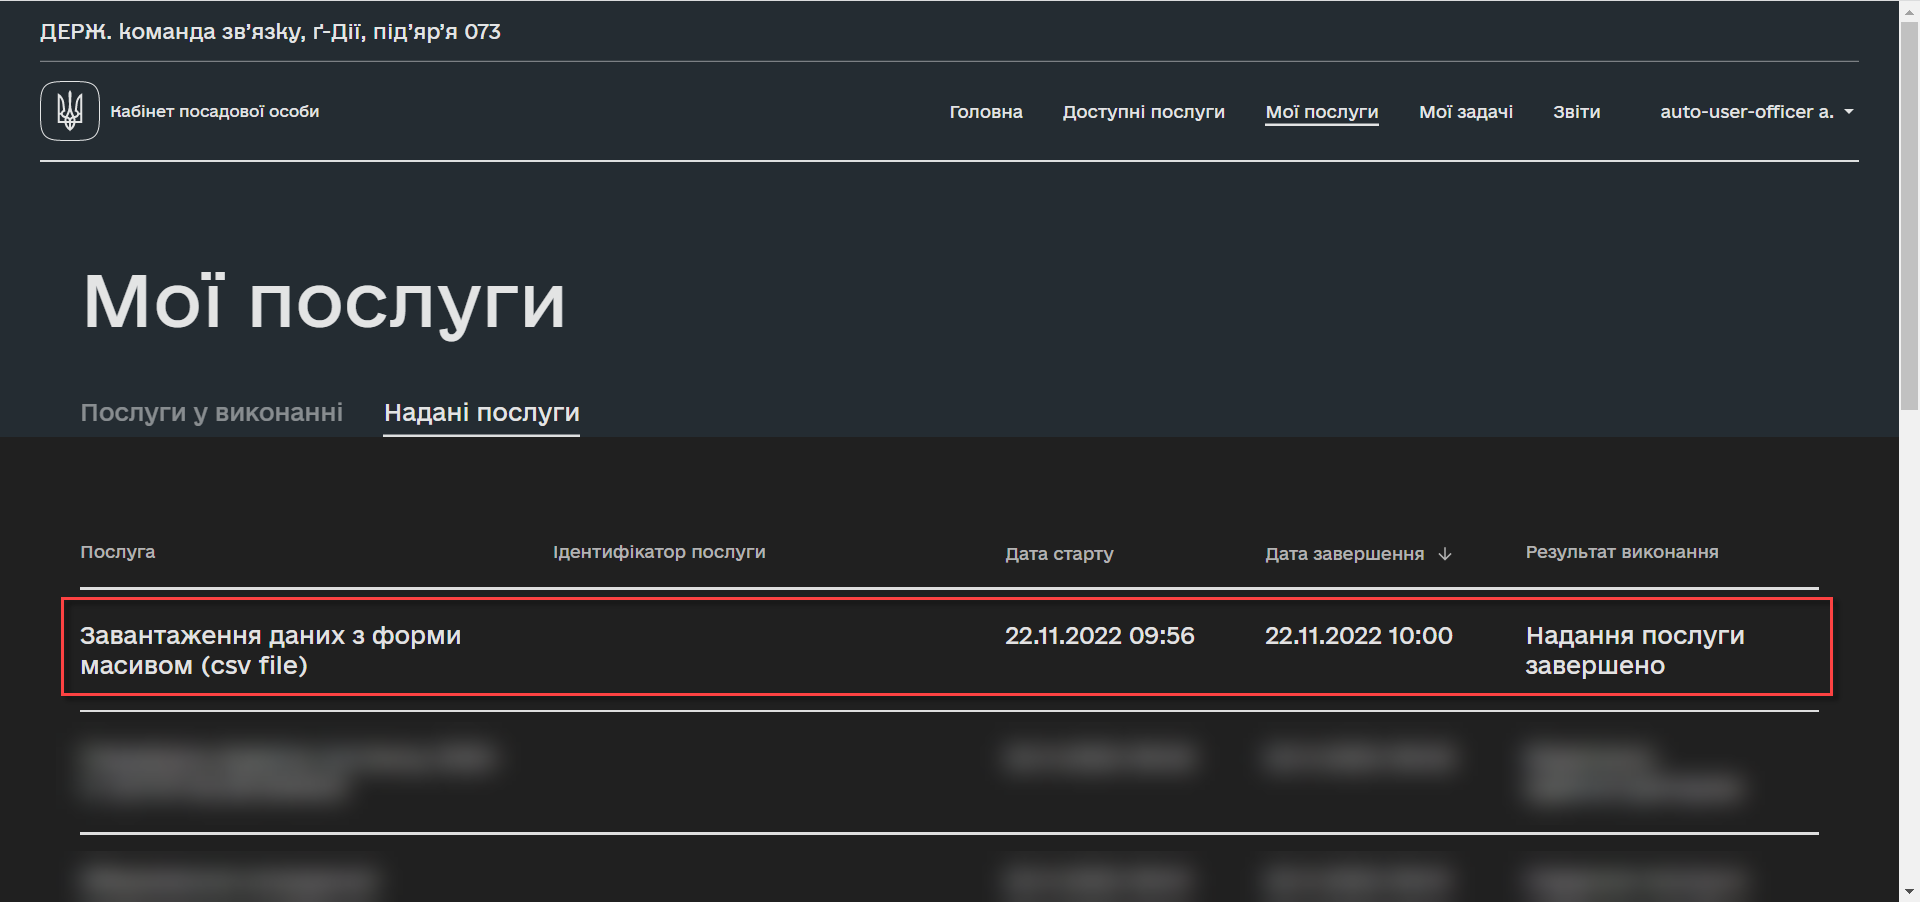
The executed business process for downloading data from the form as an array (csv file) is registered in the section
My services → `Provided services.