Managing the registry backup schedule
| 🌐 This document is available in both English and Ukrainian. Use the language toggle in the top right corner to switch between versions. |
1. Overview
The Platform allows you to configure a schedule for creating backups of registry components and define how long these backups are stored in the S3-compatible storage.
The Platform uses Velero to back up Kubernetes resources, such as PVCs, deployments, configurations, and secrets. Velero stores backups in a separate MinIO storage deployed outside the OpenShift cluster to isolate critical data from potential failures or in-cluster incidents.
Data stored in Ceph Object Bucket Claims (OBC) isn’t included in Velero backups. To preserve this data, the Platform supports a separate replication mechanism. Replication automatically copies the contents of OBC buckets to a designated storage. By default, the data is replicated to MinIO, but you can specify another S3-compatible storage, such as Amazon S3 or Google Cloud Storage.

|
You can configure backup and replication schedules using the cron format in the Control Plane interface. Backup retention should be defined in days.
The value must be an integer and not less than Backups and replication use separate schedules. See details in the sections below. |
The Platform saves all configured schedules to the deploy-templates/values.yaml file during the MASTER-Build pipeline run,
which updates the registry configuration.
The Create-registry-backup Jenkins pipeline runs both backup and replication processes based on the schedules you define in Control Plane.
This pipeline launches two independent processes: creating a backup using Velero and replicating data from Ceph OBC. Each process uses its own schedule, but both run under the same pipeline.
Velero backs up Kubernetes resources and stores them in MinIO. Ceph OBC replication copies data to the configured S3-compatible storage. You can manage the execution time for each process separately.
2. Configuring the backup schedule
| Schedule backups during periods of lowest system load. We recommend running them at night to avoid failures and prevent any impact on users. |
2.1. Setting the backup schedule and retention period
Follow these steps to configure the schedule:
-
Sign in to the Control Plane as a registry administrator.
-
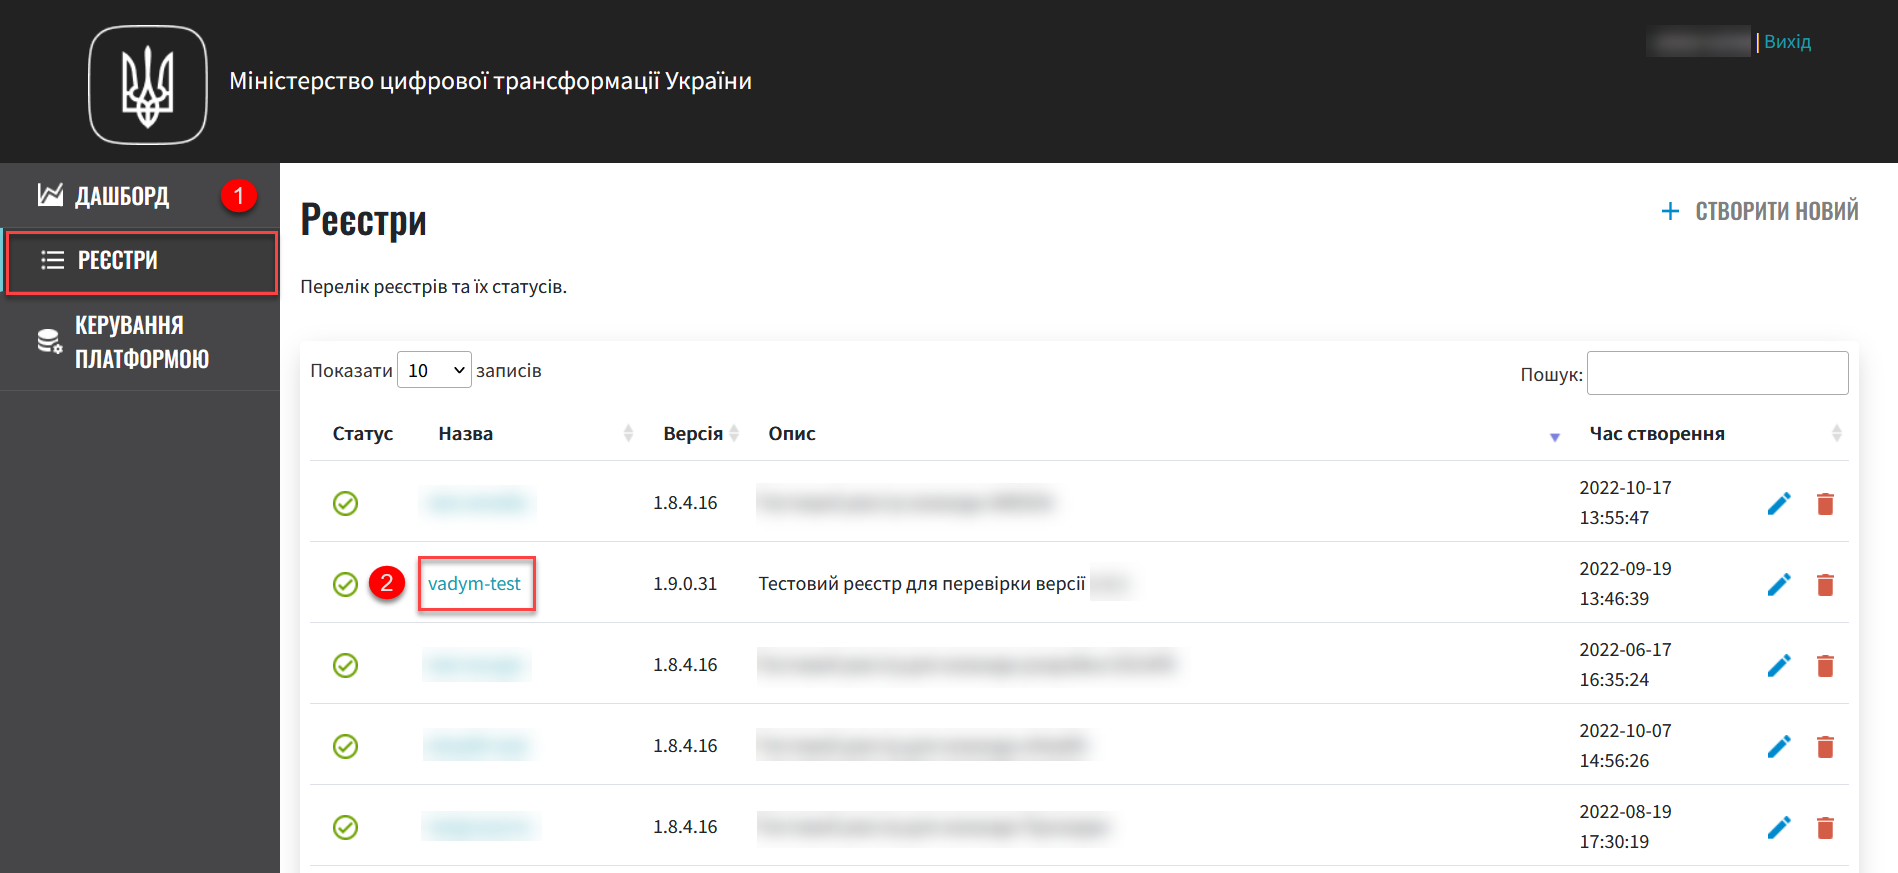
Go to the Registries section and select the registry you want to configure.
-
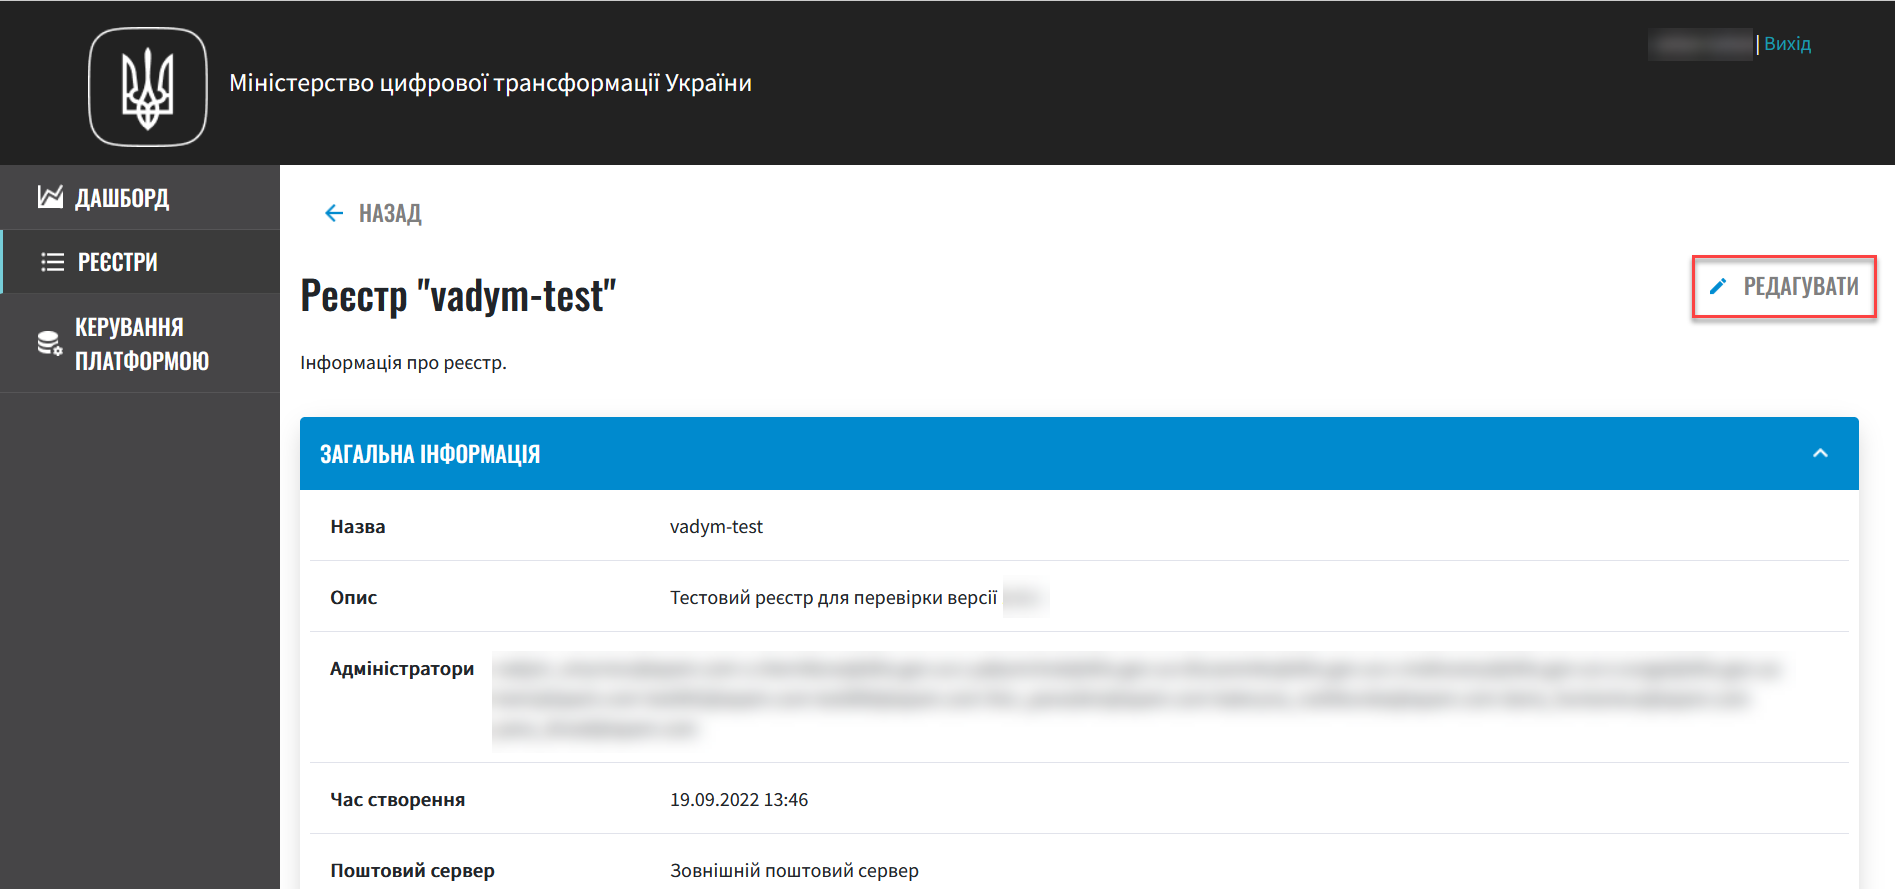
Click Edit in the top-right corner.
You can also set up the backup schedule and retention period when you create a registry, but it’s optional.
-
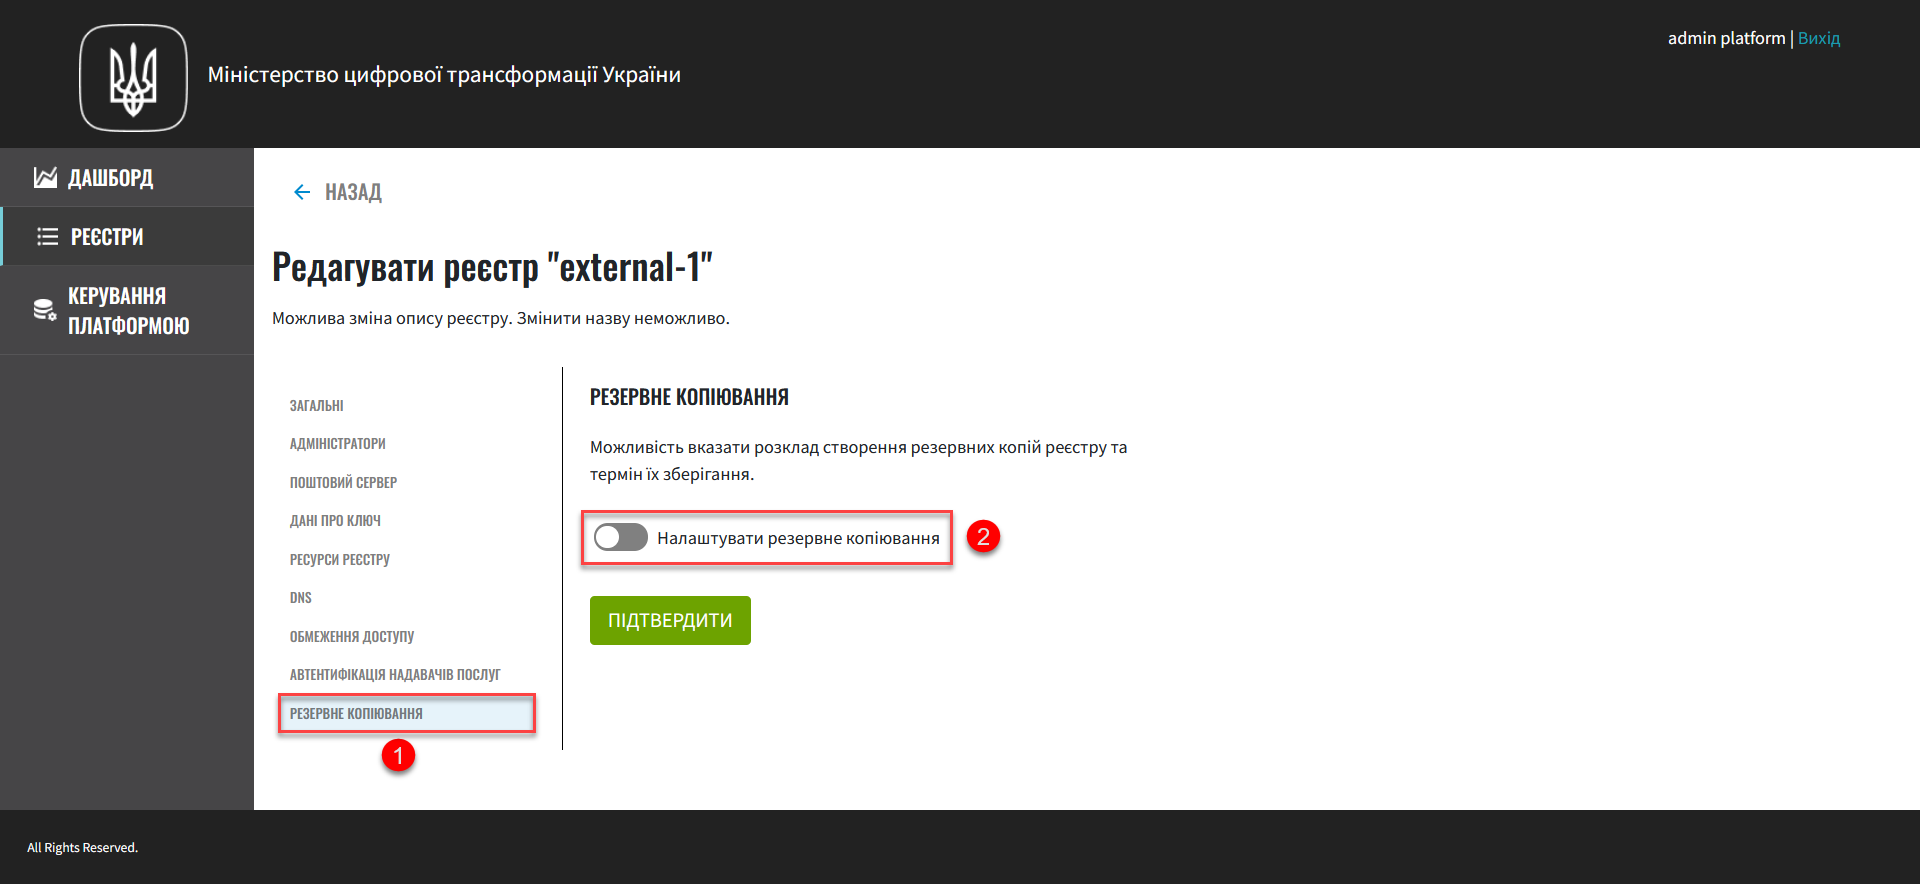
Open the Backup section. Here, you can set up the backup schedule and how long backups are stored. Toggle the switch to enable automatic backups and configure the schedule.
By default, automatic backups are disabled for new registries.
Configure the backup schedule using the unix-cron format. The schedule uses Kyiv time.
By default, the time zone
Europe/Kievis set in thevalues.yamlconfiguration file and applied as an environment variable in the Jenkins pod. This setting defines the local time context for scheduled operations such as backups and replications.If you’re working on a global deployment with a different time zone requirement, contact your Platform administrator. They can help update the time zone configuration to match your environment’s location and compliance needs.
Use https://crontab.guru/ — a simple and helpful editor for cron expressions.
-
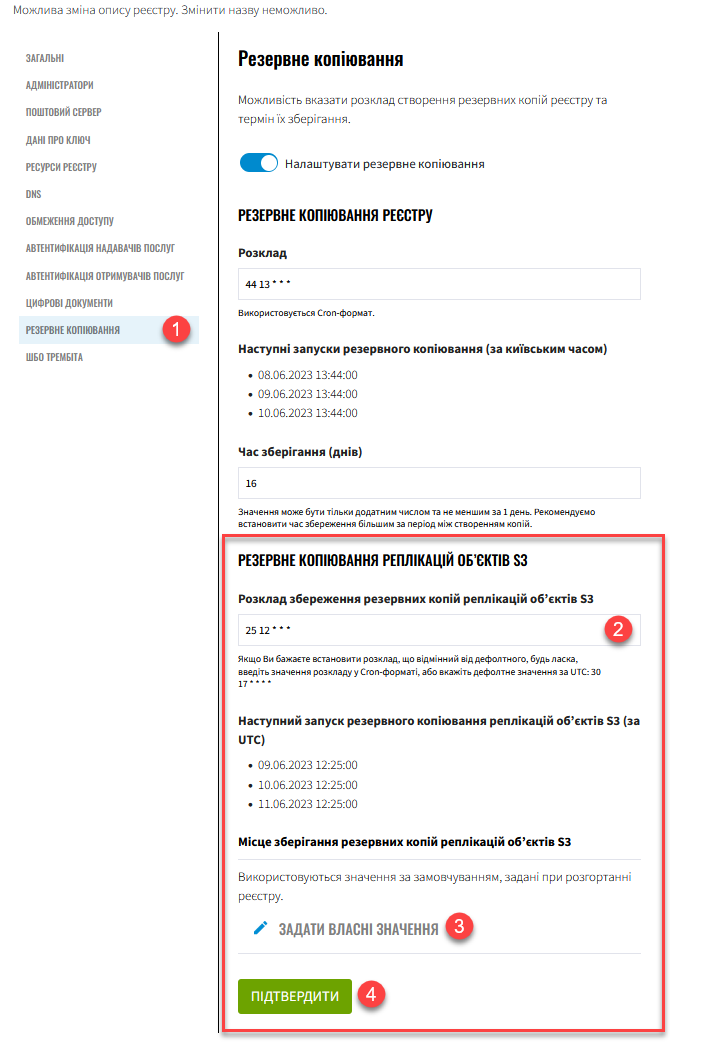
In the Schedule field, enter a value such as:
5 10 * * MON-FRI. Use spaces to separate parts.This setting means the Platform will create a registry backup every weekday at 10:05 AM Kyiv time.
After you set the backup schedule, the interface displays a hint showing the next three scheduled backup runs:
Upcoming backup runs (Kyiv time):
-
09.06.2023 10:05:00
-
10.06.2023 10:05:00
-
11.06.2023 10:05:00
-
-
In the Retention period (days) field, enter a value such as
5. This means the system will store each backup for five days.The retention period must be an integer and not less than
1. To avoid data loss, make sure the retention period is longer than the interval between backups.
-
-
Proceed to configure Ceph OBC replication, or keep the default settings and click Confirm at the bottom of the page.
2.2. Ceph OBC data replication
2.2.1. How replication works
The Platform uses two types of storage:
-
MinIO – stores backups created by Velero.
-
Ceph OBC (Object Bucket Claims) – stores registry working data such as business process execution history, temporary files, and more.
Velero is a tool that enables backup, restore, migration, and disaster recovery for Platform components. It allows you to back up the state of the OpenShift environment (e.g., configurations, deployments, secrets, PVCs) and store it in an S3-compatible storage like MinIO or Amazon S3.
It’s important to note that Velero does not cover Ceph OBC buckets. To protect this data from loss and store it in a separate location, the Platform uses a dedicated object bucket replication mechanism.
Ceph OBC replication automatically copies the contents of registry object buckets to another S3-compatible storage based on settings defined by the administrator in Control Plane.
Depending on your configuration, two scenarios are possible:
-
Default configuration: Ceph OBC data is automatically replicated to the Platform’s MinIO bucket, which also stores Velero backups.
-
Custom configuration (replication configured via Control Plane): Ceph OBC data is replicated to any S3-compatible storage specified by the administrator (e.g., Amazon S3, Google Cloud Storage). In this case, the administrator configures the endpoint, access credentials, and replication schedule.
This functionality provides flexibility and adaptability, allowing you to align OBC data replication with the needs of your environment or business continuity policies.
2.2.2. How backup and replication work together
Backup and replication setup in Control Plane works as follows:
-
The registry administrator enables backup and sets the schedule (using a cron expression).
-
The system creates the Create-registry-backup Jenkins pipeline, which executes two parallel processes:
-
Creates a backup of the registry using Velero, including all PVCs and Kubernetes resources in YAML format, stored in a MinIO bucket.
-
Replicates Ceph OBC buckets to the target storage — MinIO by default, or a custom destination if configured.
-
-
If you change the replication storage target, it only affects Ceph OBC replication. Velero backups always remain stored in MinIO.
This provides a two-part backup model:
-
Kubernetes resource backup via Velero.
-
Separate Ceph OBC data replication to a backup storage.
2.2.3. Configuring the replication schedule
-
Sign in to the Control Plane as a registry administrator.
-
Go to the Registries section and select the registry you want to configure.
-
Click Edit in the top-right corner.
-
Open the section and configure the replication schedule.
The replication schedule uses the unix-cron format and is based on UTC.
The time zone is defined in the
values.yamlconfiguration and also set as an environment variable in the Jenkins pod.Use https://crontab.guru/ to easily edit and understand cron expressions.
-
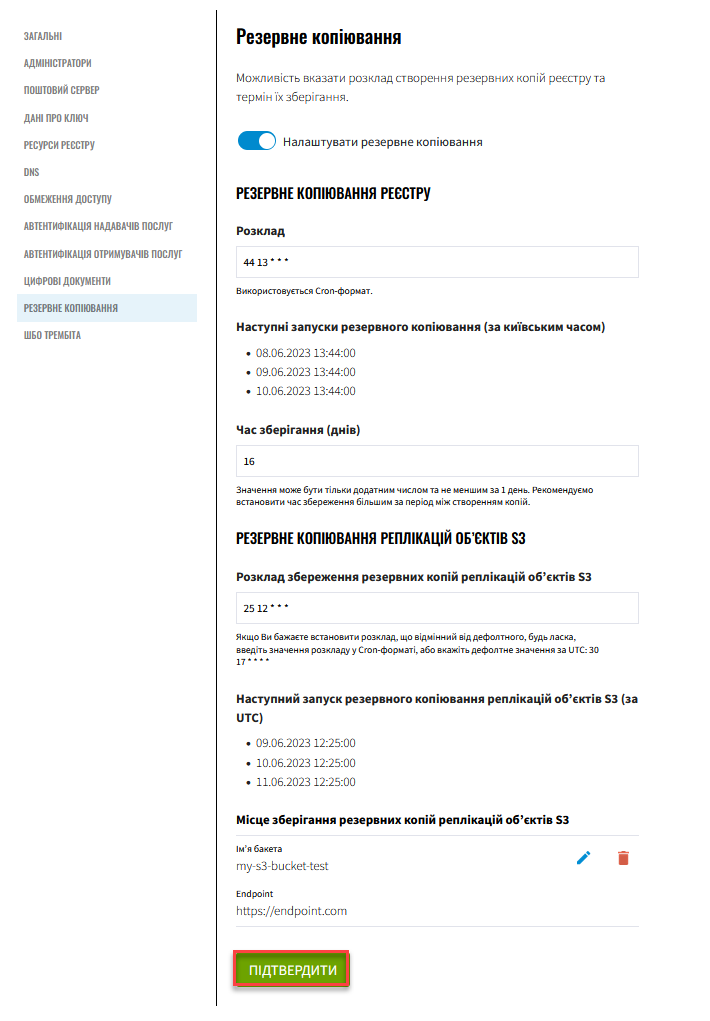
In the Schedule field, enter a value like
25 12 * * *. Use spaces to separate fields. This means Ceph OBC data will be replicated every day at 12:25 UTC. -
If you don’t provide a custom schedule, the system uses the default:
30 17 * * * *(UTC).After you define the replication schedule, the interface shows a hint with the next three execution times:
Next scheduled object replication (UTC):
-
09.06.2023 12:25:00
-
10.06.2023 12:25:00
-
11.06.2023 12:25:00
-
-
-
Configure the replication storage target.
If you don’t provide custom values, the system uses default values defined during registry deployment. -
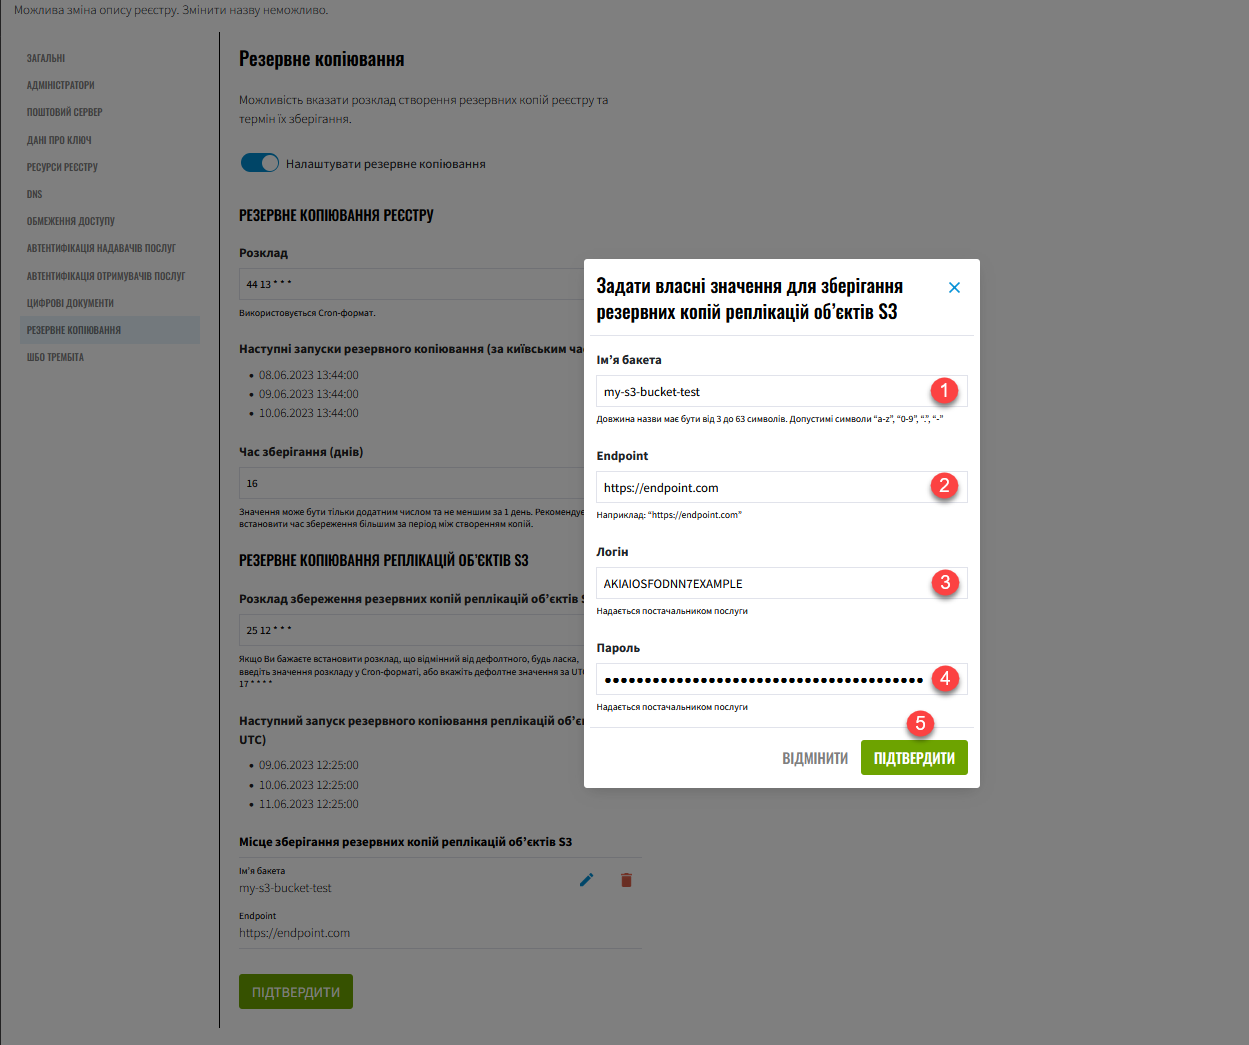
To set custom storage values, click Set custom values and complete the form:
Table 1. Example configuration for Amazon S3 Field Description Bucket name
The name must be unique within your S3 environment. Length: 3–63 characters.
Allowed characters:
"a-z","0-9",".","-".Example:
my-s3-bucket-123Endpoint
The URL to connect to the S3-compatible storage.
Example:
https://endpoint.comFor Amazon S3:
-
Global:
https://s3.amazonaws.com -
Regional:
https://s3.<region>.amazonaws.com, where<region>is the region ID (e.g.,us-west-2).
Login
Access credentials provided by your S3 provider.
For Amazon S3: AWS Access Key ID.
Example:
AKIAIOSFODNN7EXAMPLEPassword
Secret credentials provided by your S3 provider.
For Amazon S3: AWS Secret Access Key.
Example:
wJalrXUtnFEMI/K7MDENG/bPxRfiCYEXAMPLEKEY -
-
Click Confirm to save your custom values, or Cancel to discard changes.
-
-
On the Backup page, click Confirm again to apply the changes and submit a request to update the registry configuration.
2.3. Applying the schedule configuration
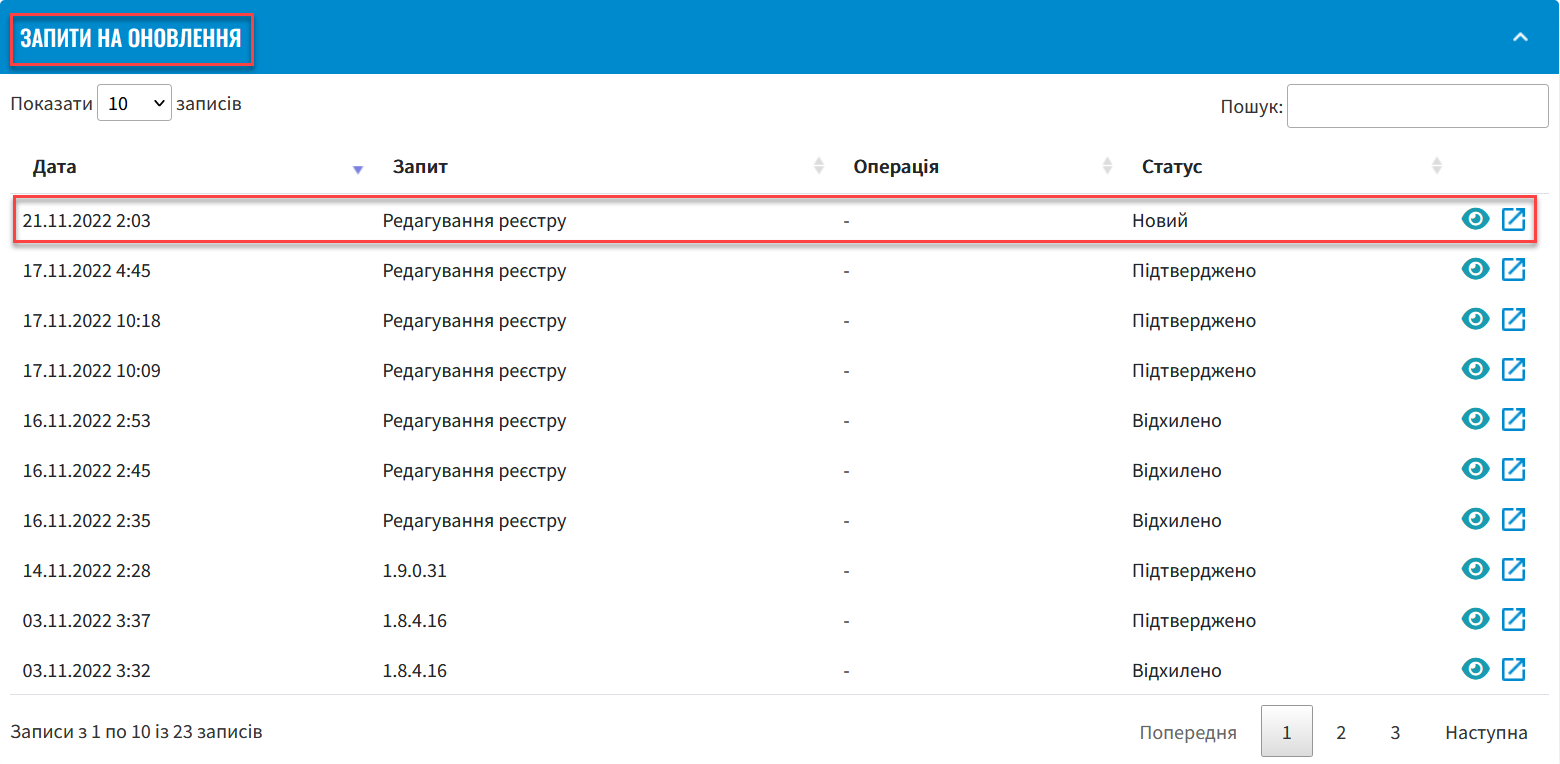
Once you configure the backup schedule (as described in the previous sections),
the system creates an update request with the status New and type Edit registry.
-
In the section, find the relevant request.
-
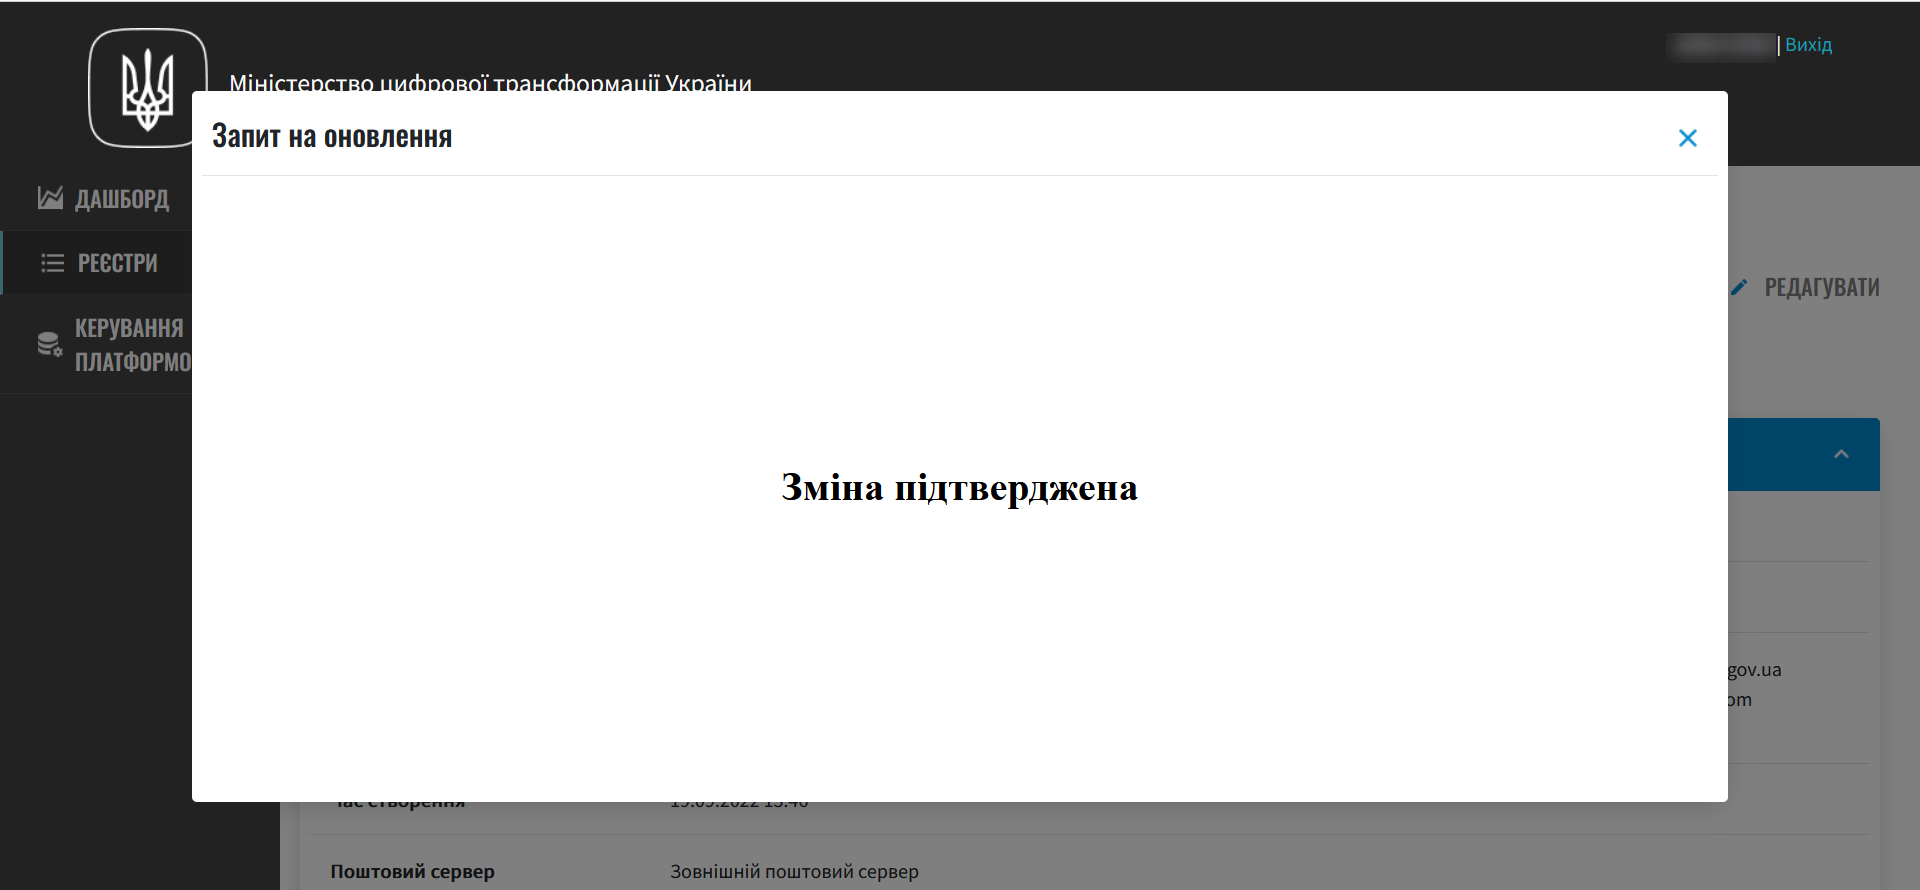
Click the view icon 👁 to open the request.
-
In the new window, compare the two versions of the configuration, verify that your changes are correct, and click Confirm. Alternatively, you can reject the configuration changes by clicking Reject.
Once confirmed, the system applies the changes to the
deploy-templates/values.yamlconfiguration file in the registry repository.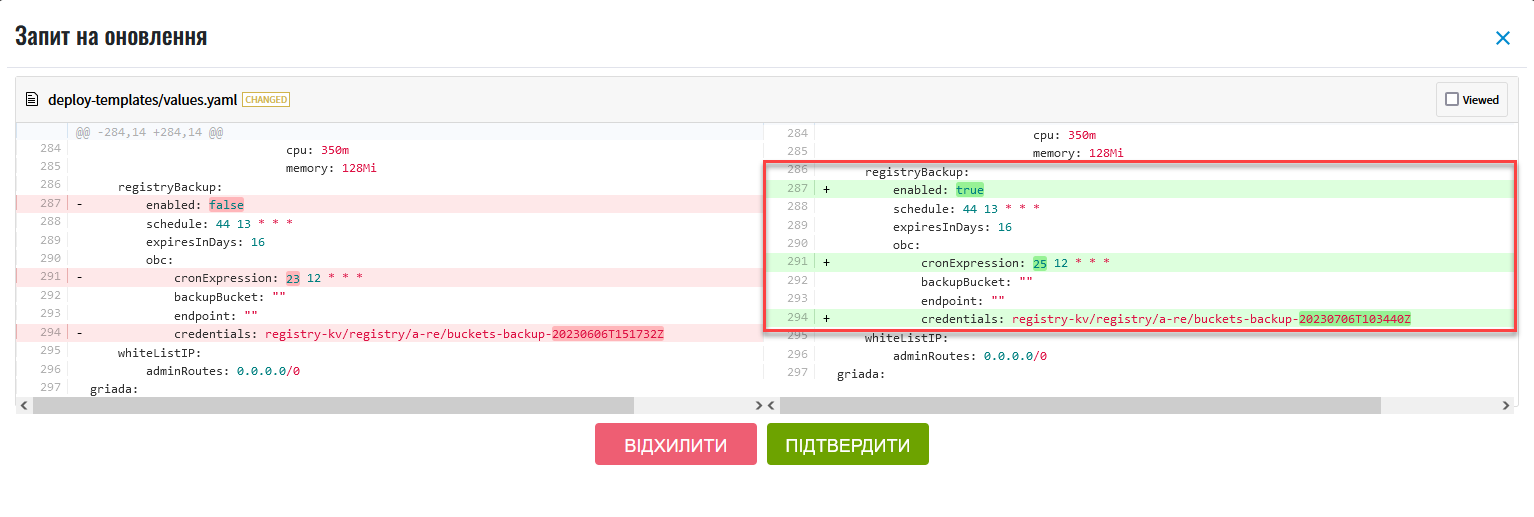
After confirmation, the request status changes to
Confirmed. -
Wait for the build process to complete. This may take a few minutes.
When the Platform successfully applies the configuration, the Create-registry-backup Jenkins pipeline will start at the scheduled time. It will use the set parameters to create backups and replicate data to the designated storage locations.
3. Creating and verifying backups
At the configured date and time, the system creates backups automatically according to the defined schedule.
To verify the status of a registry backup:
-
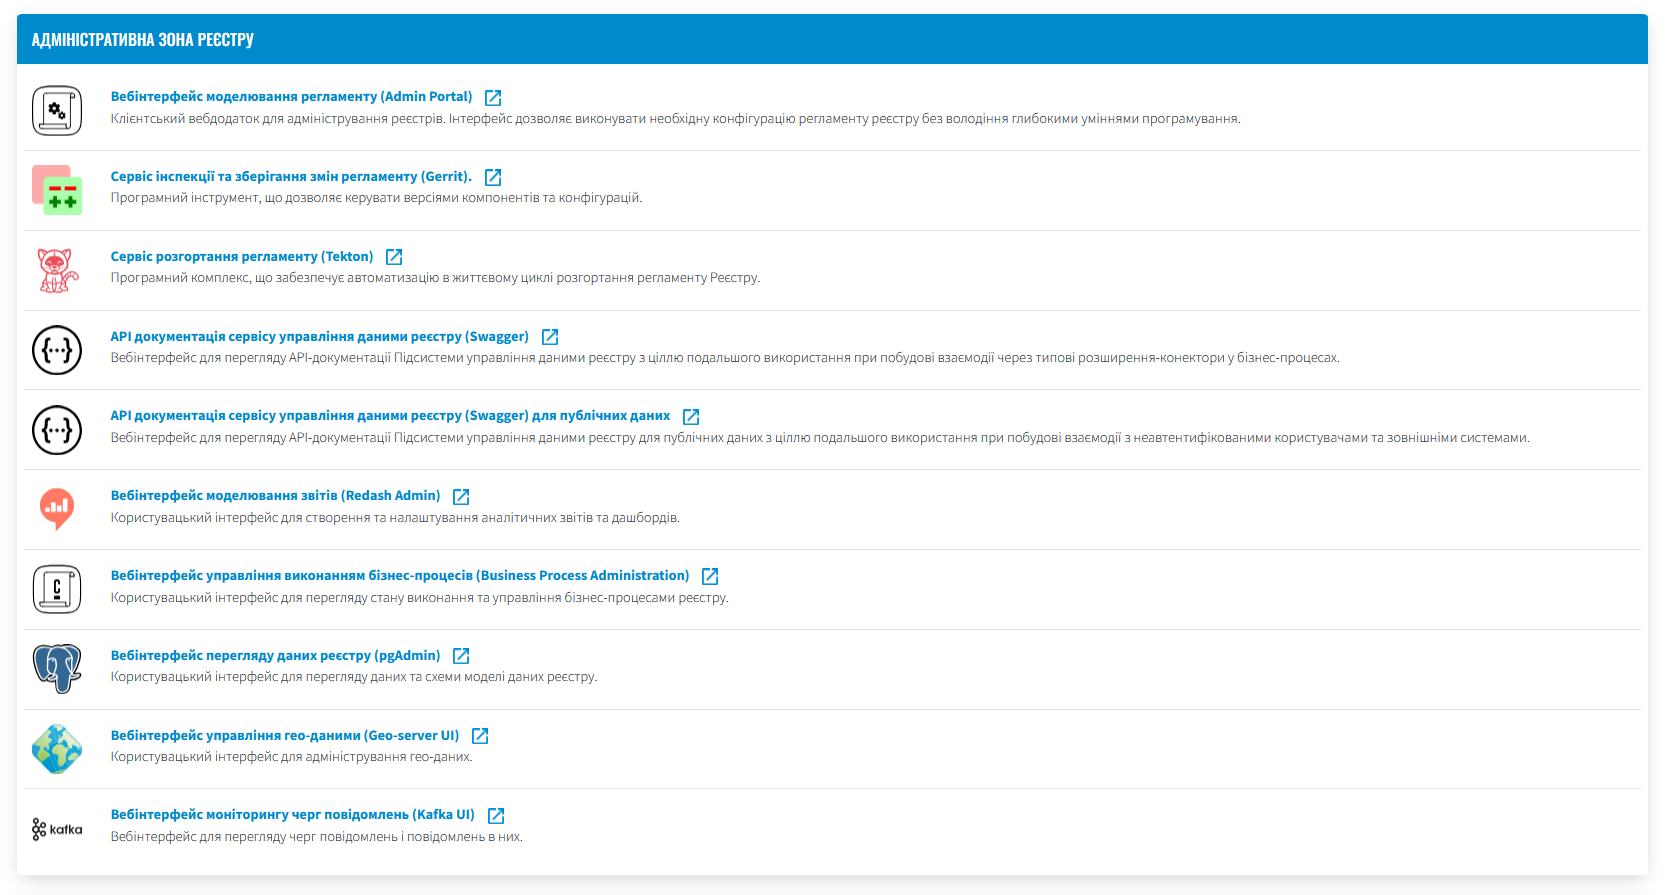
In the , find the Registry admin zone and open the Regulations deployment service (Jenkins).
-
Go to the folder for the desired registry and select the pipeline Create-registry-backup-
<registry-name>, where<registry-name>is the name of your registry. If the pipeline is highlighted in green, the build was successful.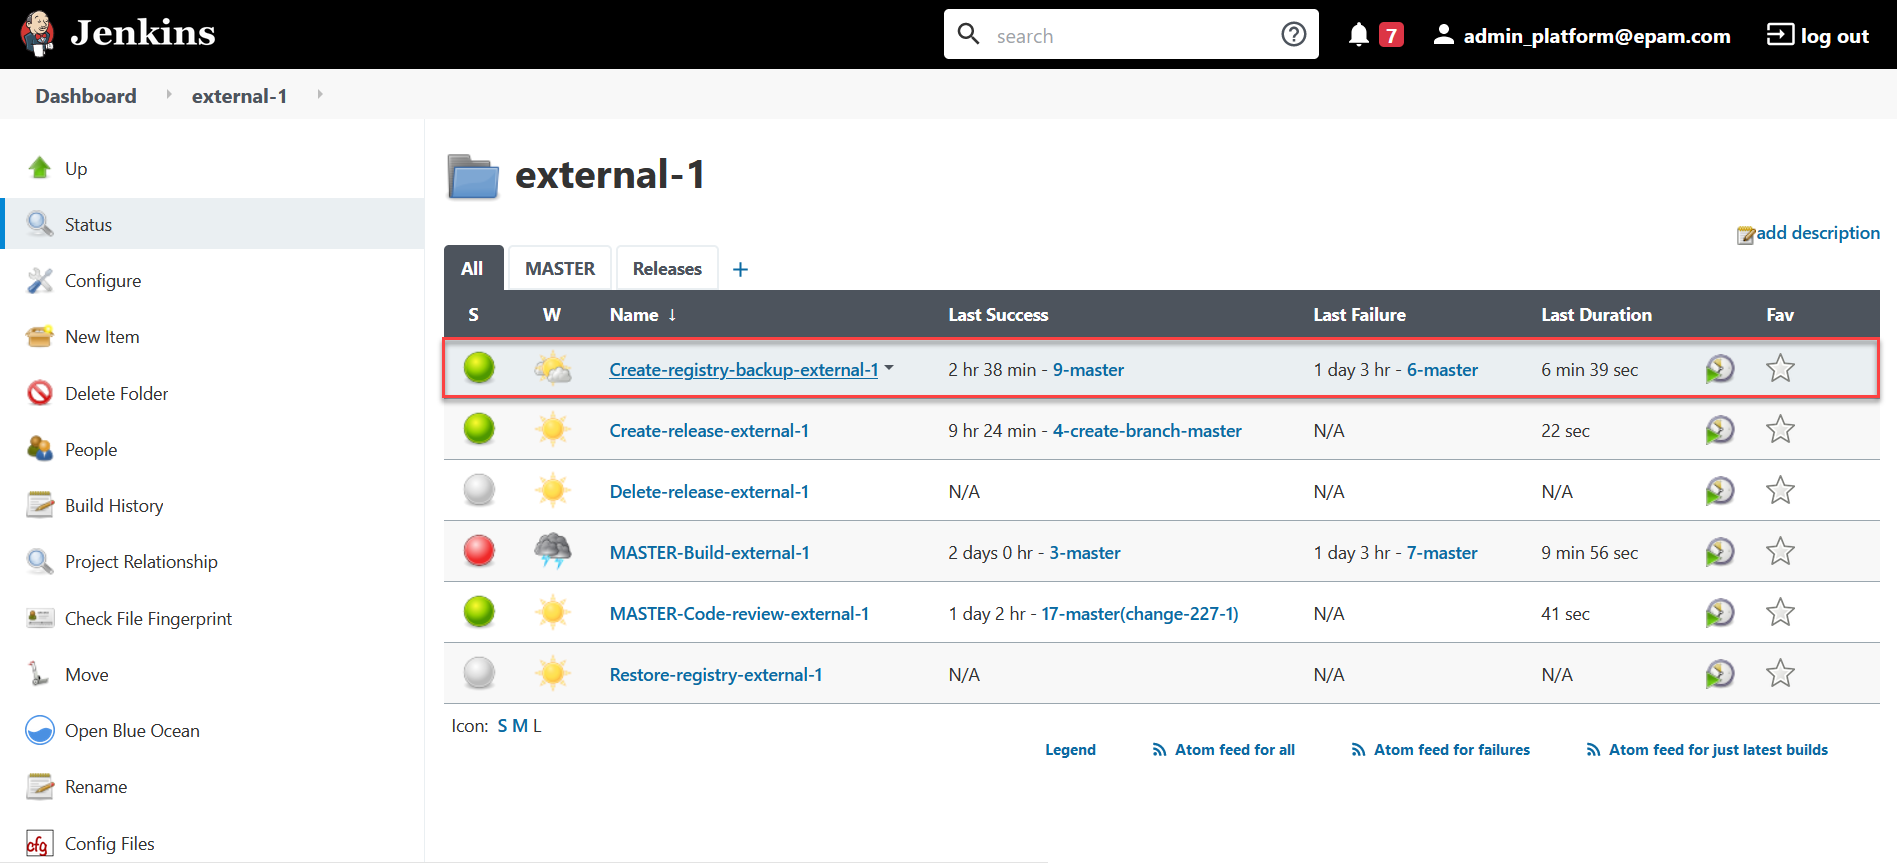
-
Open the build details.

-
Open Console Output to view the pipeline execution logs.

-
Scroll down to the bottom of the page and check that the registry backup was created. You should see the following output:
Console Output – Successful backup message[INFO] Velero backup - external-1-2023-02-17-17-07-36 done with Completed status
This message indicates that the backup for the registry named
external-1was created with a timestamp and a successful completion status.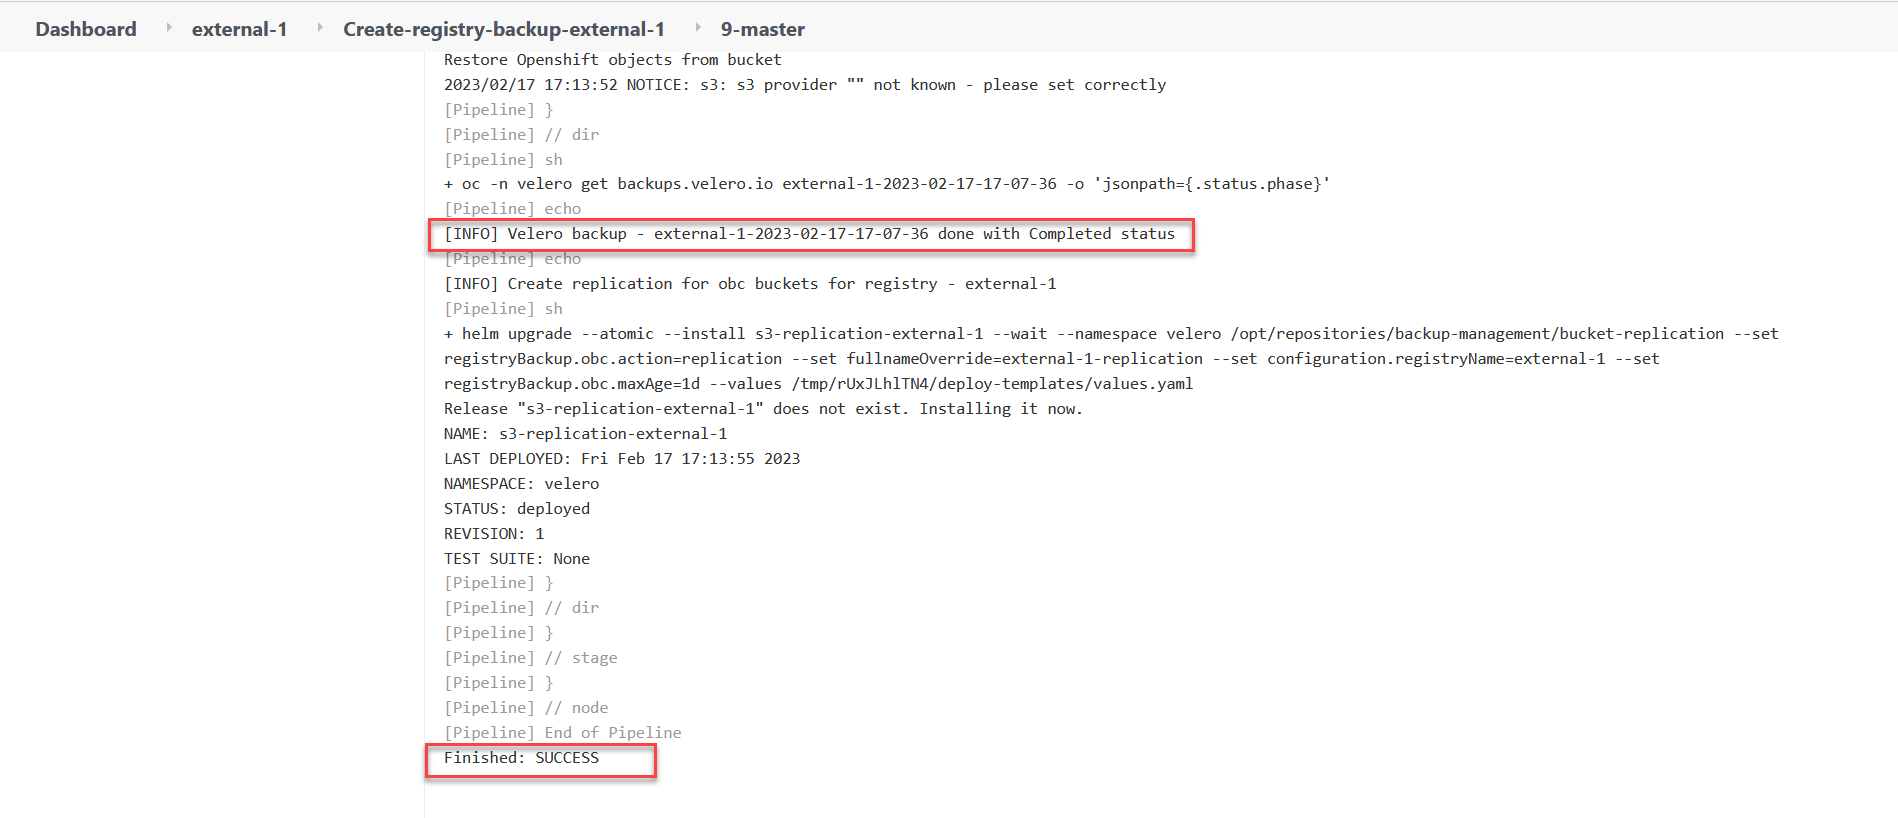
After the retention period expires, the system automatically deletes outdated backups.