Creating Platform administrators
1. Overview
A Platform administrator is a user responsible for managing and maintaining the infrastructure of the Platform.
This role is required to deploy the Platform, create registries, and install updates. Platform administrators may also collaborate with other teams, such as equipment administrators, to assess the resources necessary to ensure the Platform’s reliability and efficient functioning.
|
For details on the Platform’s roles and functional responsibilities, see: |
After deploying the Platform on target environments, the system automatically creates a single administrator user: kube:admin. This user is needed to add the first Platform administrator, who, in turn, can add other administrators and create registries.
Platform administrators are created in the Control Plane admin console.
2. Adding administrators
To add the first administrator, perform these steps:
-
Sign in to the OpenShift web console as a
kube:adminuser.To obtain kube:admincredentials, contact the Platform’s support team.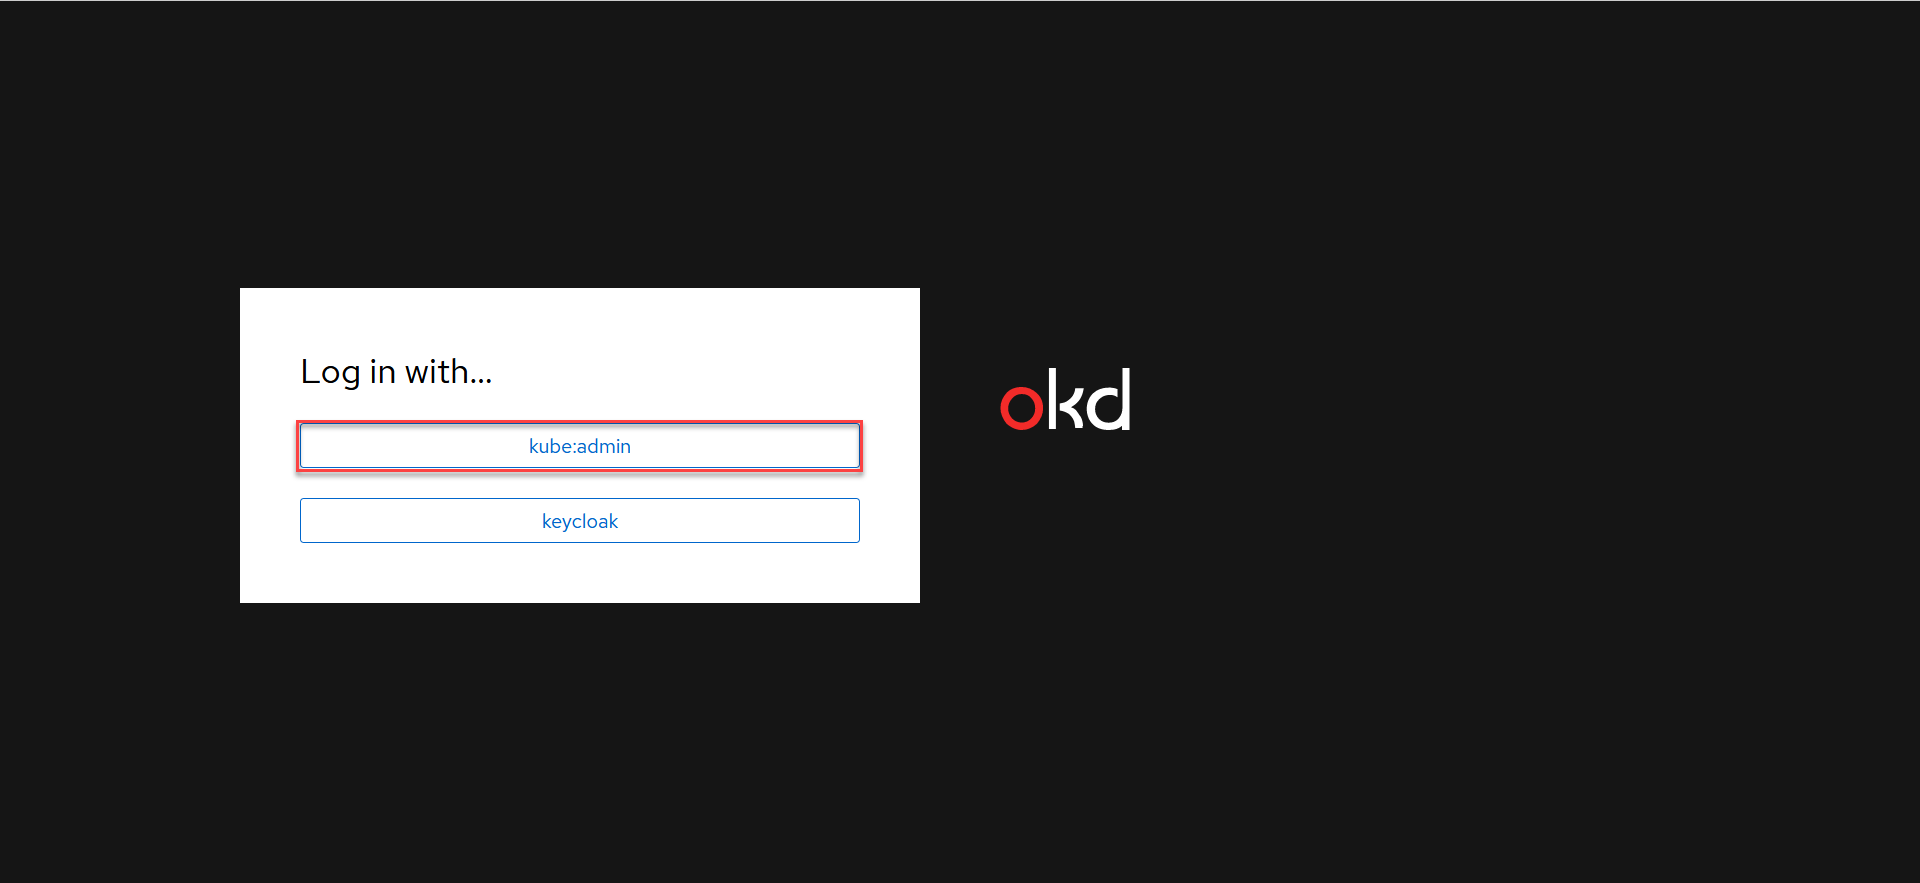
-
Go to Home > Projects, find and open the
control-planeproject. -
Go to Networking > Routes and open the link to the
control-plane-consolecomponent from the Location column.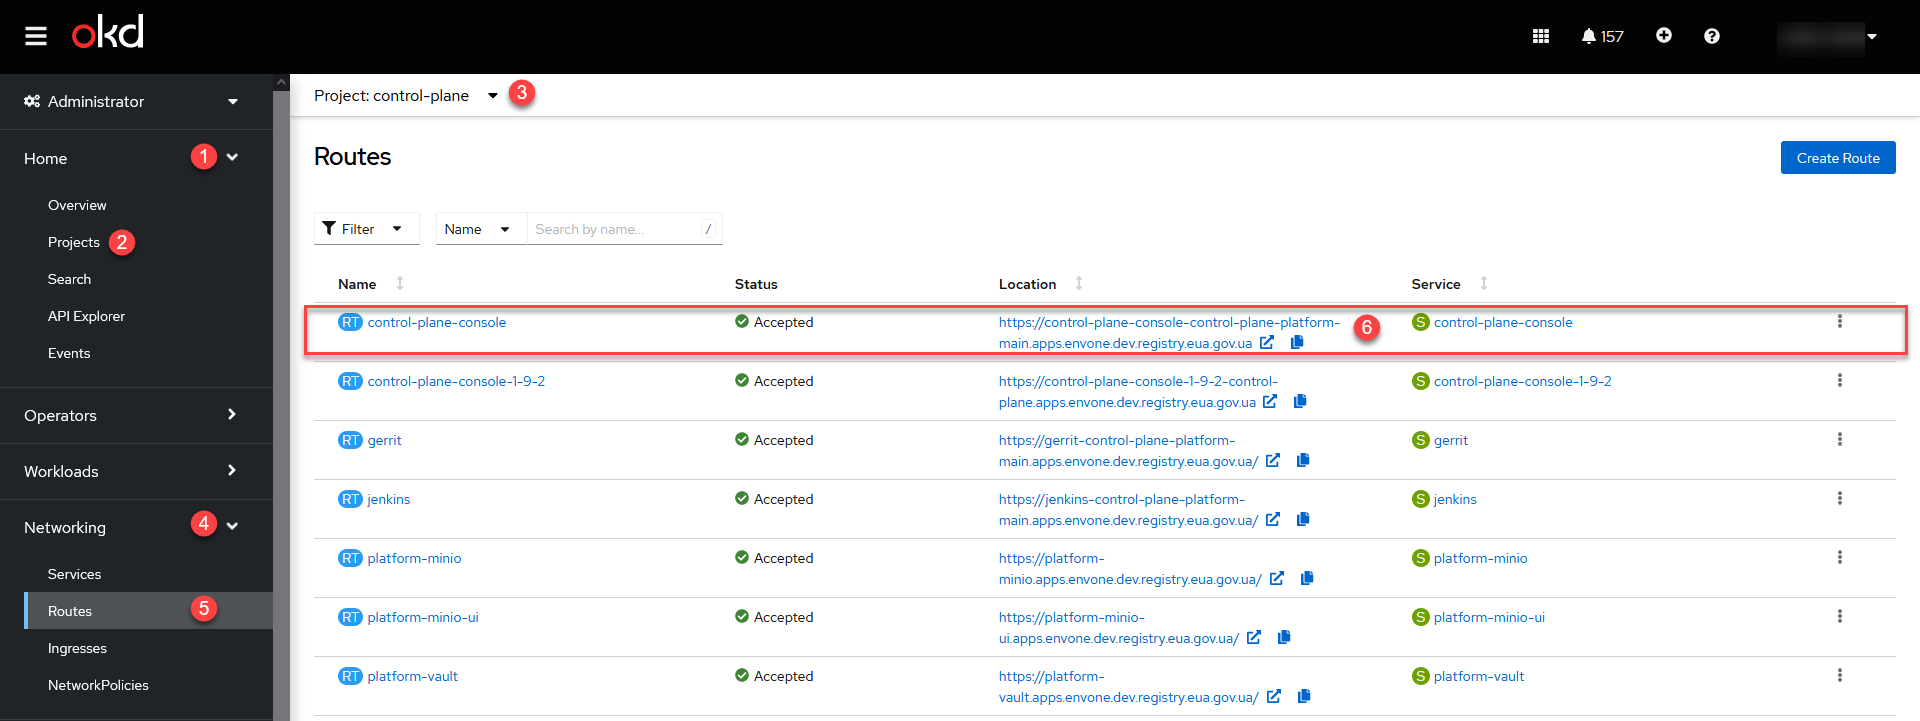
-
Sign in to the Control Plane admin console as
kube:adminusing the same credentials as in OpenShift.
-
Open the Platform management section and click
Editin the upper-right corner.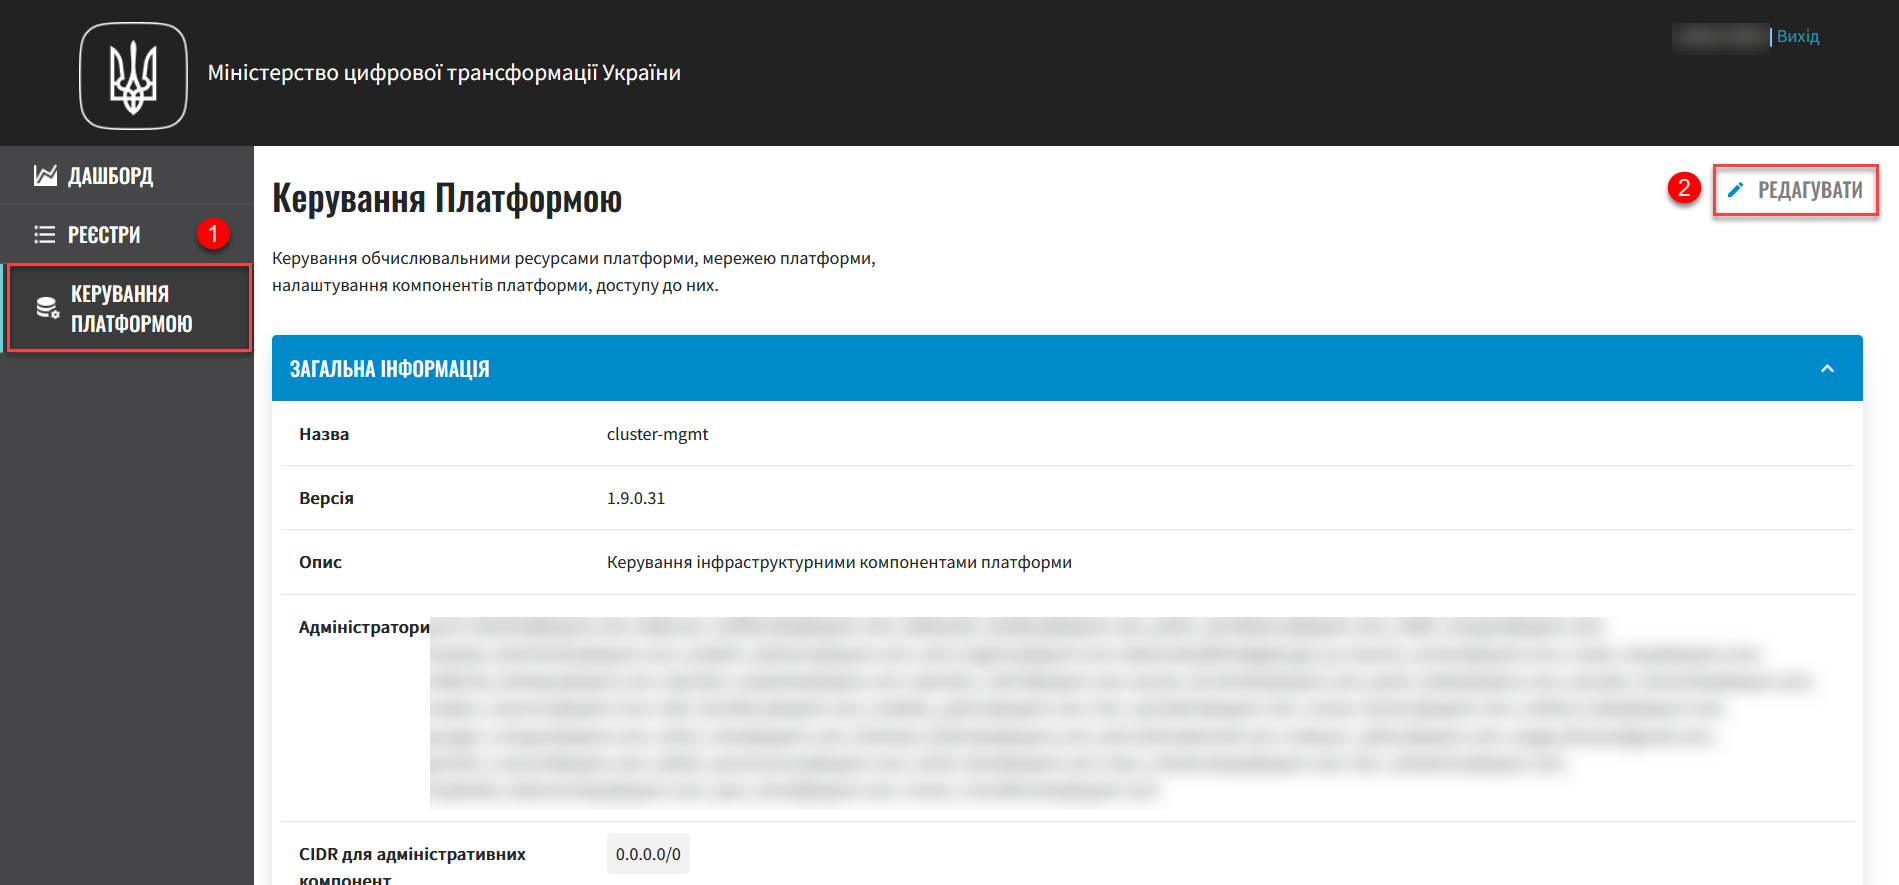
-
Open the Administrators section and add one or more administrators that need access to Platform management.
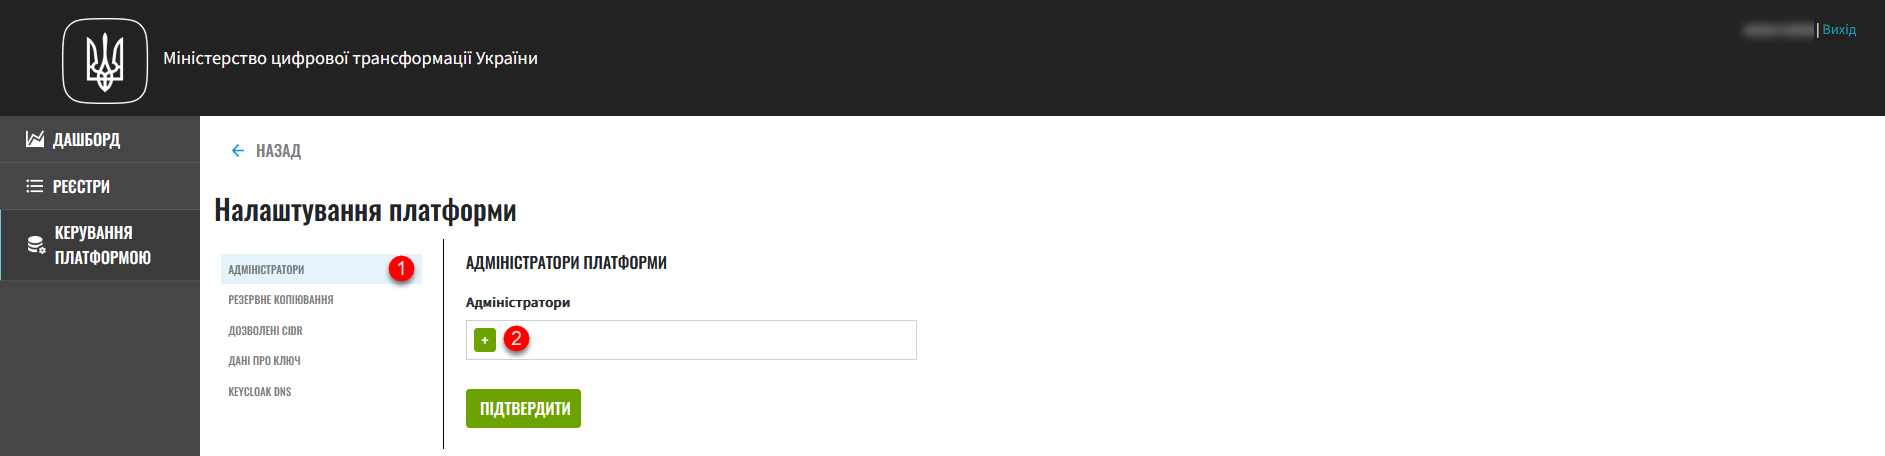
Click the
+(Add) button and provide the following details for each administrator:-
First name
-
Last name
-
Email address
-
Temporary password
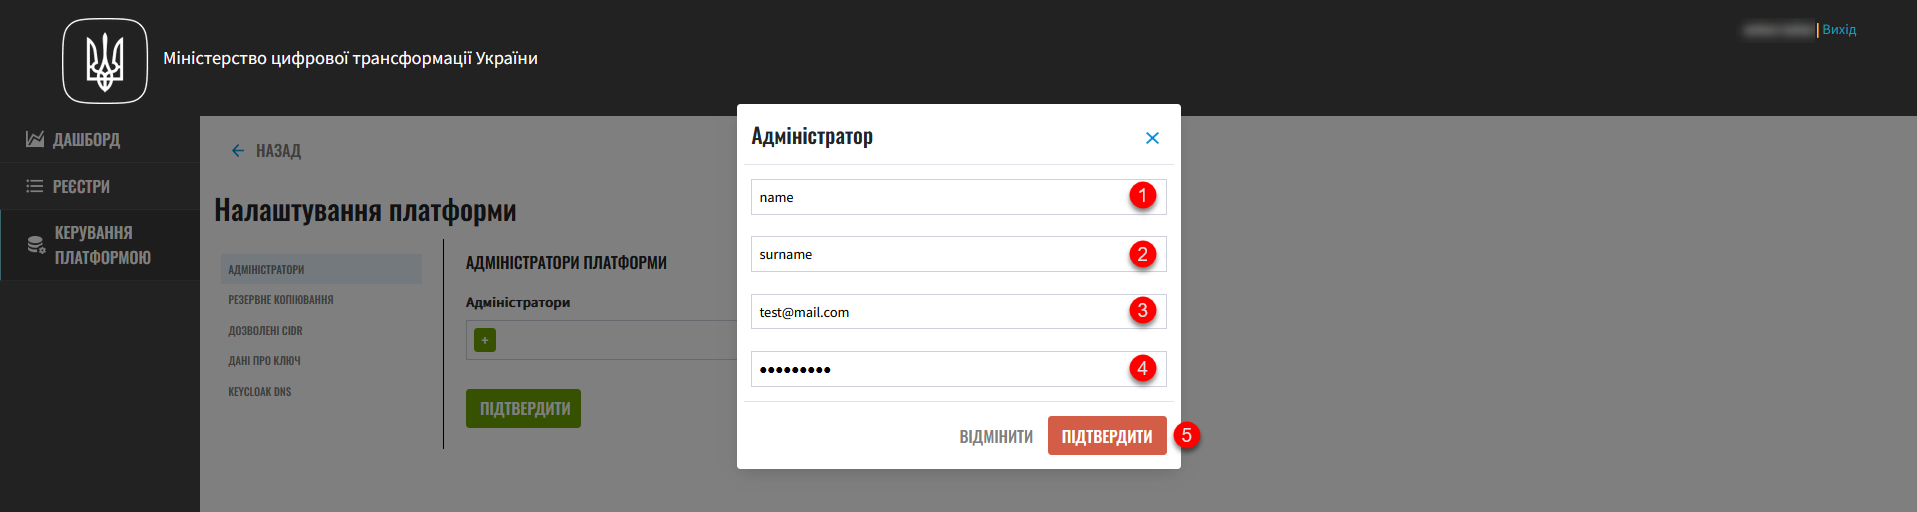
To add several administrators, repeat this step for each user separately (click
+> provide details >Confirm).Use lower case for email addresses.
Allowed characters are: digits (
0-9), Latin letters (a-z), underscores (_), hyphens (-), at sign (@), dots (.), and commas (,).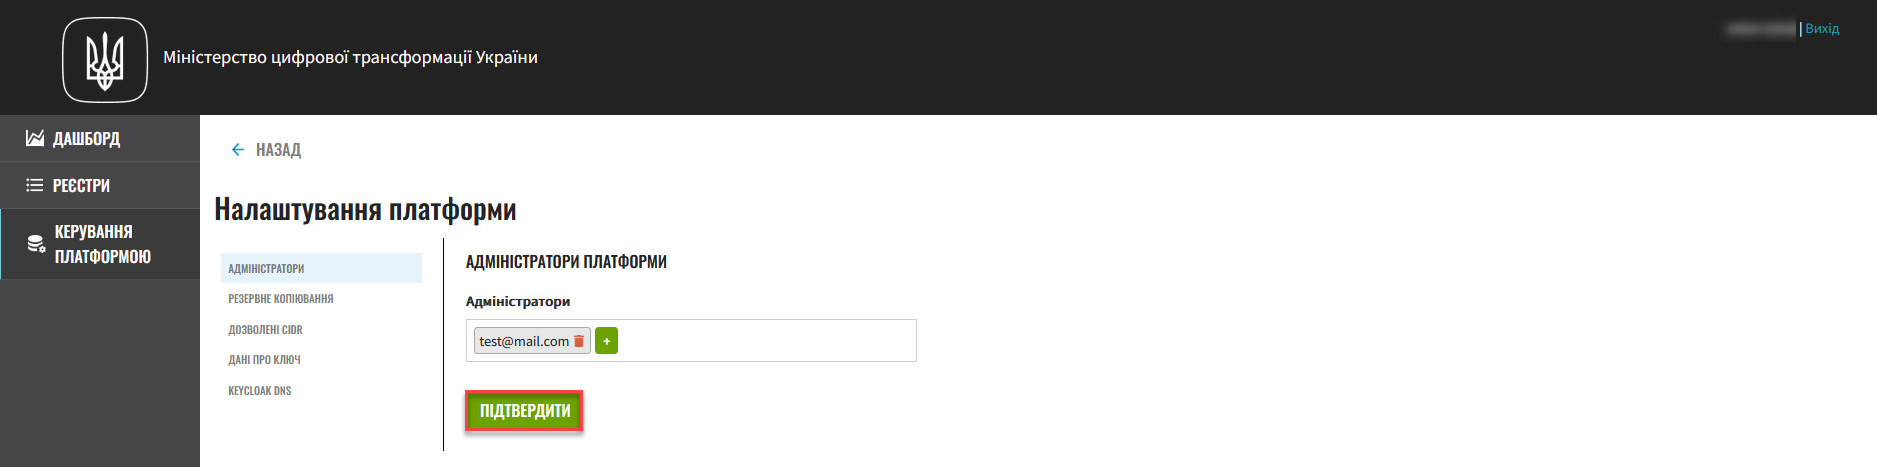
-
-
Click
Confirmto save your changes.You can also remove an administrator by clicking the delete icon (🗑) next to their username. As a result, the system generates a
Platform administrators updaterequest with aNewstatus. You can view request details in the Platform management > Update requests section.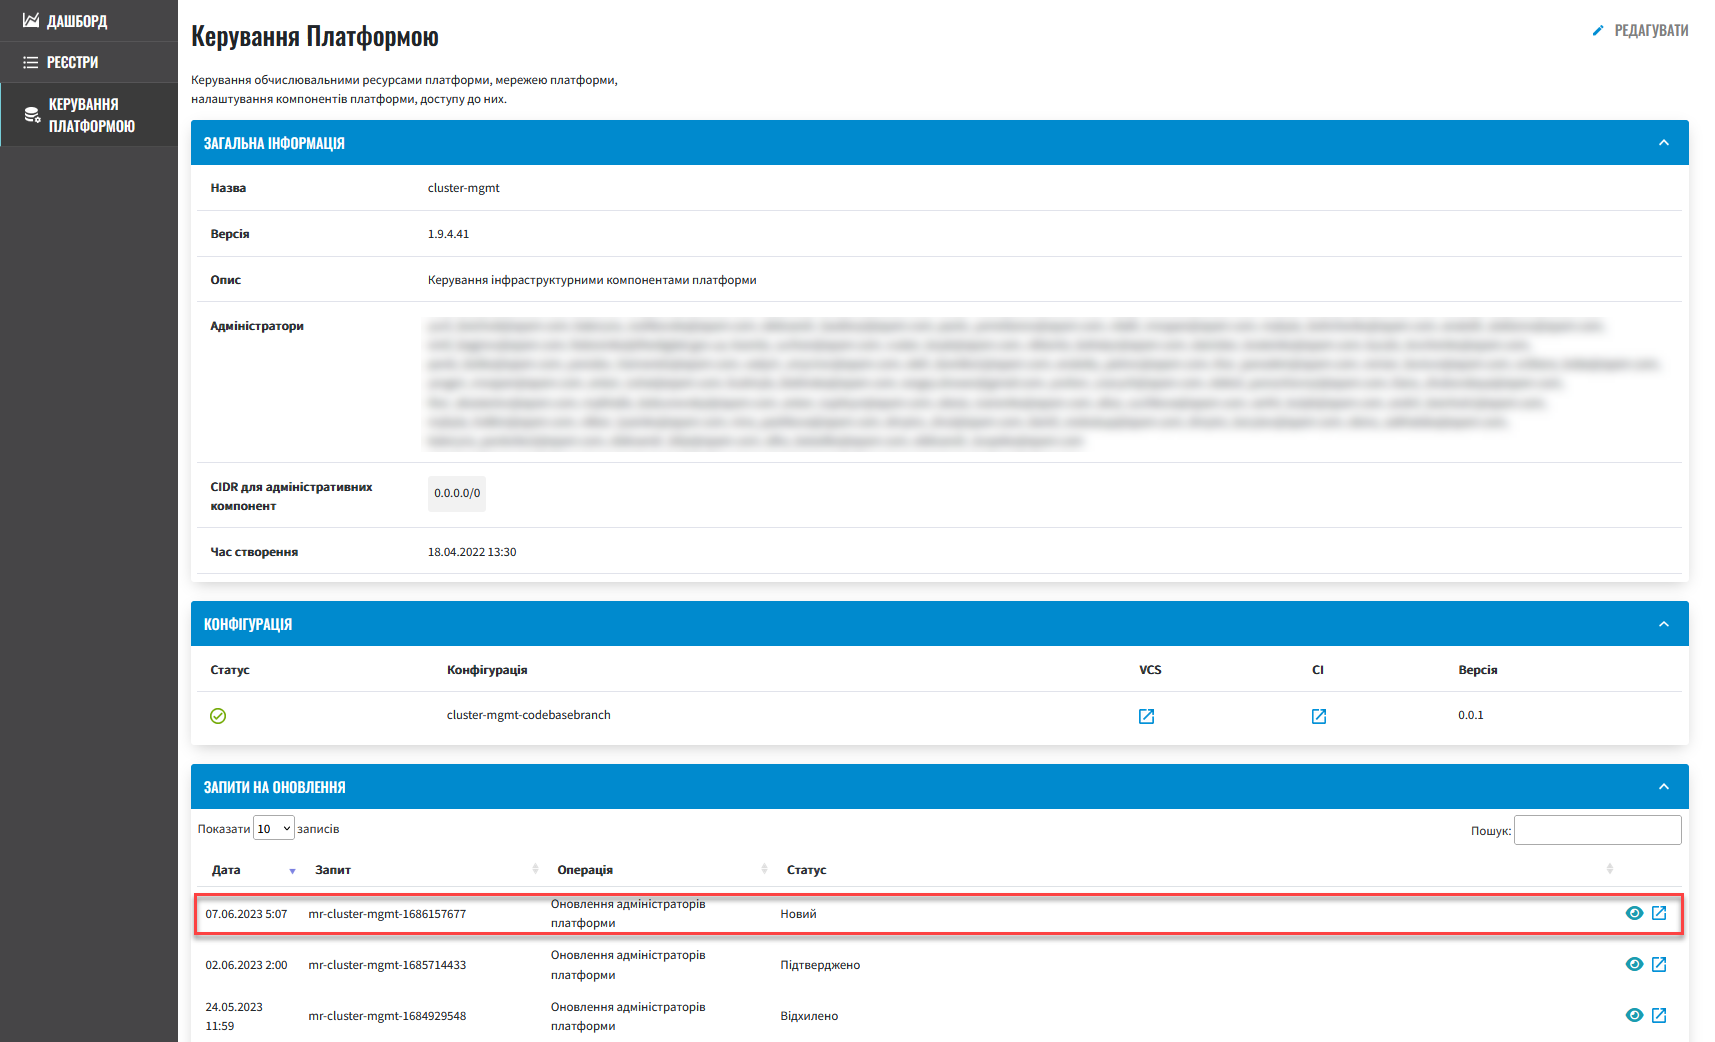
-
In the Update requests section, click the view icon (👁) to open your request.
-
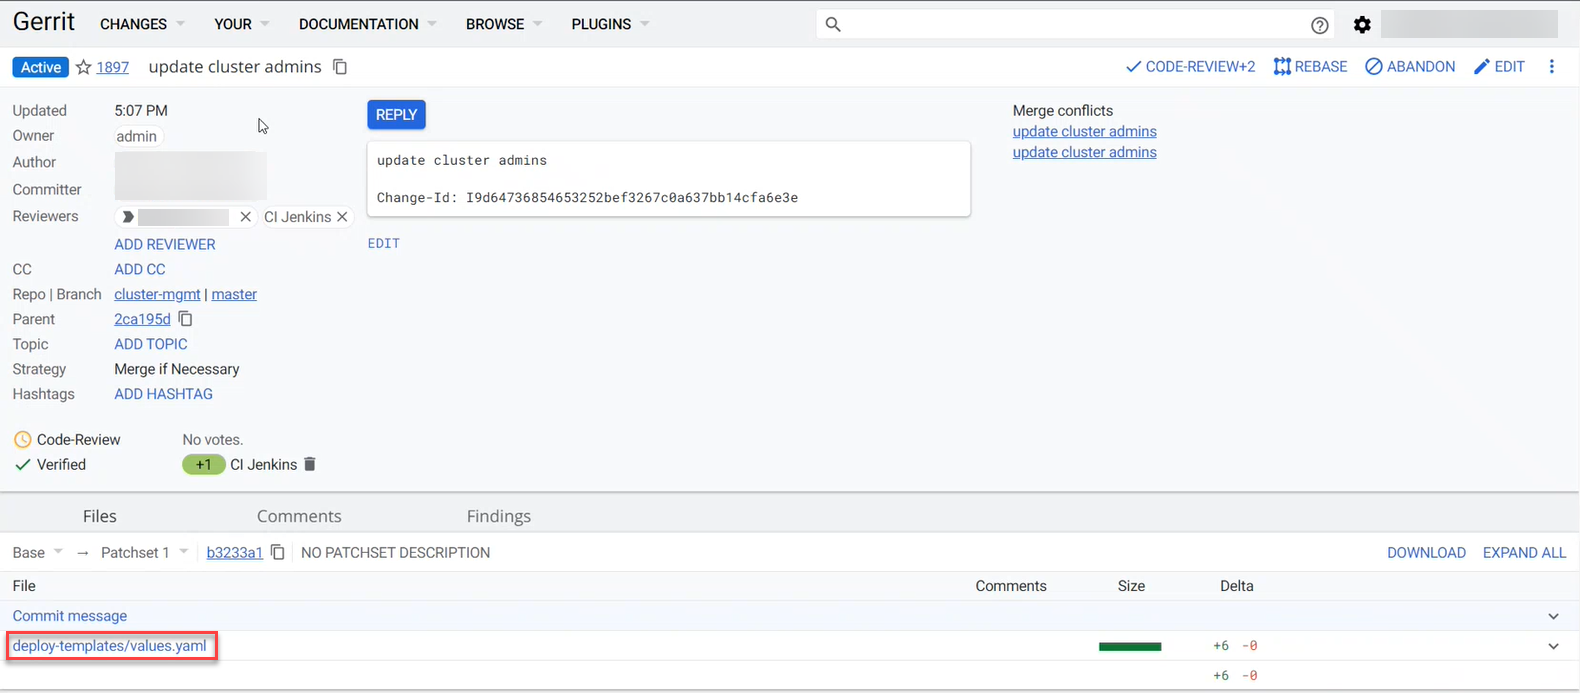
Compare the changes between the two versions that open in a new window and make sure the data you entered is correct. Click
Approve.The proposed changes are applied to the deploy-templates/values.yaml configuration file of the cluster-mgmtcomponent upon confirmation.
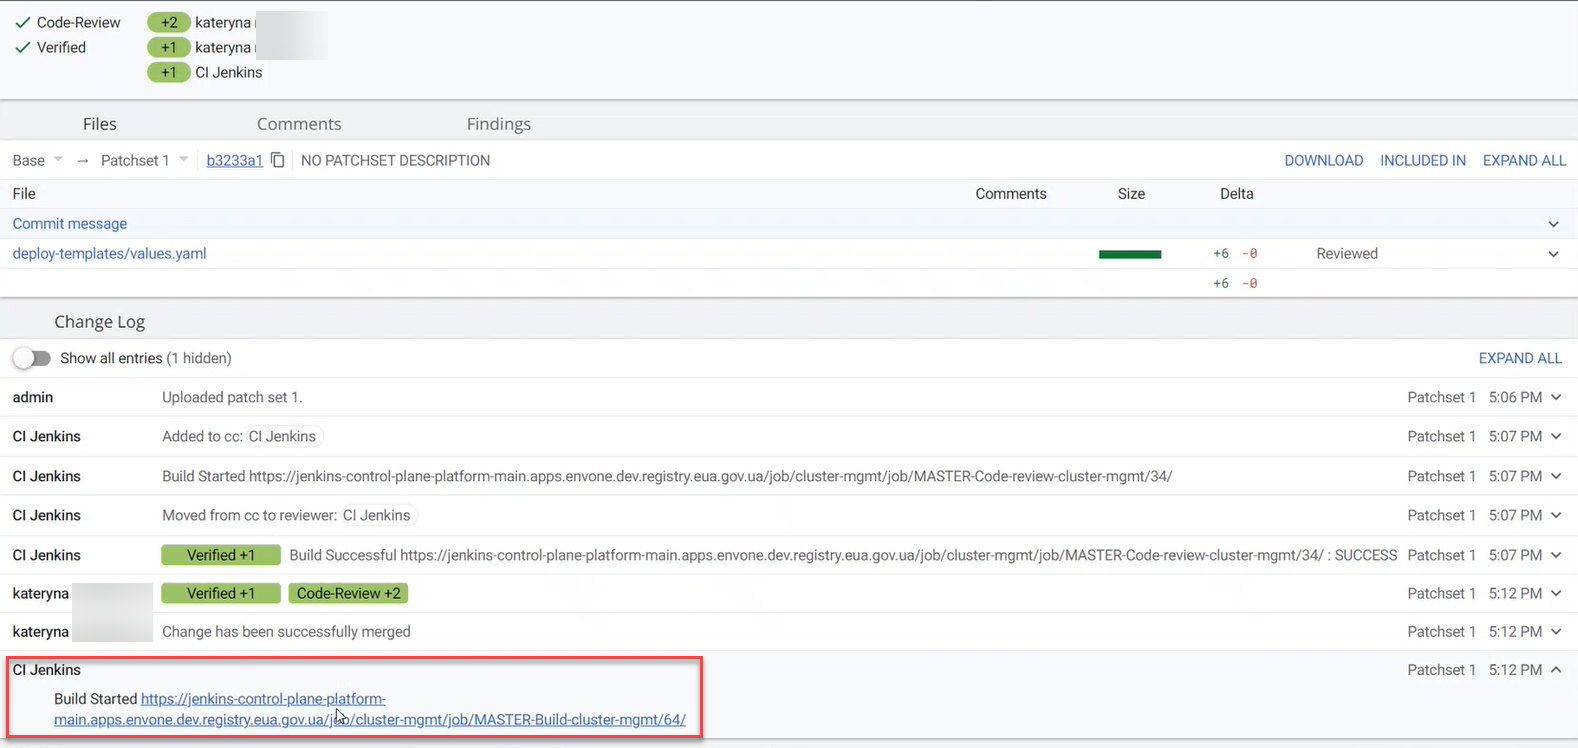
After the approval, the changes are applied to the
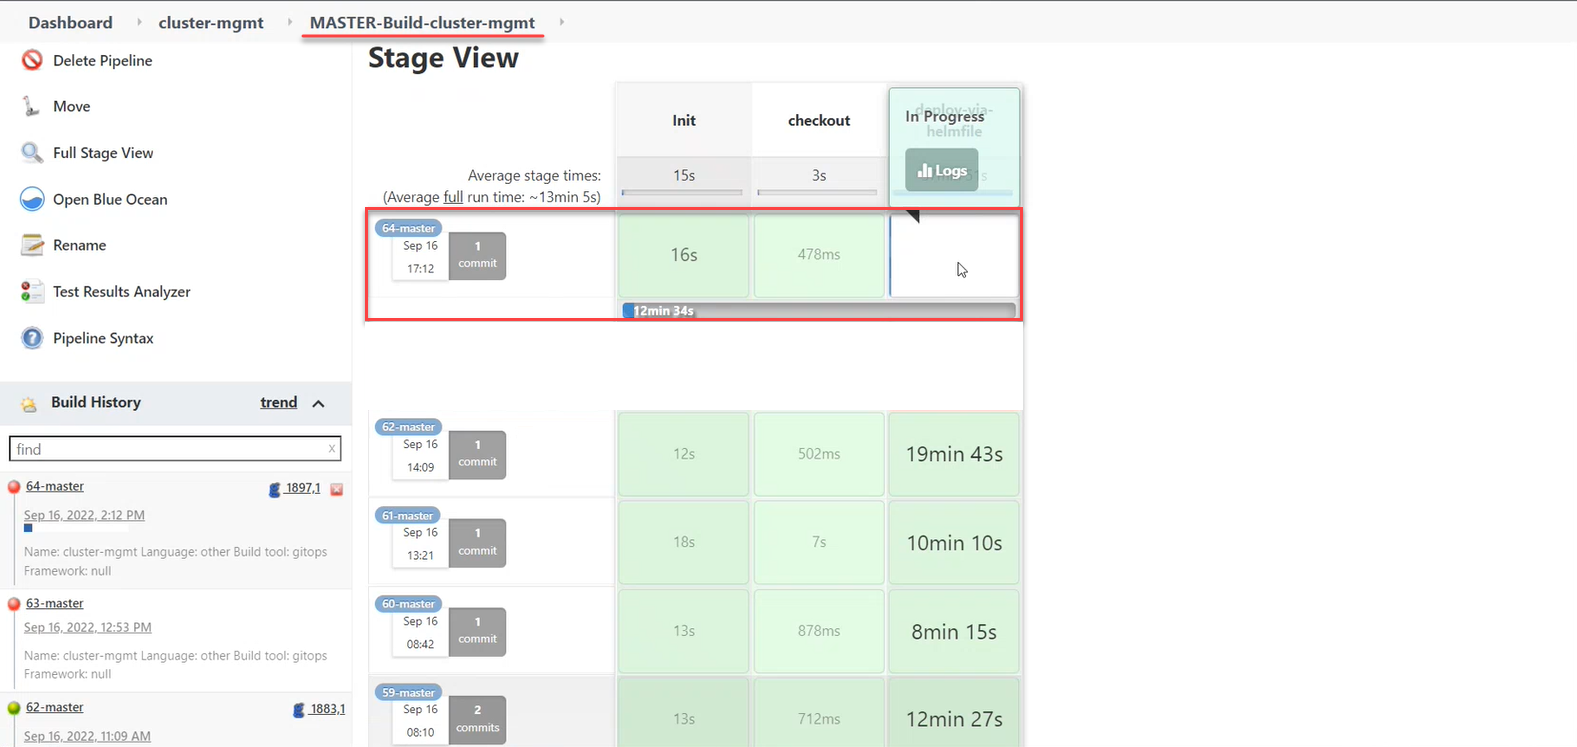
masterbranch of a corresponding repository, which starts the MASTER-Build-cluster-mgmtbuild process.After the build is completed, the system creates a Platform administrator account with the necessary access rights.
You can verify access within a couple of minutes. A Platform administrator automatically gets the necessary access rights, including
Cluster-adminsandcluster-mgmt-admingroups and thecp-cluster-mgmt-adminrole in the Keycloak service.Platform administrators have full access to OpenShift and Control Plane.
They can add other Platform administrators, create registries, and assign registry administrators.
For details on creating registry administrators, see Creating registry administrators.
-
You can now sign in to Control Plane as a Platform administrator. To do this, sign out of the
kube:adminaccount and sign in via the Log in with > keycloak option using your Platform administrator credentials.
From now on, you can add or remove Platform administrators using the same steps you performed under the
kube:adminaccount.
An alternative way to approve the changes via GerritWhen you sign in using your Platform administrator account, not
|
3. Managing access to the administrator portal
The Platform administrator in the openshift realm of the Keycloak service can provide access rights to the regulations administrator portal.
Perform these steps:
-
Sign in to the OpenShift web console.
To obtain the credentials, contact the Platform’s support team. -
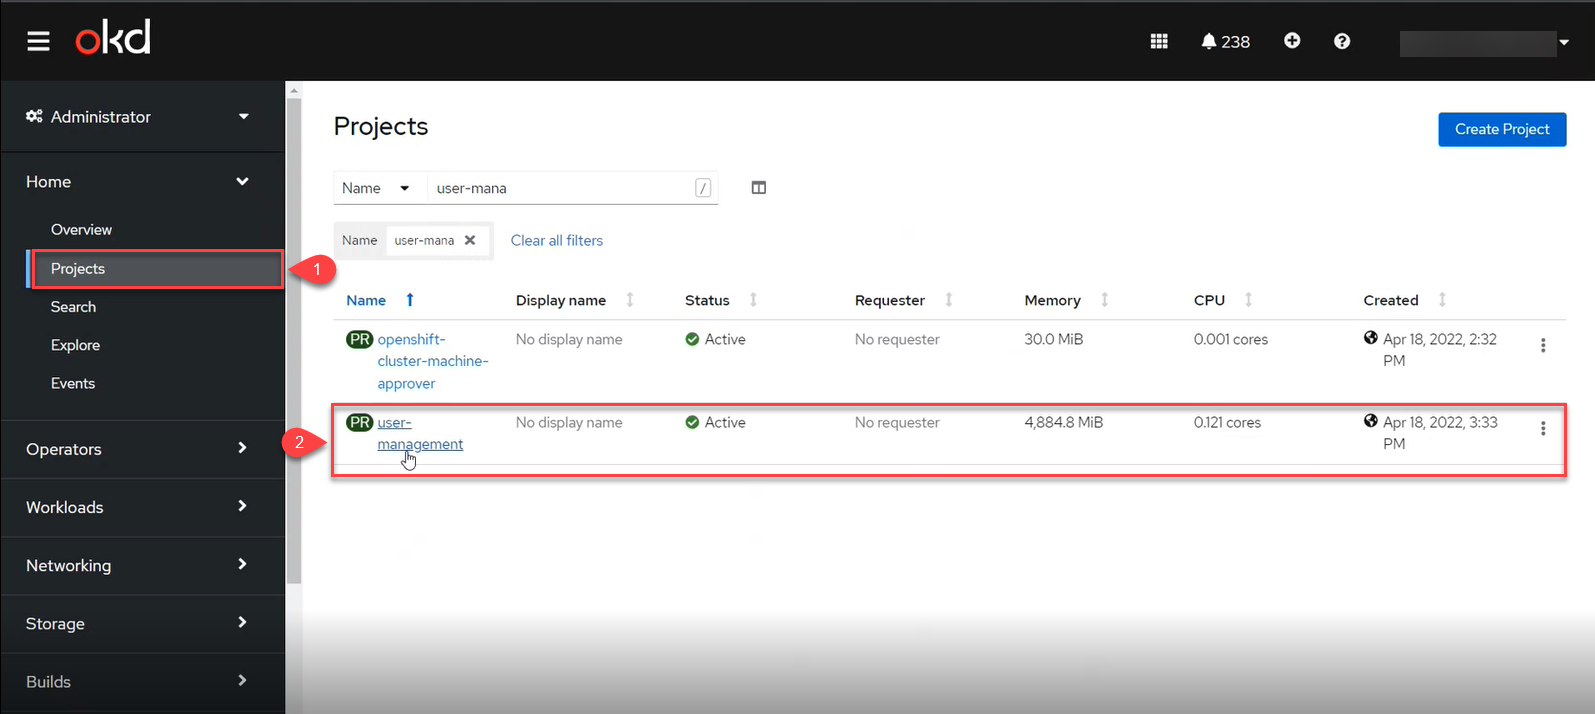
Go to Projects > user-management.
-
Open the Networking section and click the keycloak service link.
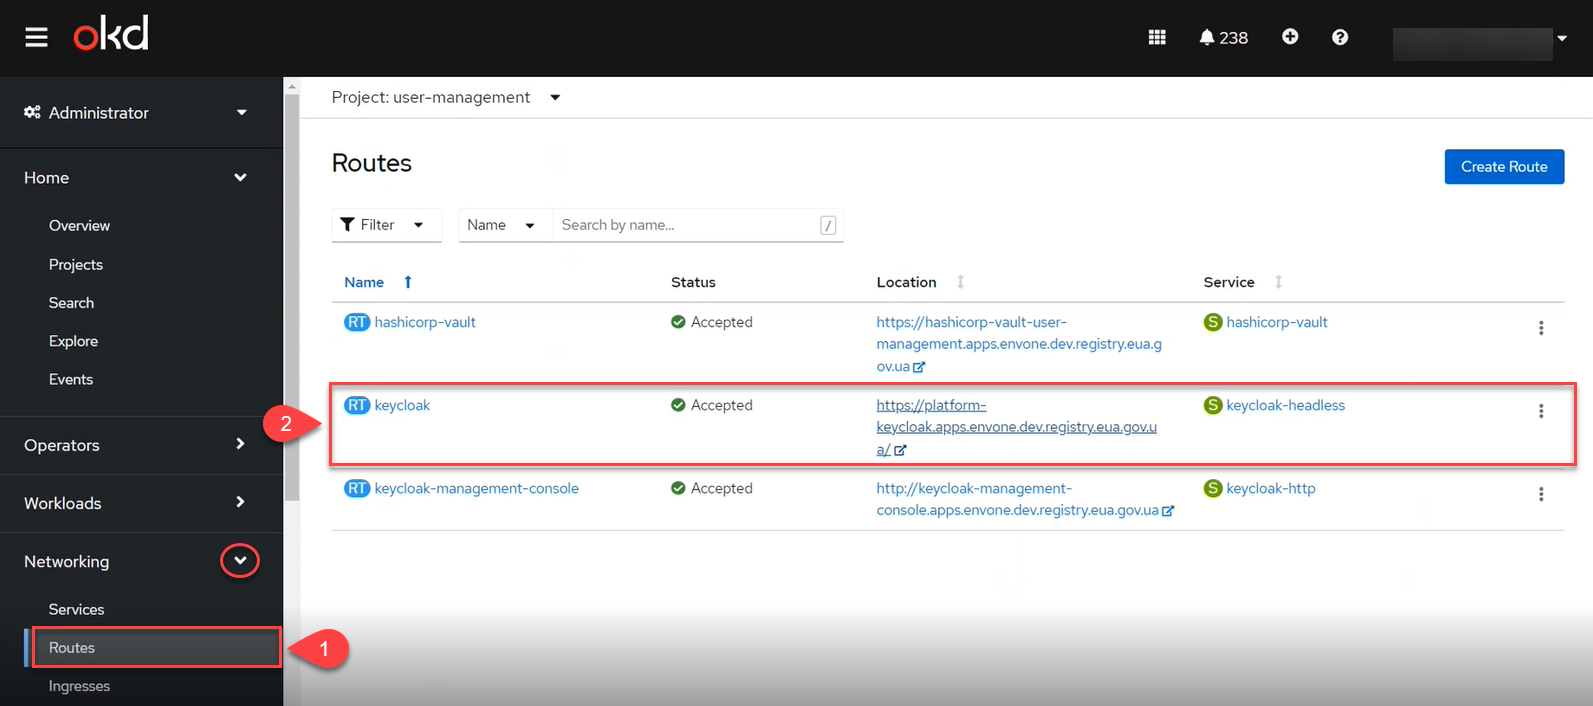
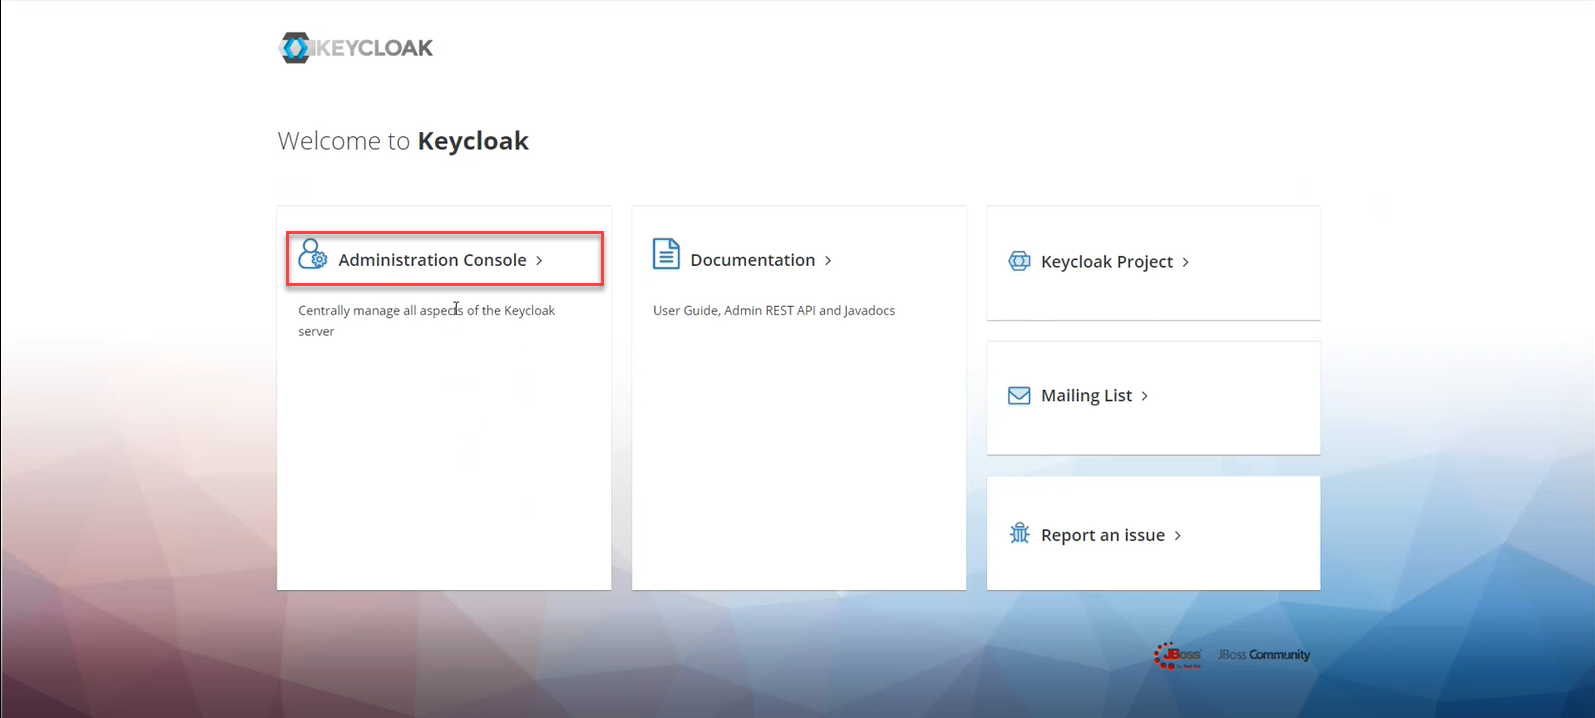
-
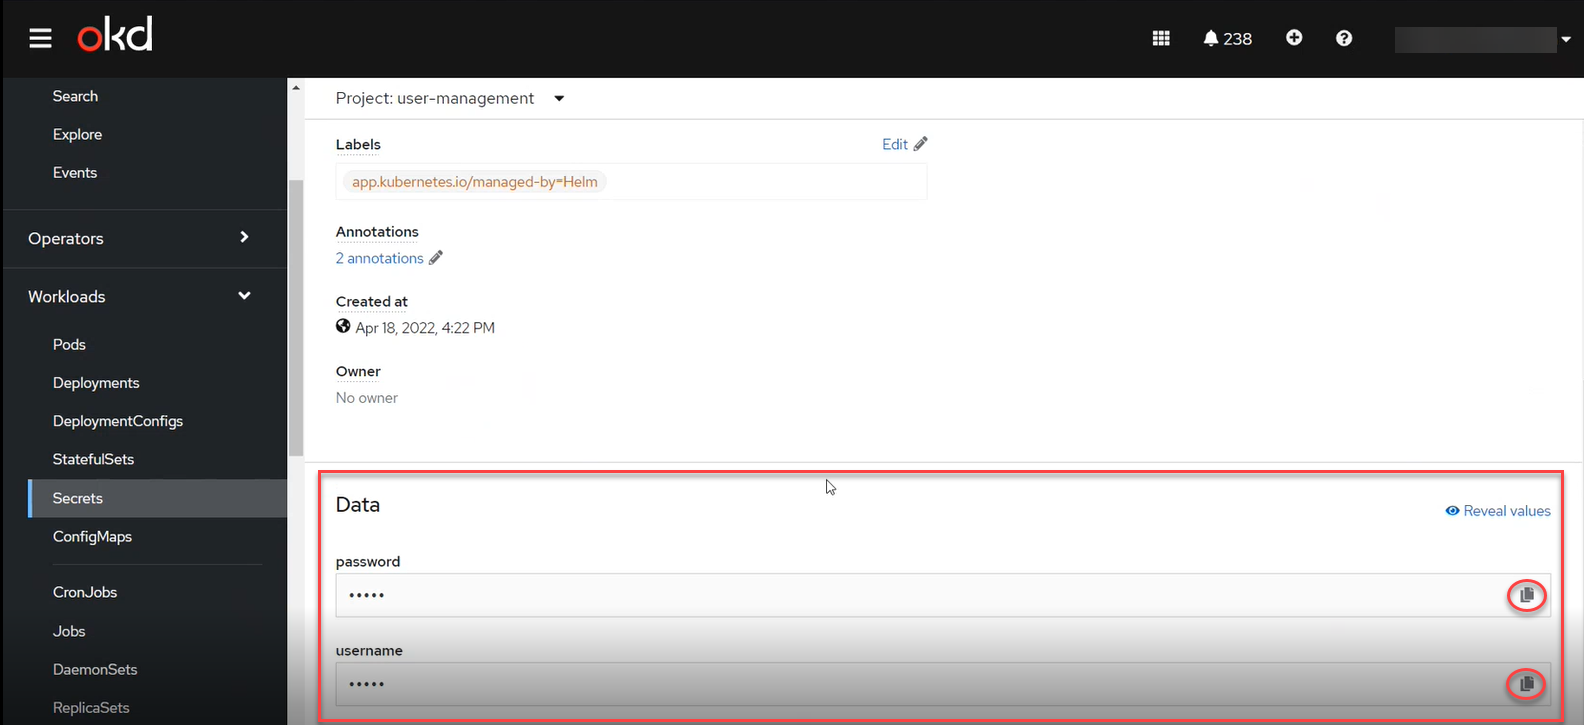
Sign in to the Keycloak Administration Console using the Keycloak secret (username and password).
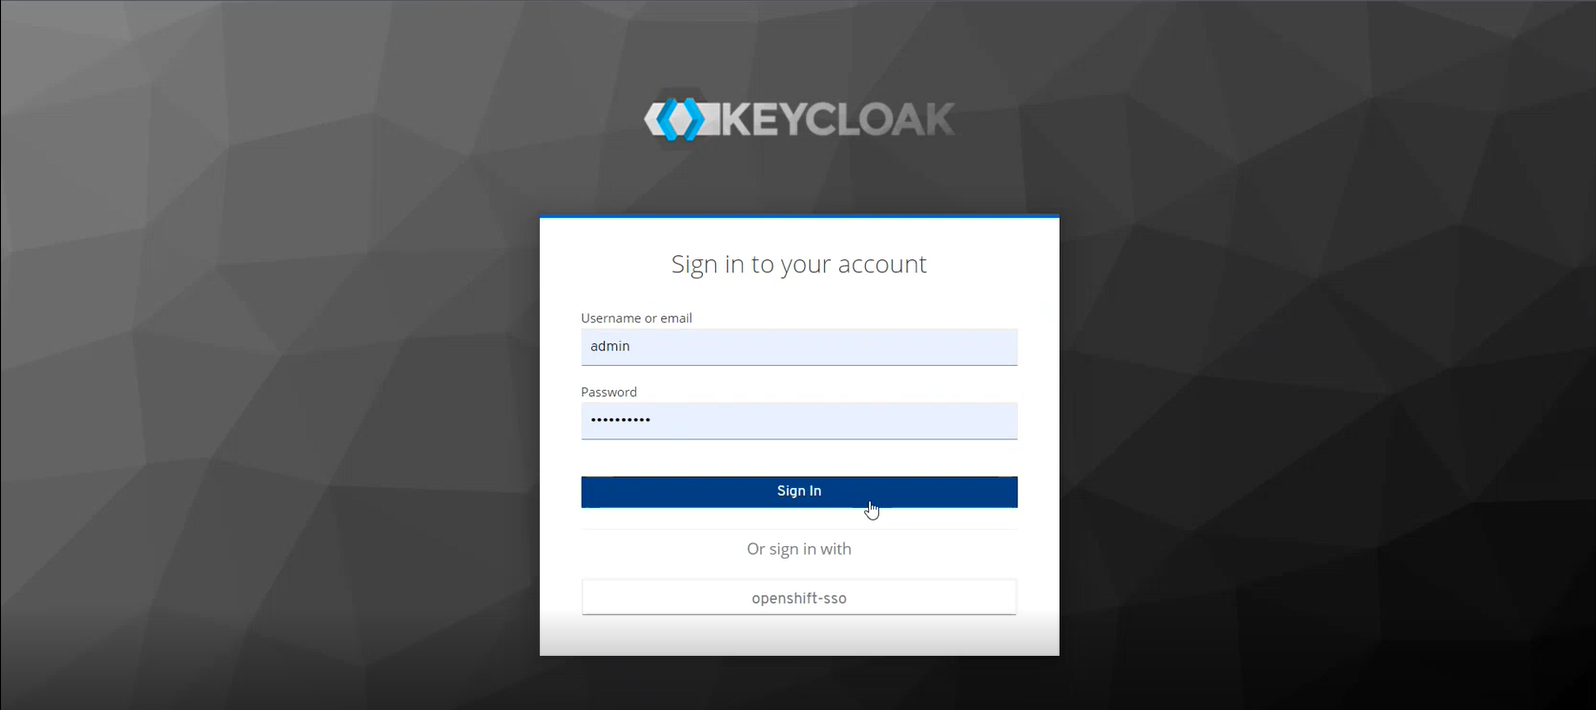
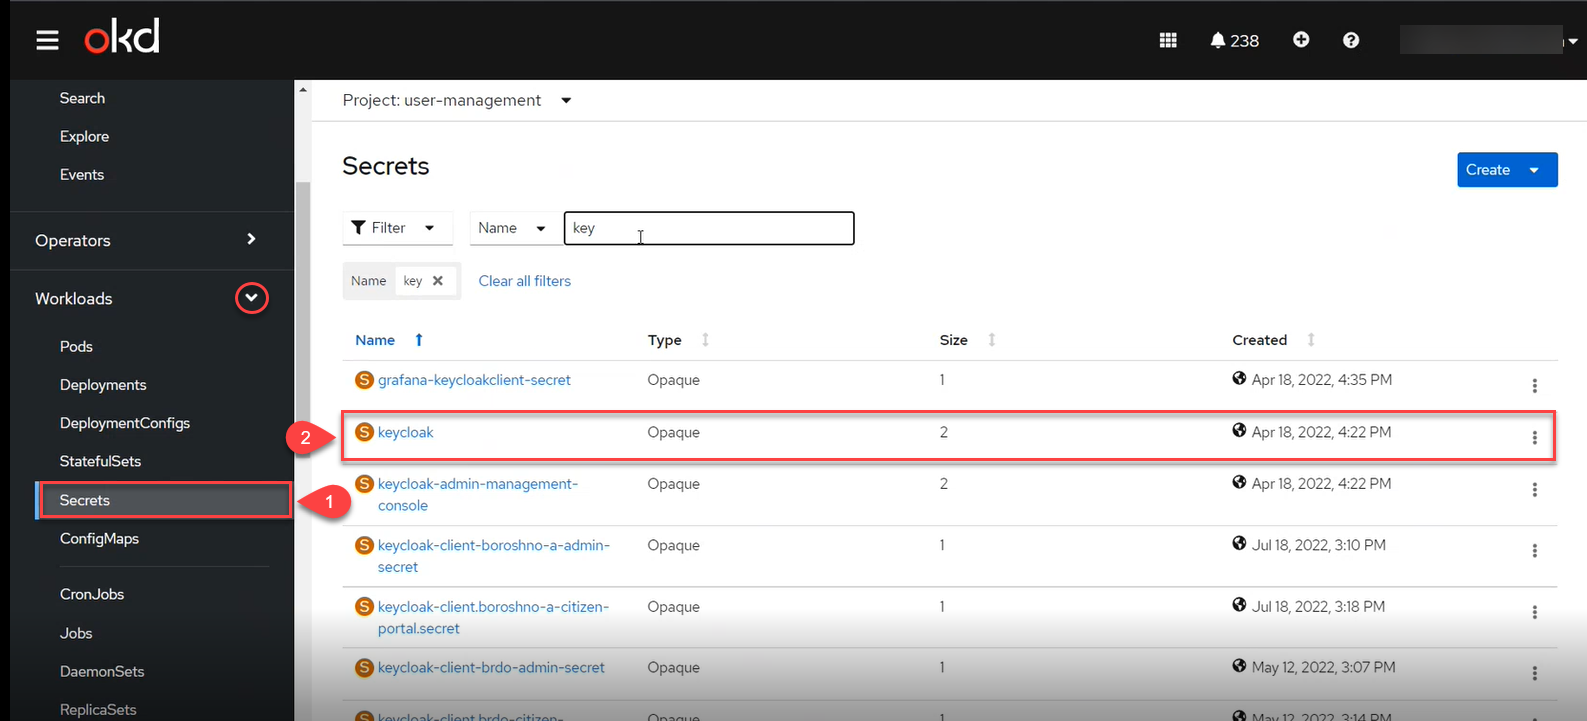
You can obtain the credentials in the Keycloak service’s secrets.
To do this, copy the secrets from the Workloads > Secrets > keycloak section.
-
Go to the
openshiftrealm > Users and select the user you wish to grant access to.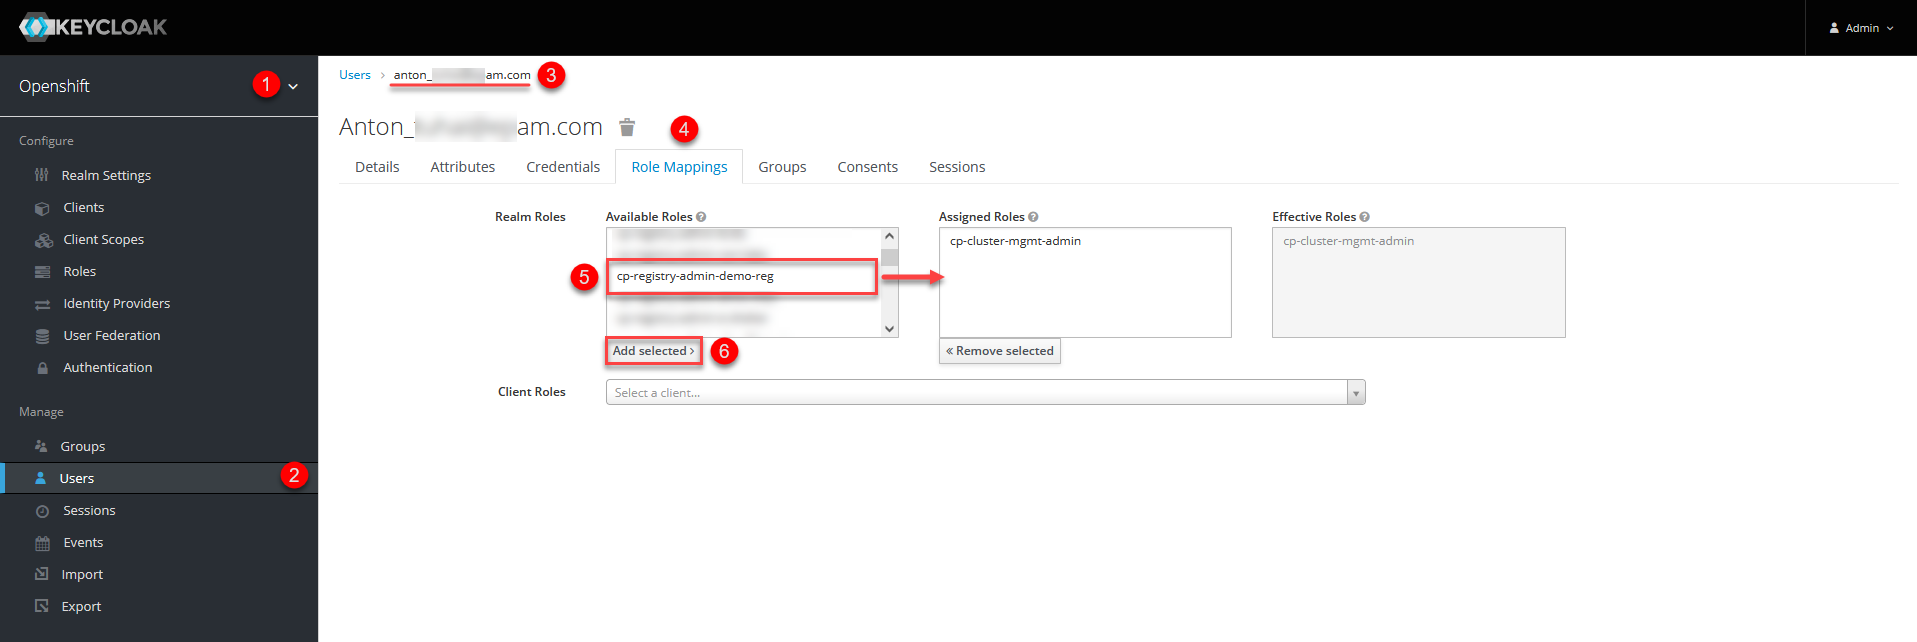
-
Open the Role Mappings tab and select the cp-registry-admin-
<registry-name>role in the Available Roles list, where<registry-name>is the name of the registry where the administrative portal is deployed. -
Click
Add selectedto move the role to the Assigned Roles list. This grants access to the user.
4. Related pages
As a Platform administrator, you can create and update infrastructure and registry components configurations and add other Platform and registry administrators.